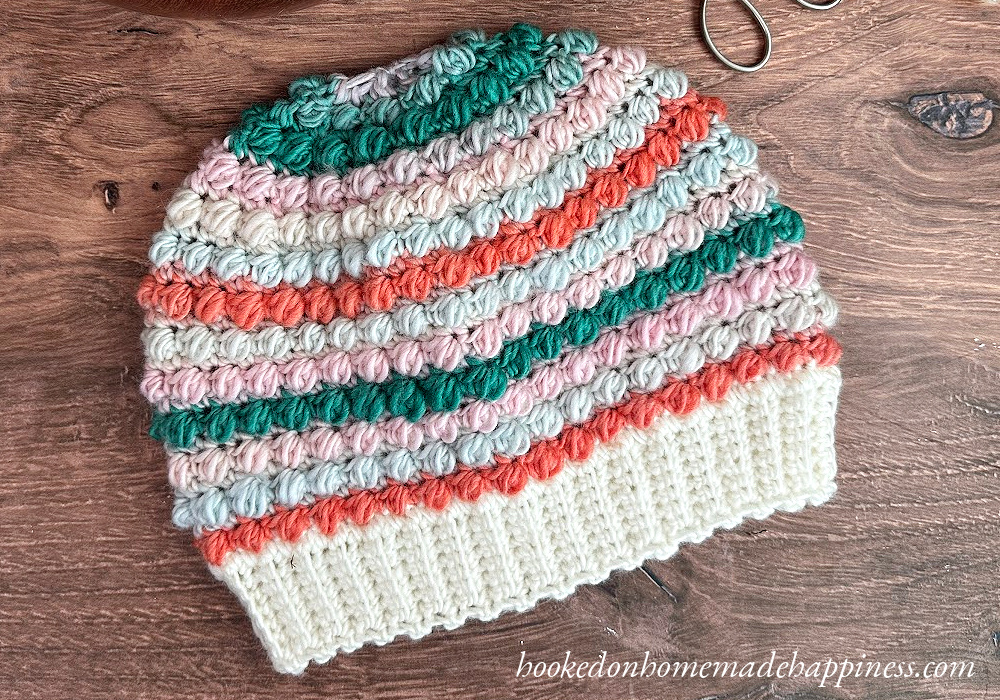
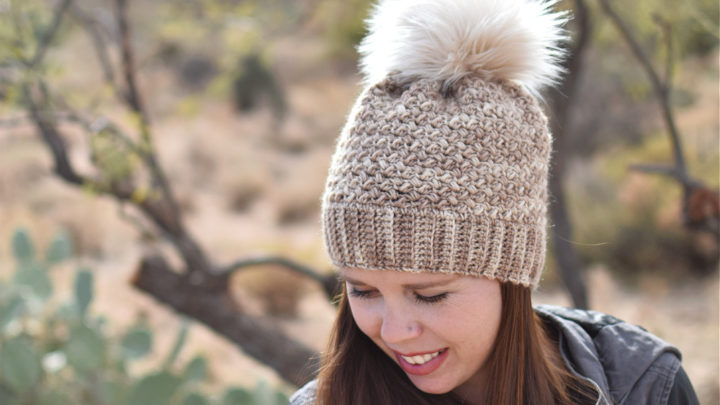
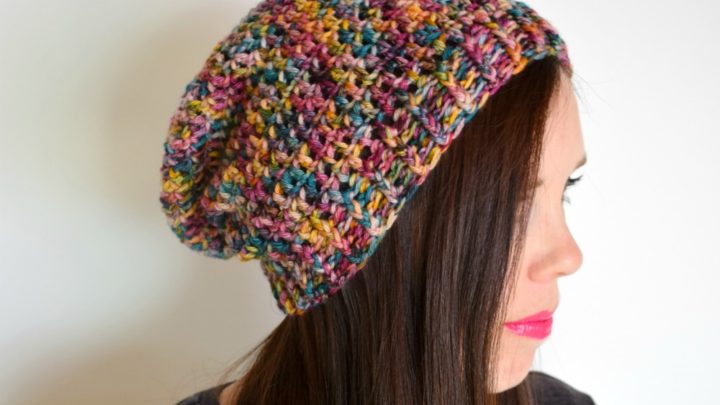
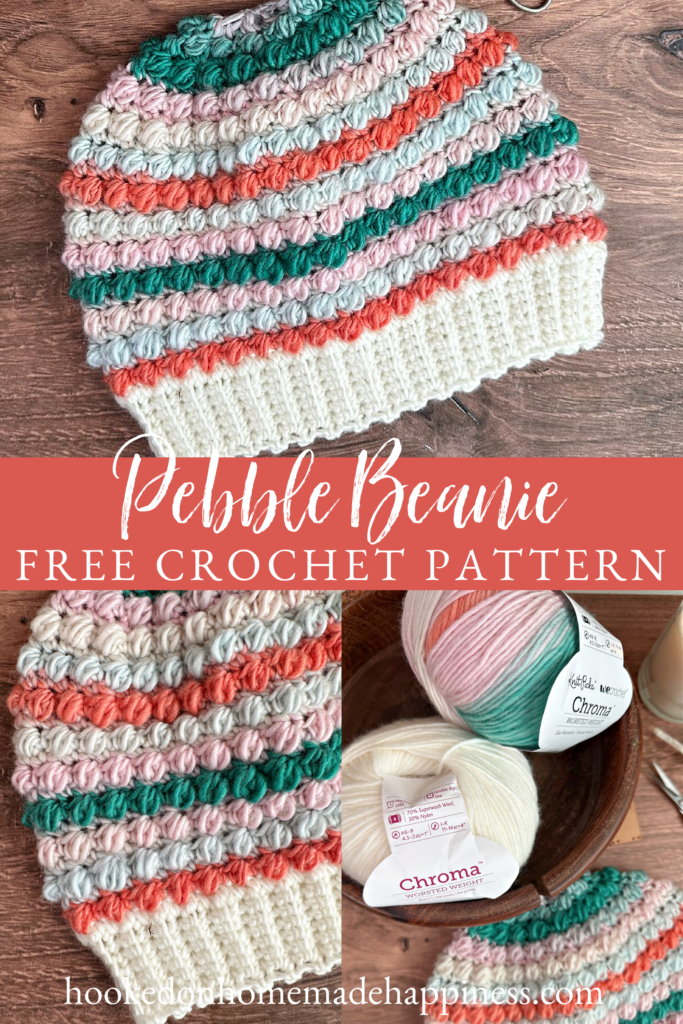
Are you tired of scrolling through endless crochet patterns, struggling to find one that is both unique and easy to follow? Look no further, because we have the perfect pattern for you: the Pebble Beanie Crochet Pattern. This pattern combines a classic beanie design with a beautiful texture created by the unique pebble stitch. With a combination of single crochets and puff stitches, this pattern is accessible for all skill levels. Get ready to create a cozy and stylish accessory that will quickly become your go-to for chilly days. This is an updated version of a pattern written in 2017. You can still find the original pattern HERE.

The Pebble Stitch
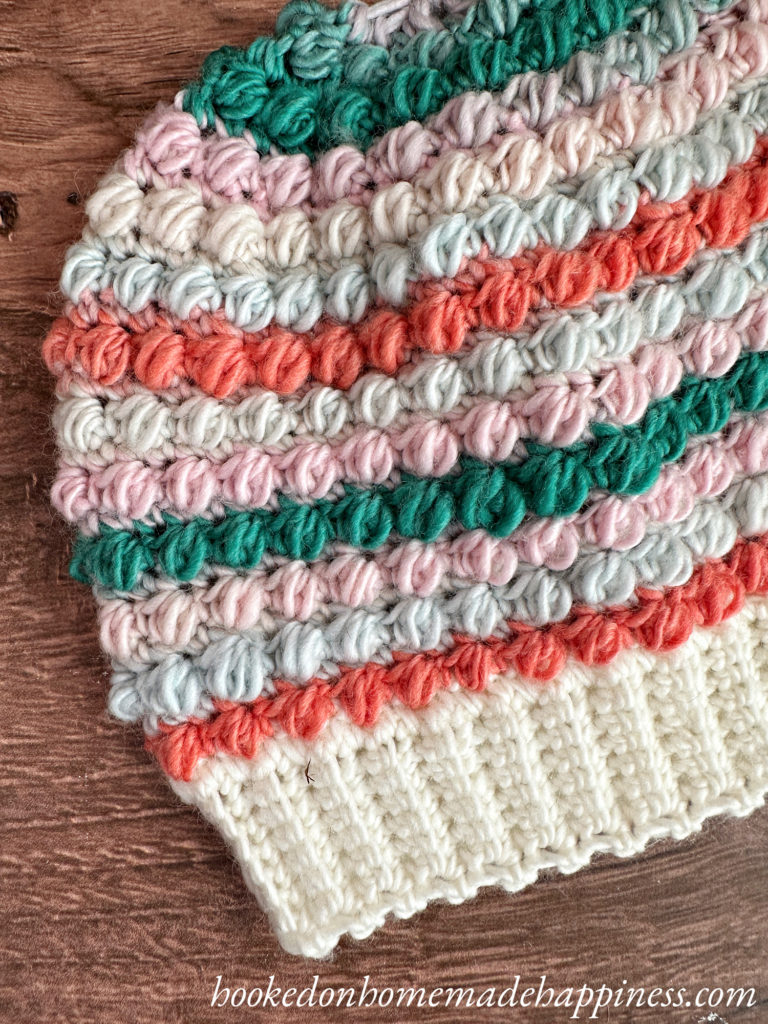
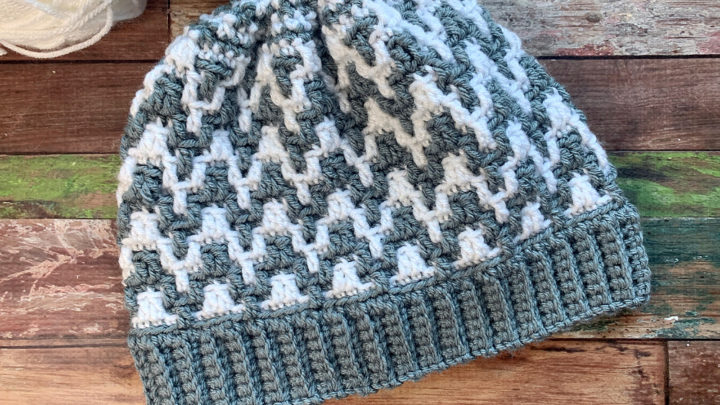
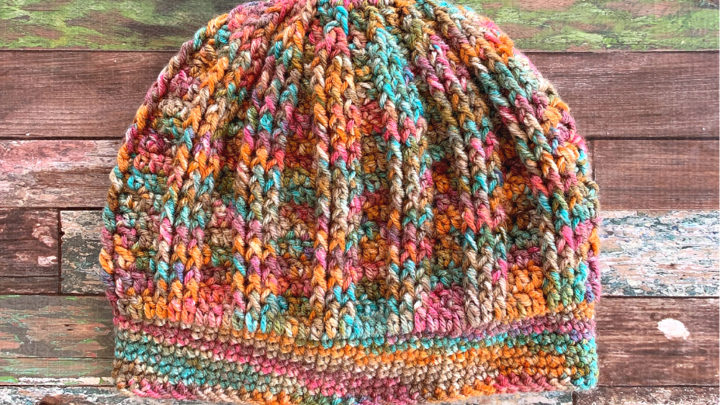
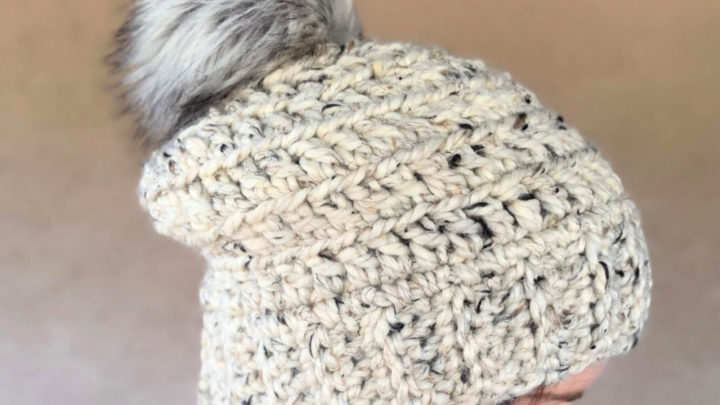
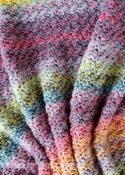
The pebble crochet stitch is a unique stitch, appealing to both crochet novices and experts. Its texture, reminiscent of pebbles strewn along a riverbed, invites a fantastic tactile experience. Additionally, it is highly versatile, allowing it to be incorporated into various crochet projects, like afghans, scarves, or even sweaters. The pebble stitch creates a dense, cozy fabric. Combining simple single crochets and puff stitches is all it takes to create this visually appealing stitch.
Choosing Your Yarn
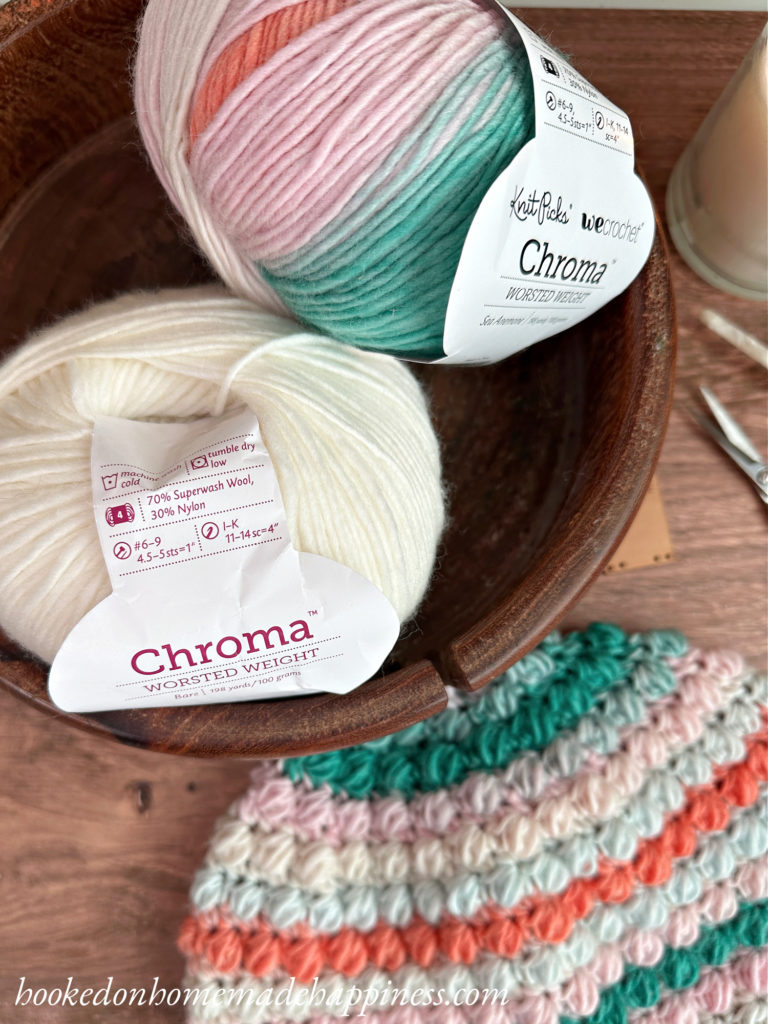
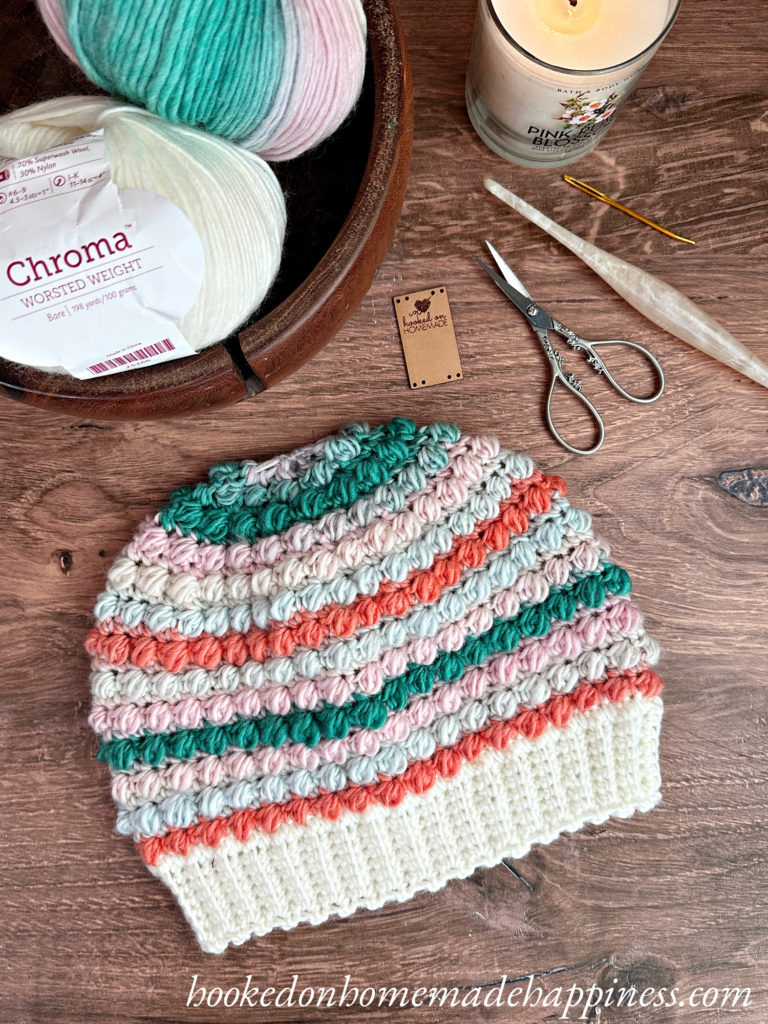
For this beanie I used Chroma Worsted from WeCrochet. I love the color combinations this yarn has to offer. The self-striping is perfectly placed to create evenly spaced stripes. Chroma Worsted is a wool blend, but if wool isn’t your thing, an acrylic yarn would work as well. This beanie also looks great with a solid color yarn. The yarn possibilities are endless with this beanie! So grab your favorite worsted weight yarn and let’s get started!
More Homemade Happiness
click here to pin for later >>>
Pebble Beanie Crochet Pattern
Get the full pattern below or purchase the ad-free, printable PDF in my Etsy Shop or Ravelry Shop
PIN for later HERE
Add to your Ravelry Queue HERE
Materials
100g worsted weight (acrylic, wool, or a blend) yarn in 2 colors (I used WeCrochet Chroma in Bare and Sea Anemone)
I/5.5 mm hook
Yarn needle
Scissors
Level
intermediate
Pattern notes & stitches to know
ch – chain
sl st – slip stitch
sc – single crochet
sc blo – single crochet back loop only
PS – puff stitch – *yarn over, insert hook into next stitch, pull up a loop* repeat from * to * 2 more times, yarn over, pull through all 7 loops
RS – right side
WS – wrong side
· written in US terms
· ch 1 does not count as sc
· This beanie is worked from the bottom up, starting with the ribbing around the bottom.
· The main portion of the beanie is made in turned rounds.
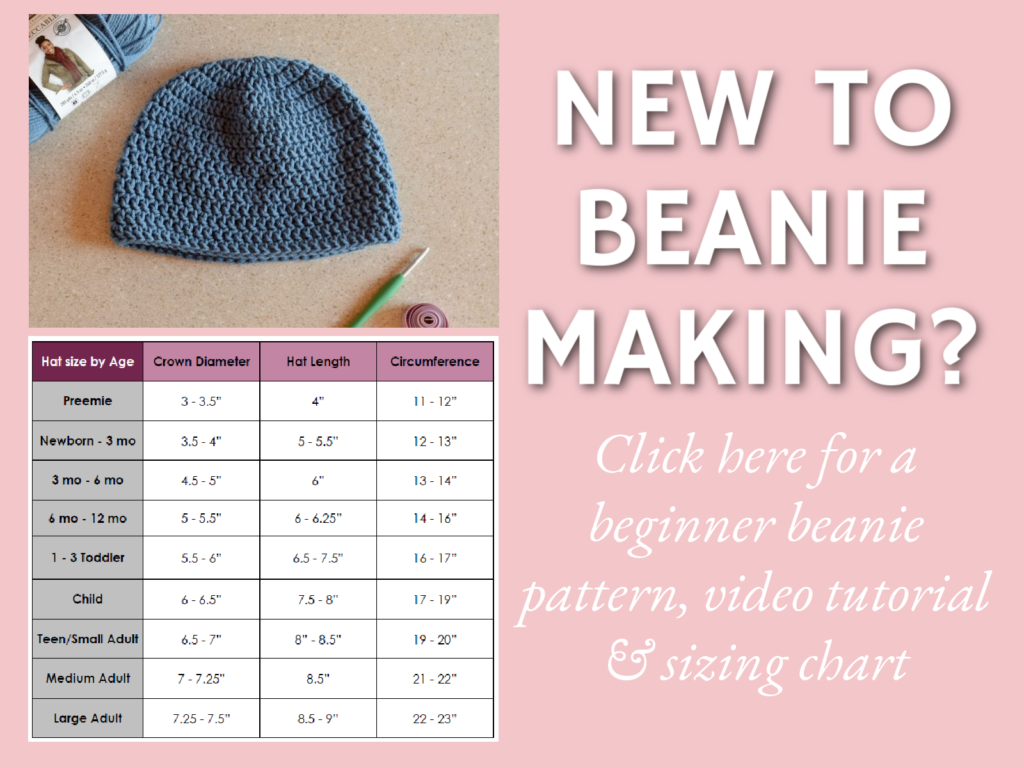
Approx Finished Size –
Child: Circumference: 18” Length: 7”
Small Adult: Circumference: 20” Length: 8”
Large Adult: Circumference: 22” Length: 8”
PEBBLE BEANIE CROCHET PATTERN
Watch the Full Video Tutorial Here
Pattern is written in 3 sizes. Child size is noted first, Small Adult noted in ( ), Large Adult noted in [ ]
Starting with the brim color ch 9
Row 1: sc in the 2nd ch from the hook and in each ch across (8 sc)
Row 2 – 66, (72) [78] : ch 1, turn, sc, sc blo in next 6 stitches, sc in last (8 sc)
To adjust the circumference, add or take out ribbing rows. Number of rows must be a multiple of 6.
Bring both short ends of the ribbing together, slip stitch the ends together. Now you will work around the top of the ribbing in joined rounds.
Round 1 (rs): ch 1, sc evenly around, working 1 sc in the end of each row of ribbing, join to the first sc with sl st (66, (72), [78] sc)
Change to main color
Round 2 (ws): ch 1, turn, sc in first stitch, PS in next, *sc in next stitch, PS in next* repeat from * to * around, join to first sc with sl st (66, (72), [78])
Round 3 (rs): ch 1, turn, sc in each stitch around, join to first sc with sl st (66, (72), [78] sc)
Round 4 (ws): ch 1, turn, PS in first stitch, sc in next, *PS in next stitch, sc in next* repeat from * to * around, join to first PS with sl st (66, (72), [78])
Round 5 (rs): ch 1, turn, sc in each stitch around, join to first sc with sl st (66, (72), [78] sc)
Round 6 – 12, (16), [20]: repeat rounds 2 – 5, ending with a round 4 repeat
Decreases for the crown begin in the next round
Round 17 (rs): ch 1, turn, *sc in 4 stitches, sc2tog* repeat from * to * around, join to first sc with sl st (55, (60), [65] sc)
Round 18 (ws): ch 1, turn, sc in first stitch, PS in next, *sc in next stitch, PS in next* repeat from * to * around, join to first sc with sl st (55, (60), [65])
Round 19 (rs): ch 1, turn, *sc in 3 stitches, sc2tog* repeat from * to * around, join to first sc with sl st (44, (48), [52] sc)
Round 20 (ws): ch 1, turn, PS in first stitch, sc in next, *PS in next stitch, sc in next* repeat from * to * around, join to first PS with sl st (44, (48), [52])
Round 21 (rs): ch 1, turn, *sc in 2 stitches, sc2tog* repeat from * to * around, join to first sc with sl st (33, (36), [39] sc)
Round 22 (ws): ch 1, turn, sc in first stitch, PS in next, *sc in next stitch, PS in next* repeat from * to * around, join to first sc with sl st (33, (36), [39])
Round 23 (rs): ch 1, turn, *sc in 1 stitch, sc2tog* repeat from * to * around, join to first sc with sl st (22, (24), [26] sc)
Round 24 (ws): ch 1, turn, PS in first stitch, sc in next, *PS in next stitch, sc in next* repeat from * to * around, join to first PS with sl st (22, (24), [26])
Round 25 (rs): ch 1, turn, sc2tog around, join to first sc with sl st (11, (12), [13] sc)
Fasten off.
Leave a long end for sewing.
Using a yarn needle, weave the long end in and out around the top of the beanie. Pull tight to cinch closed. Sew the top closed. Weave in the ends.
Looking for more patterns? Follow me on Facebook, Instagram, and Pinterest! Please share a pic of your finished product with me. I’d love to see it!


Only registered users can comment.