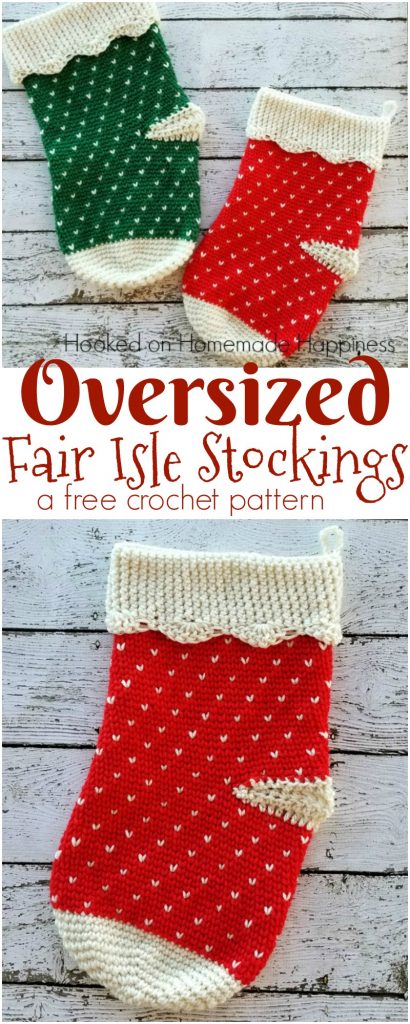
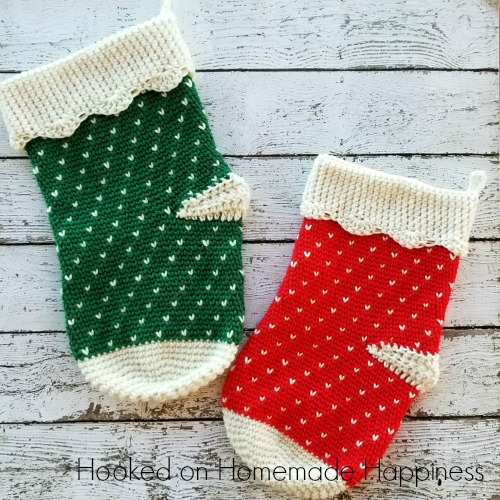
The stockings were hung by the chimney with care, In hopes that St. Nicholas soon would be there! Make sure there’s plenty of room for Santa with these Oversized Fair Isle Christmas Stockings Crochet Pattern!
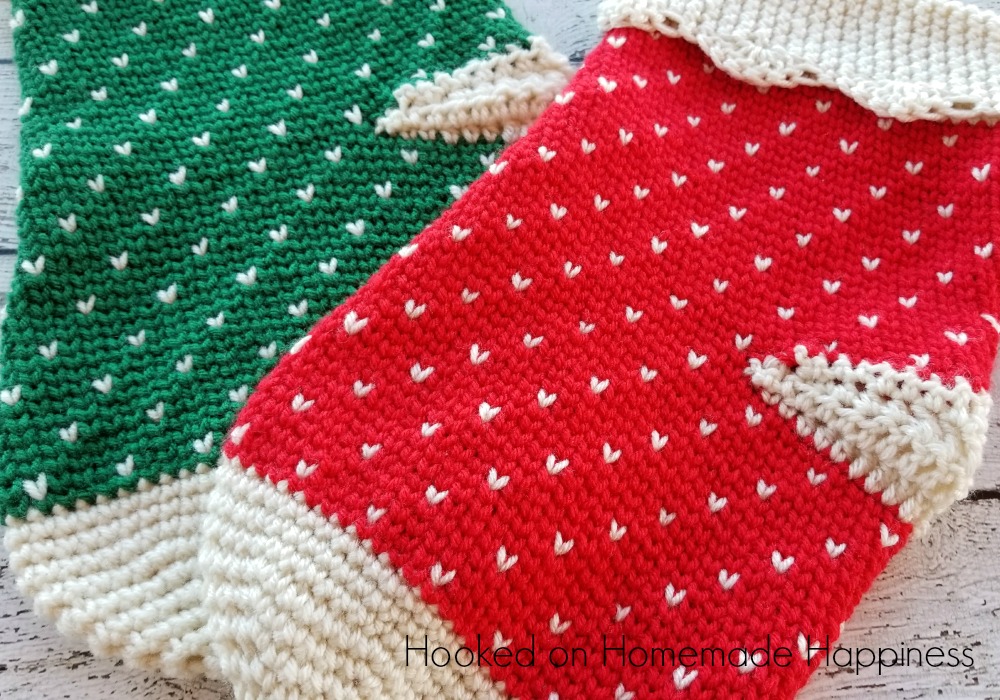
These oversized stocking are perfect for Santa to fill with treats. I crocheted our previous stockings when I first learned to crochet… and, well… let’s just say new ones were needed! What I really like about these (besides the fact that they’re HUGE!) is how solid the fabric is. It won’t stretch much and small toys won’t fall out between stitches. These things are made for lots of toys & treats!
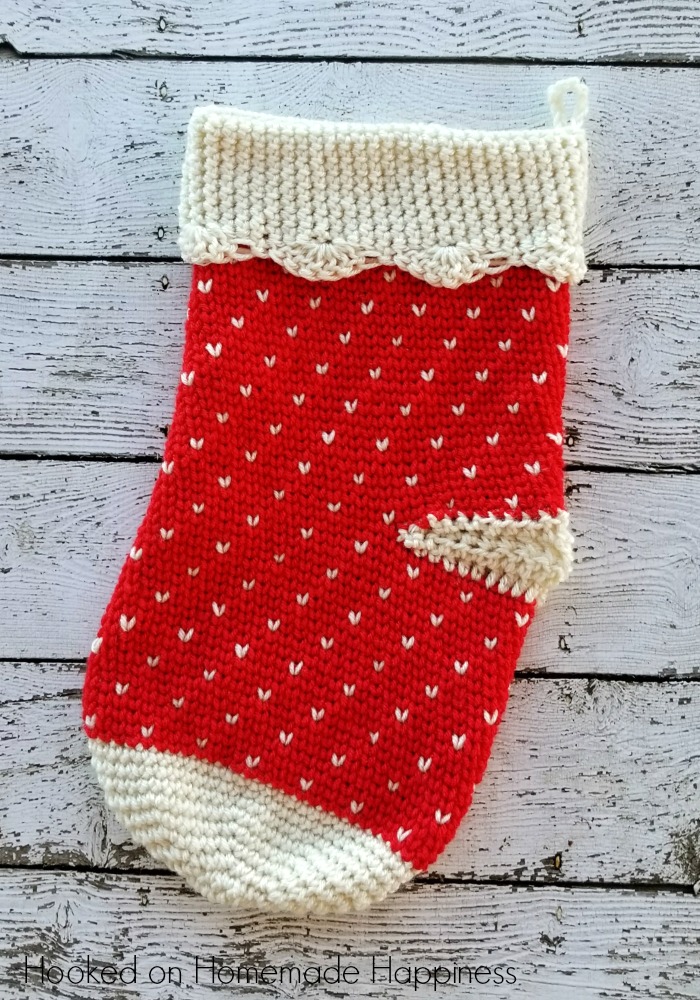
Oversized Fair Isle Stocking Crochet Pattern
– Get the free pattern below or purchase the ad-free, printable PDF in my Ravelry Shop
– PIN for later HERE
– Add to your Ravelry Queue HERE
Materials
Worsted weight (4) yarn – I used Red Heart Super Saver in Paddy Green, Aran, and I Love this Yarn in Fire Red (it was what I had in my stash 🙂 )
5.5 mm hook
6.0 mm hook
Yarn needle
Scissors
Level
Intermediate
Pattern notes & stitches to know
Magic ring (alternatively, ch 3 and sl st to first ch to form a loop)
Sl st – slip stich
Ch – chain
Sc – single crochet
Fair isle sc – photo tutorial in pattern
Hdc – half double crochet
Dc – double crochet
Sc2tog – single crochet 2 together
Finished Size:
Length: 16”
Width: 8”
STOCKING
Color A = my ivory color
Color B = the red or green color (or whatever contrasting color you want)
Starting with 5.5 mm hook and Color A
Ch 1 at the beginning of each round does not count as sc
Make a magic ring
Round 1: ch 1, sc 8 into ring, join to first sc with sl st, pull ring closed (8 sc)
Round 2: ch 1, 2 sc in each stitch around, join to first sc with sl st (16 sc)
Round 3: ch 1, *sc, 2 sc in next* repeat from * to * around, join to first sc with sl st (24 sc)
Round 4: ch 1, *sc in 2 stitches, 2 sc in next* repeat from * to * around, join to first sc with sl st (32 sc)
Round 5: ch 1, *sc in 3 stitches, 2 sc in next* repeat from * to * around, join to first sc with sl st (40 sc)
Round 6: ch 1, *sc in 4 stitches, 2 sc in next* repeat from * to * around, join to first sc with sl st (48 sc)
Round 7: ch 1, *sc in 5 stitches, 2 sc in next* repeat from * to * around, join to first sc with sl st (56 sc)
Round 8 – 10: ch 1, sc in each stitch around, join to first sc with sl st (56 sc)
Change to color B, do not fasten off Color A
Round 11: ch 1, sc in each stitch around, join to first sc with sl st (56 sc)
In the next round you will use the crochet fair isle sc stitch.
To work this stitch you will insert your hook between the “legs” of the sc in the previous row (instead of the top loops) and work a sc. This is what gives the faux “knit” like look
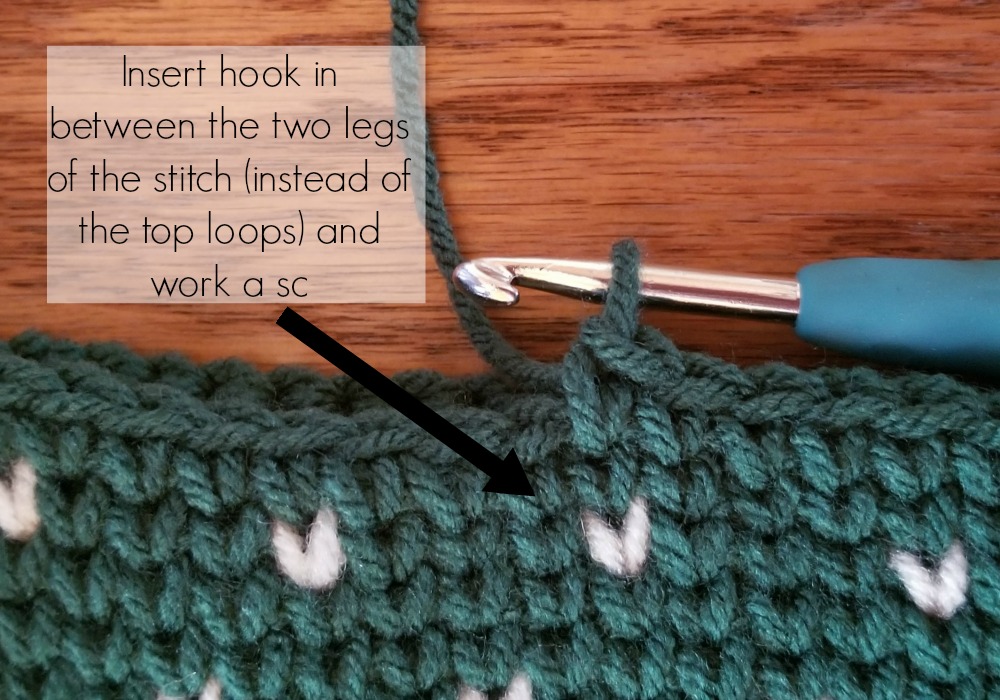
To change colors in this stitch:
Complete the previous stitch in Color B
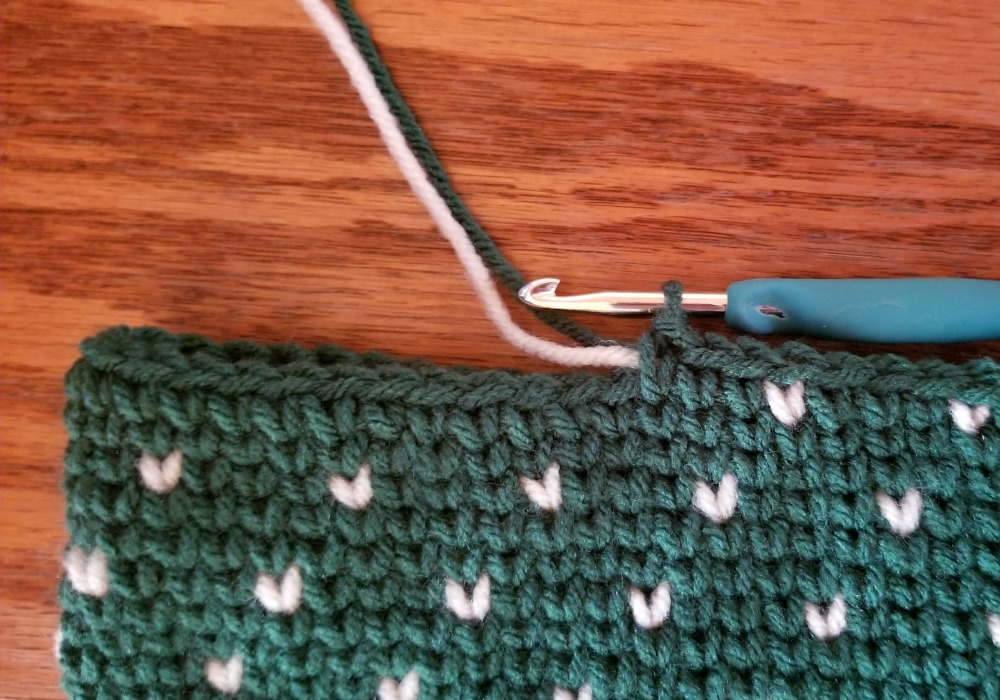
Insert hook in the legs of the next stitch, pull up a loop in Color A
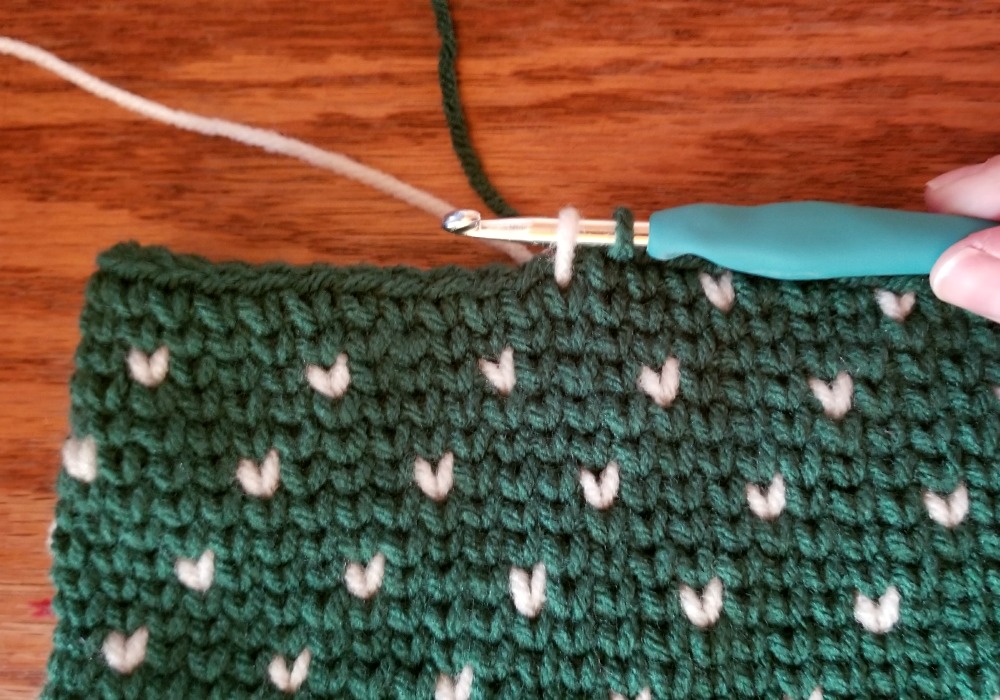
Yarn over with Color B and finish the stitch in color B
I carried Color A behind the stitches so I could pick it up every 4th stitch. I didn’t fasten off the ivory throughout the stocking
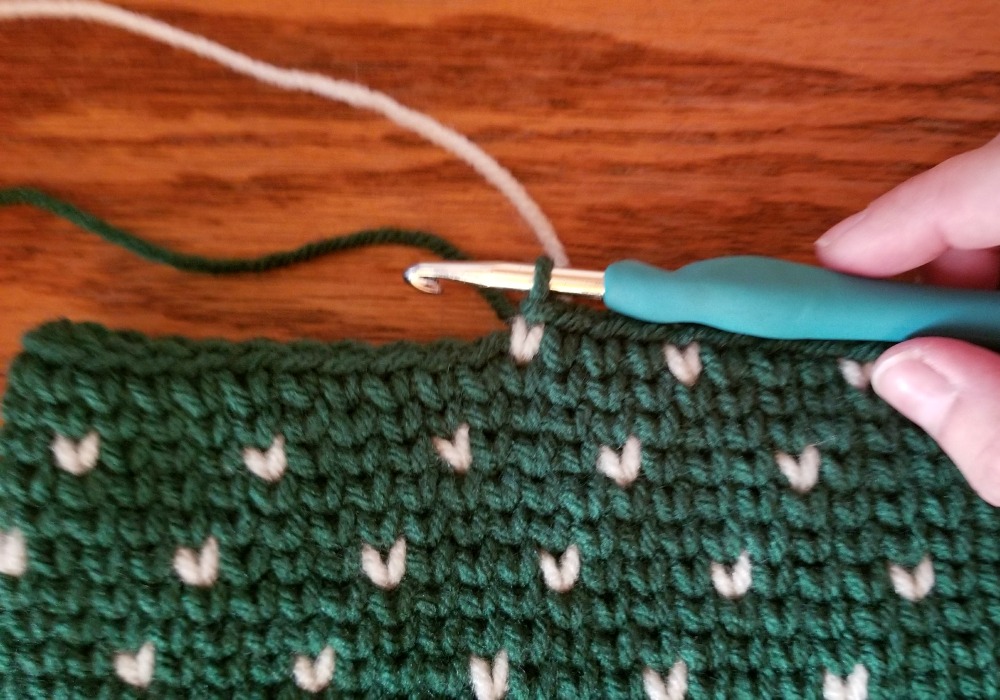
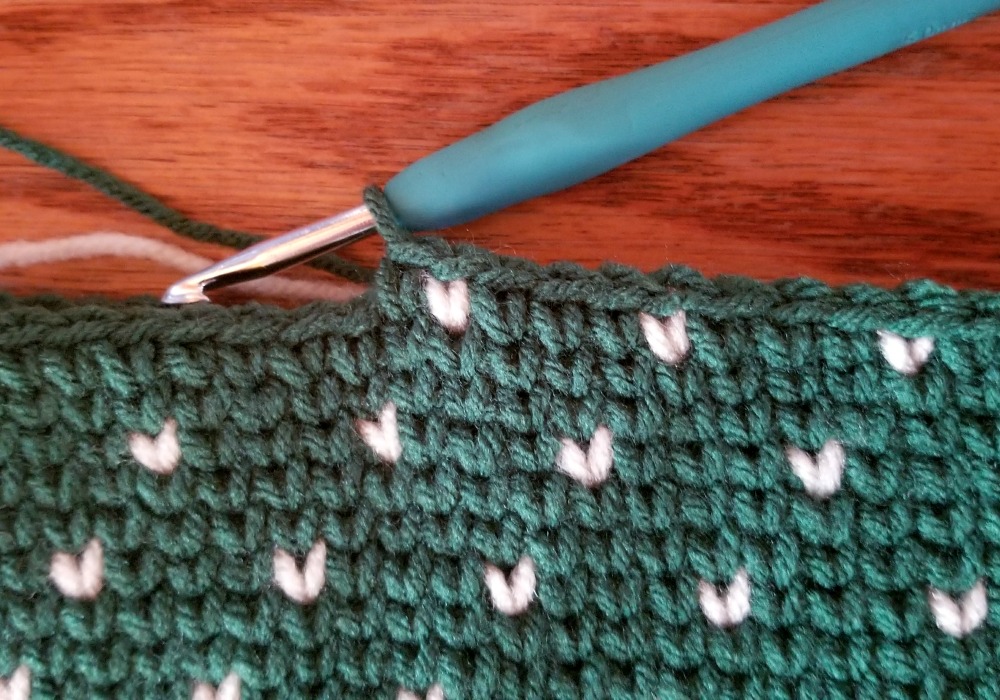
Continuing in Color B and carrying Color A
Round 12: ch 1,*fair isle sc in color B in 3 stitches, fair isle sc in color A in next stitch*, repeat from * to * around, join to first sc with sl st (56 sc)
Round 13: ch 1, fair isle sc in color B around, join to first sc with sl st (56 sc)
Round 14: repeat round 13
Round 15: ch 1, fair isle sc in color B, fair isle sc color A in next, *fair isle sc in color B in 3 stitches, fair isle sc in color A in next* repeat from * to * around color B in last 2 stitches, join to first sc with sl st
Round 16: repeat round 13
Round 17: repeat round 13
Repeat rounds 12 – 17 to row 34
In the next rounds you will work the heel
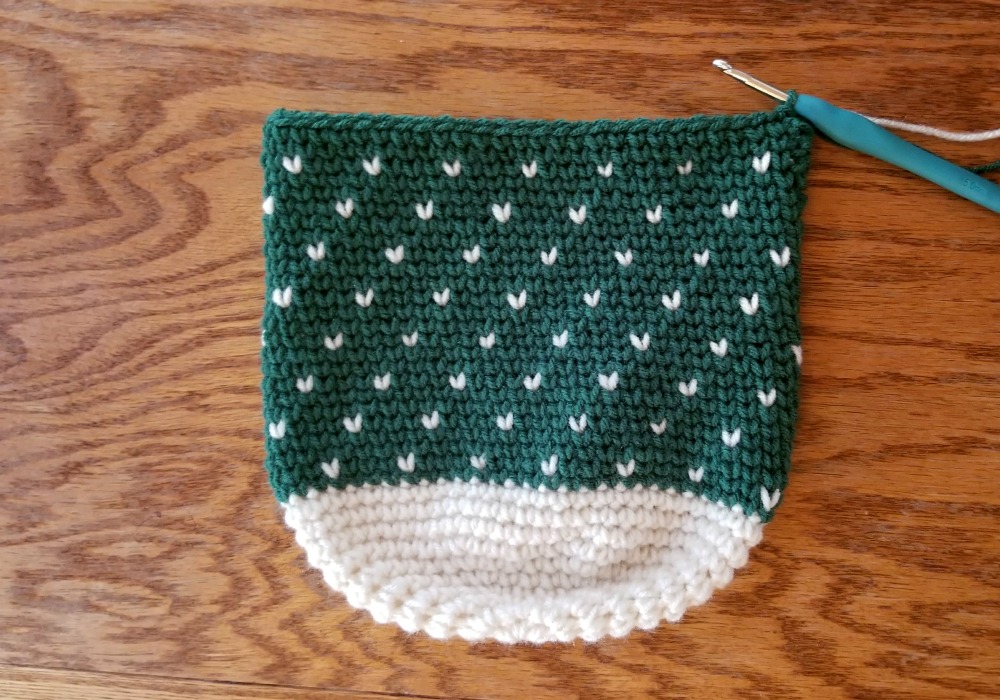
Drop Color B (do not fasten off) and use Color A
Round 34a: ch 1, sl st in 2 stitches, sc in next 2, hdc in next 3, dc in next 6, hdc in next 3, sc in next 2, sl st in next 2
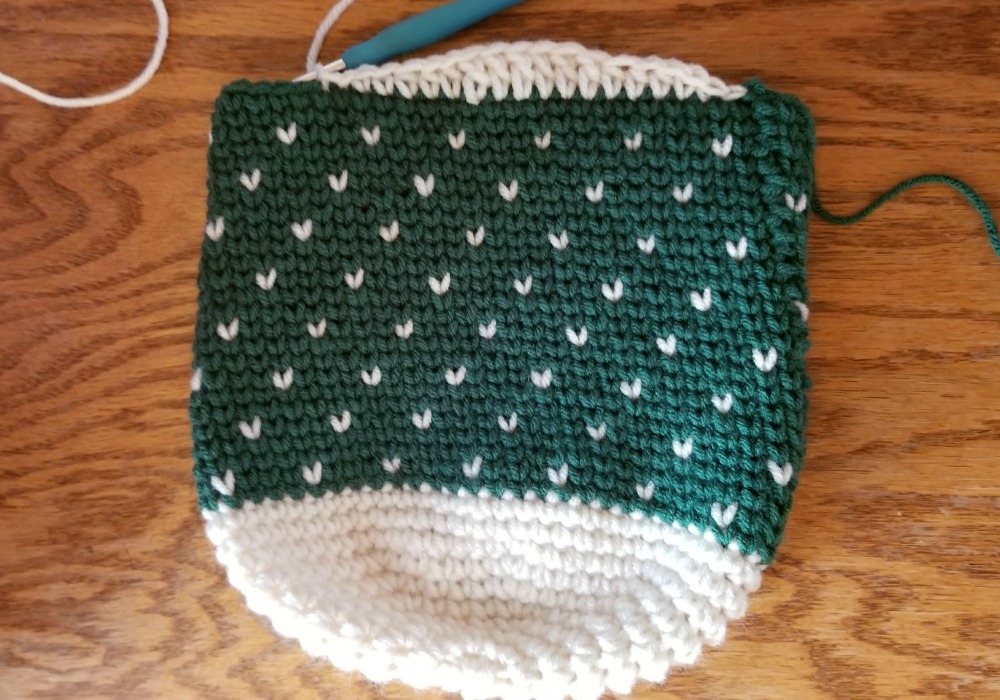
Round 34b: ch 1, turn, sc2tog (over the sl st’s), sc in next, hdc in next 3, dc in next 8, hdc in next 3, sc in next, sc2tog
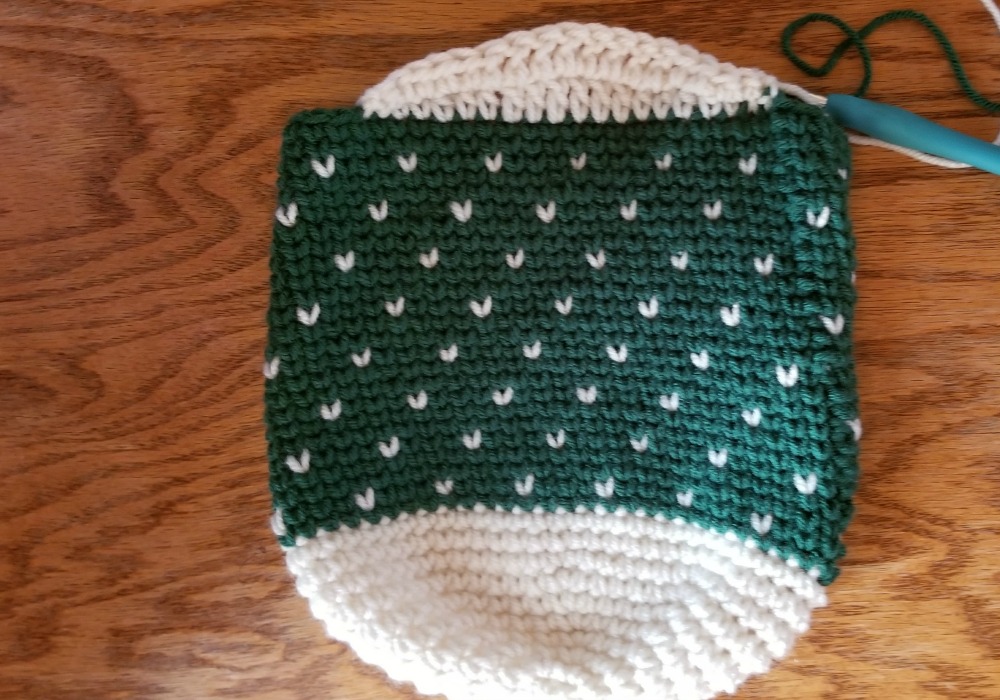
Round 34c: ch 1, turn, sc2tog, sc in next 2, hdc in next 3, dc in next 4, hdc in next 3, sc in next 2, sc2tog
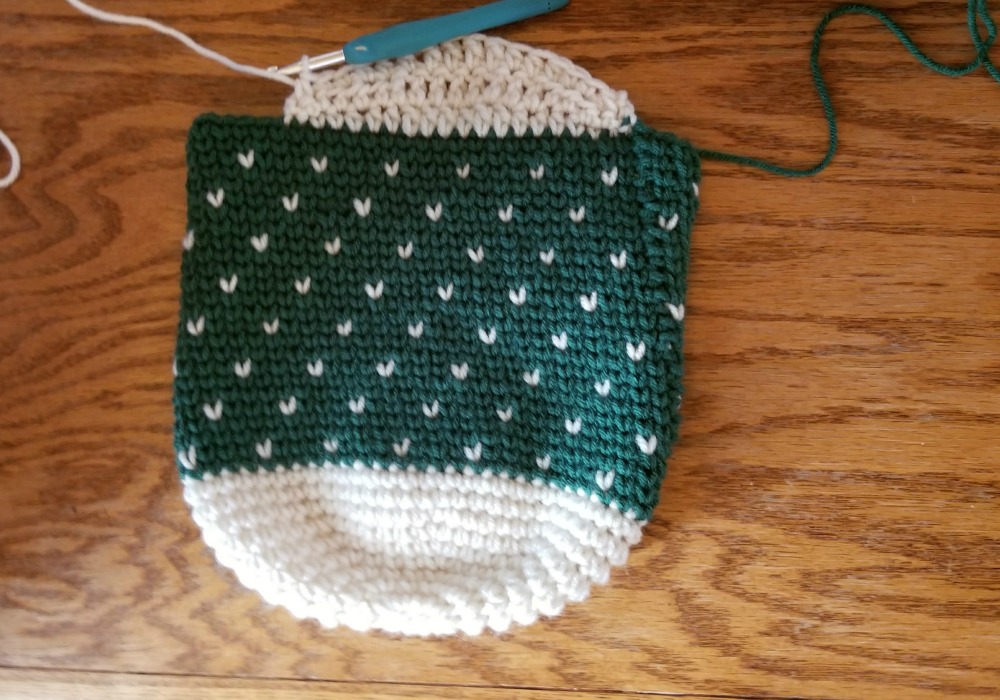
Round 34d: ch 1, turn, sc2tog, sc in next 2, hdc in next 3, dc in next 2, hdc in next 3, sc in next 2, sc2tog
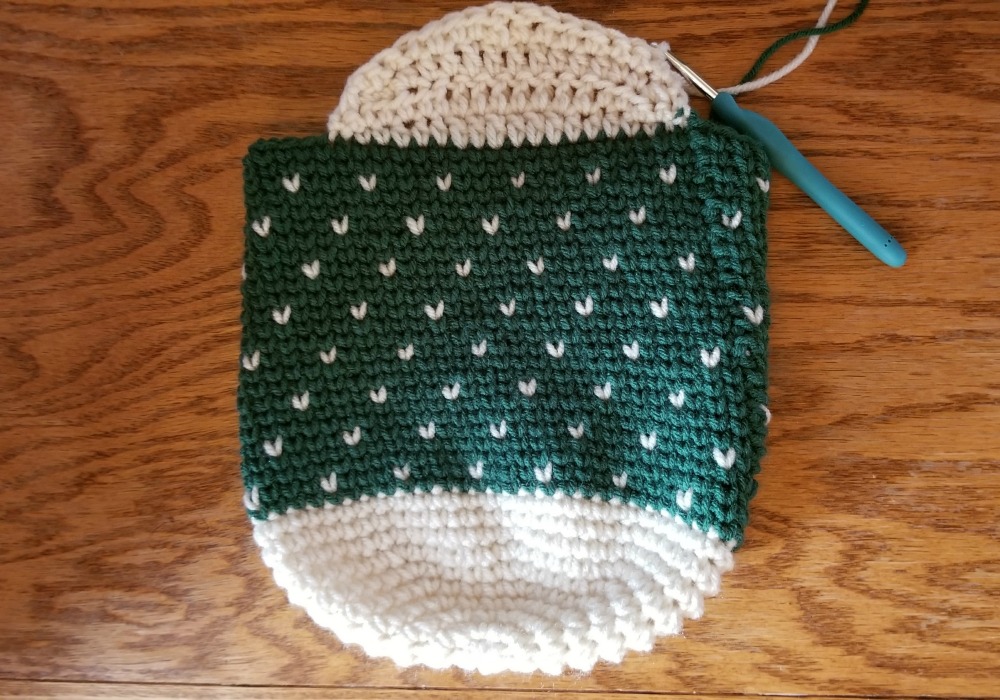
Now you’re going to work color B around the entire round. There should be 14 stitches in color A across the top of the heel and 38 stitches in color B, this gives you 52 stitches. When crocheting around work 2 stitches along each side of the heel and this will give you the 56 stitches we are working with.
If these numbers don’t match up for you, add or take out stitches to make the next round equal 56
Round 35: In color B, sc 14 across the top of the heel, sc 2 down the side of the heel, fair isle sc around the stocking, sc 2 up the other side of the heel, join to first sc with sl st (56 sc)
Round 36: ch 1, fair isle sc in color A, *fair isle sc in color B in 3 stitches, fair isle sc in color A in next stitch*, repeat from * to * around, color B in last 3 stitches (56 sc)
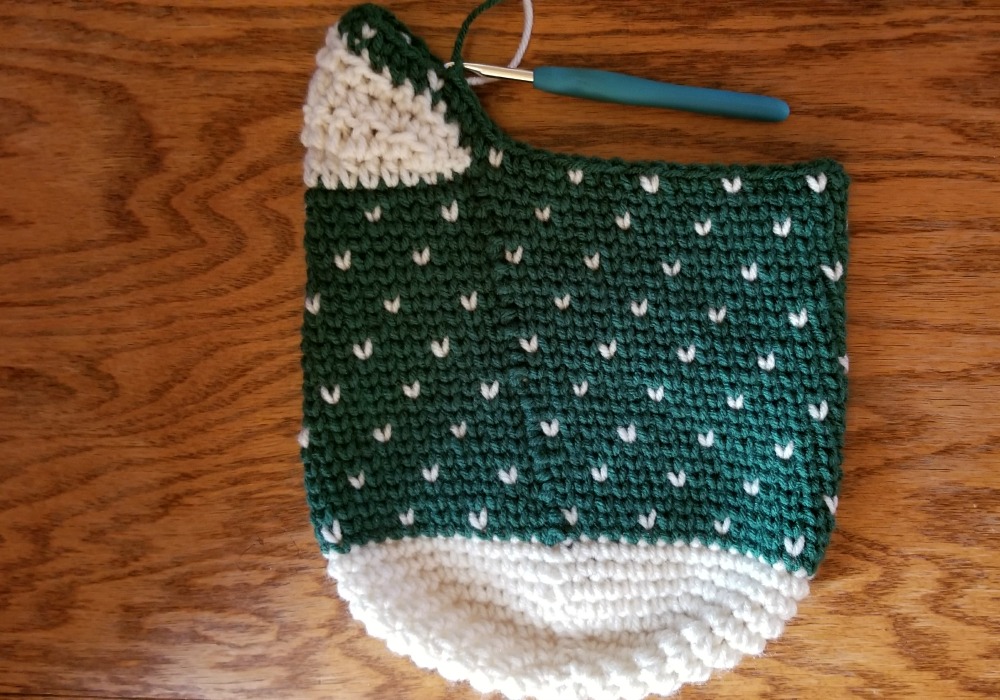
Round 37: ch 1, fair isle sc in color B around, join to first sc with sl st (56 sc)
Round 38: repeat round 37
Round 39: ch 1, fair isle sc in color B in 2 stitches, fair isle sc color A in next, *fair isle sc in color B in 3 stitches, fair isle sc in color A in next* repeat from * to * around color B in last stitch, join to first sc with sl st
Round 40: repeat round 37
Round 41: repeat round 37
Repeat rounds 36 – 41 to row 58
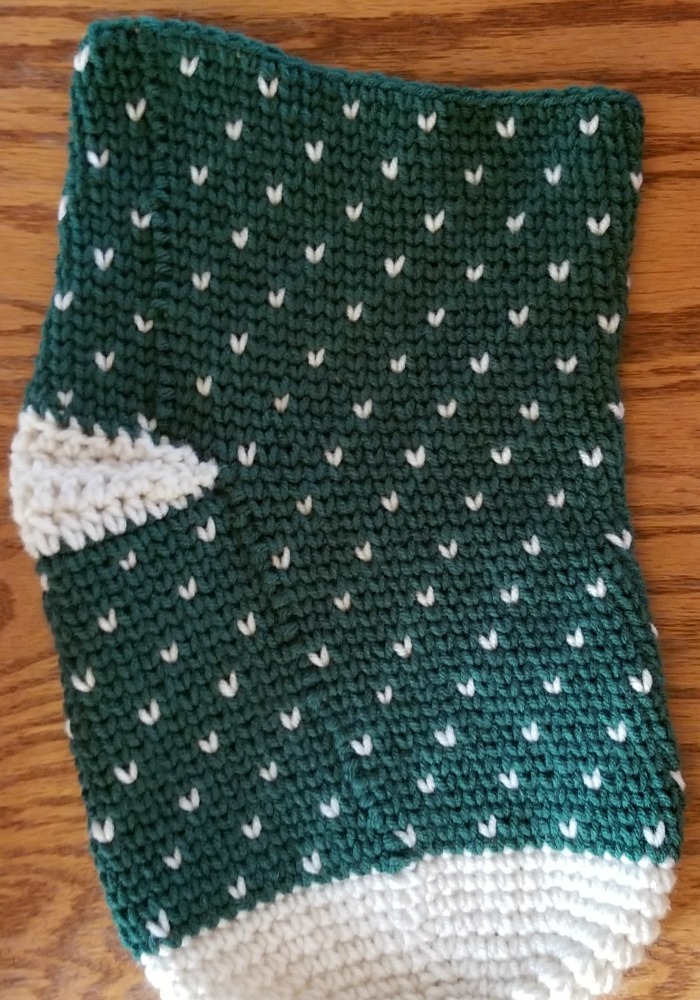
Now you’ll start working the cuff
My joining stitch was going a bit sideways, so I fastened off at this point and weaved in all my ends.
I rejoined with Color A in the middle of the back.
Round 59 – 67: ch 1, sc in each stitch round, join to first sc with sl st (56 sc)
In the next round you will make the hanger
Round 68: ch 1, sc in each stitch until you are lined up with the heel, ch 10, sc in next stitch and in remaining stitches, join to first sc with sl st (56 sc)
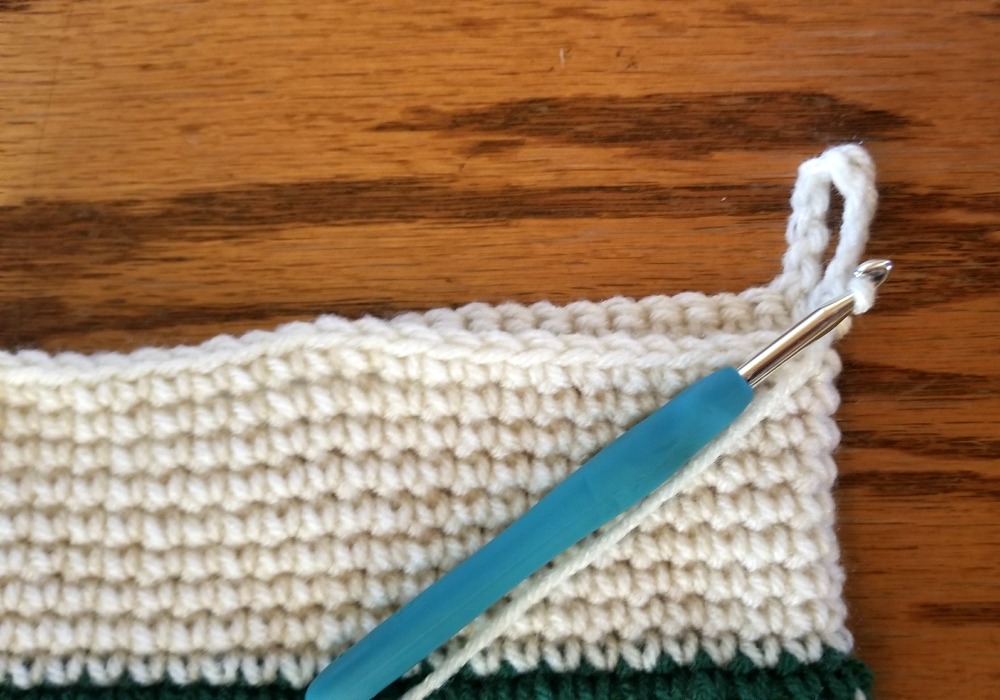
Change to 6.0 mm hook
Round 69 – 77: ch 1, sc in each stitch around (skipping the ch 10), join to first sc with sl st (56 sc)
Round 78: ch 1, sc in same stitch, *skip 3 stitches, 6 dc in next, skip 3 stitches, sc in next* repeat from * to * around, join to first sc with sl st
Fasten off, weave in all your ends. Fold the top of the cuff down to the hanger.
Looking for more patterns? Follow me on Facebook, Instagram, and Pinterest! Please share a pic of your finished product with me. I’d love to see it!

NEVER MISS A PATTERN!
Sign up for my newsletter and receive a FREE ebook with 3 of my favorite patterns PLUS patterns straight to your inbox. You’ll also get a heads up about upcoming giveaways, events, and crochet alongs.



I’ve heard this stitch called Waistcoat. Use it all the time. It is tighter than doing the yarn under but seems to be easier with my arthritis. Lovely pattern. Can’t wait to try it. Thanks.