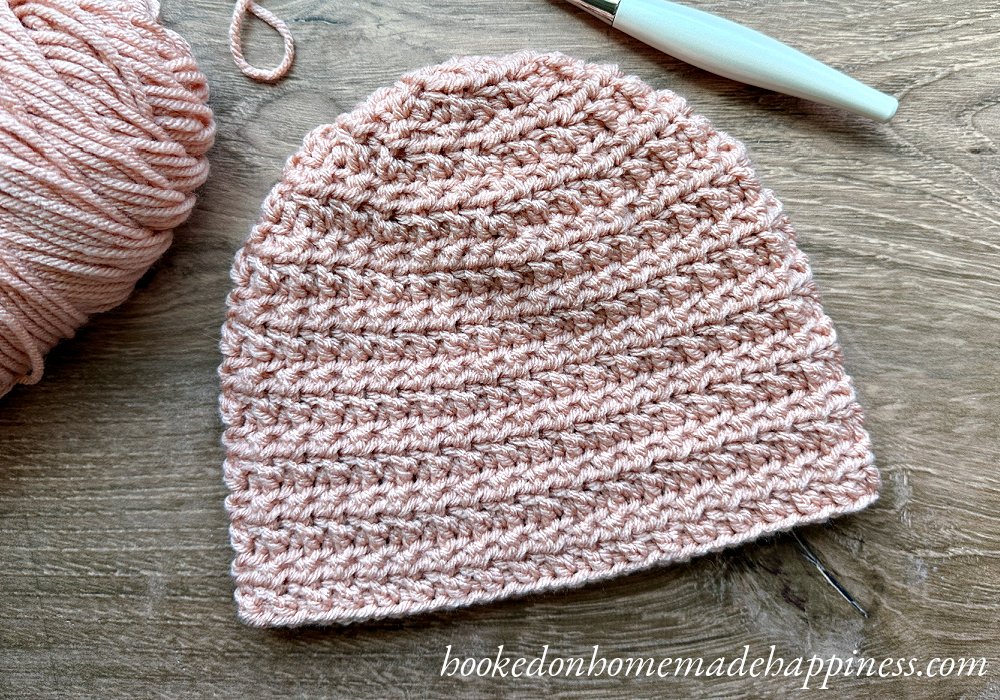
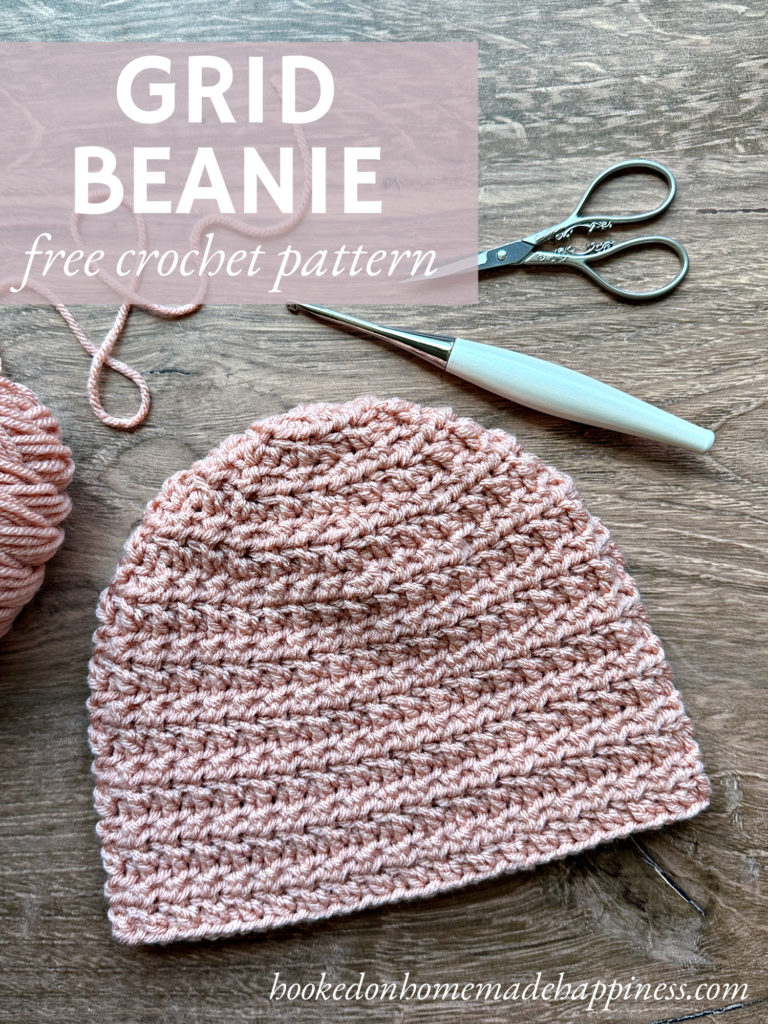
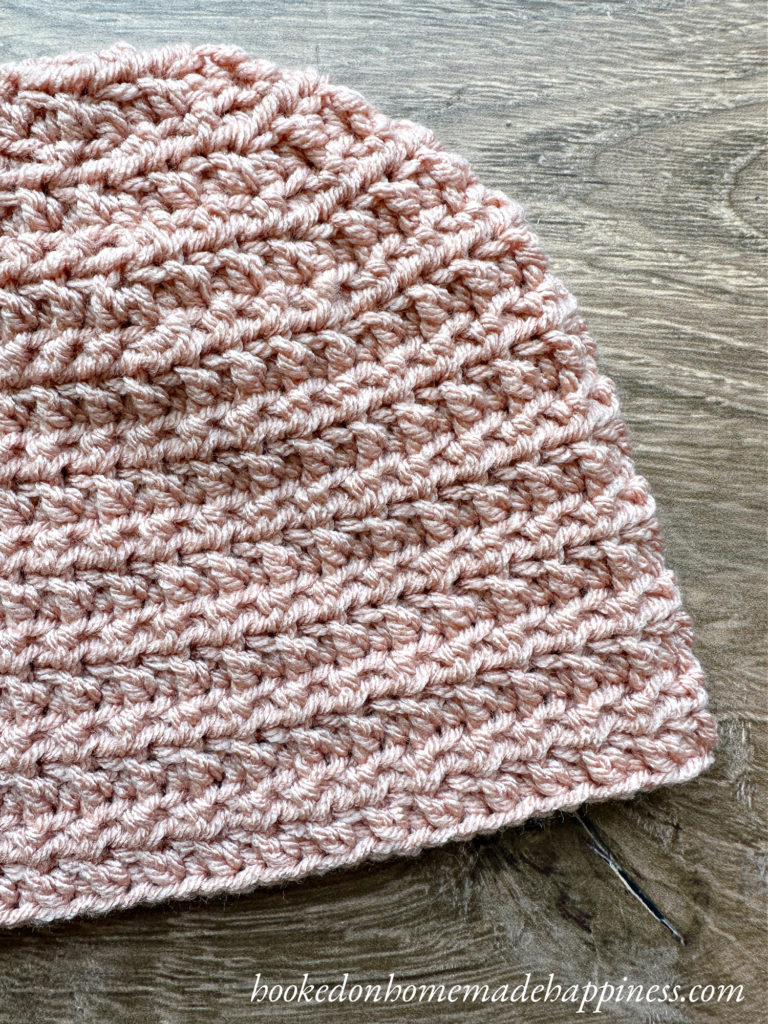
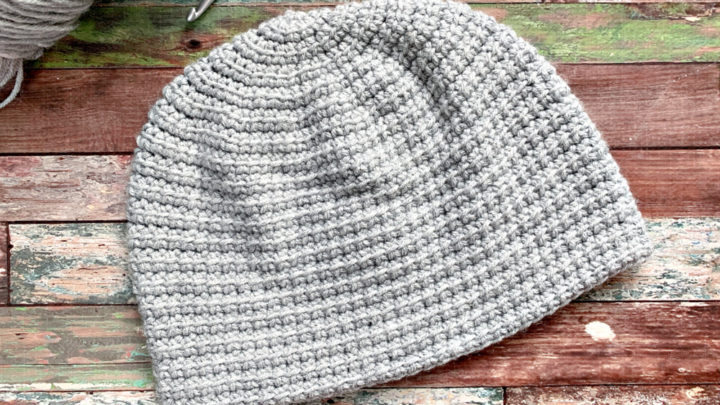
The Grid Beanie Crochet Pattern uses basic crochet stitches to create a subtle grid-like texture.
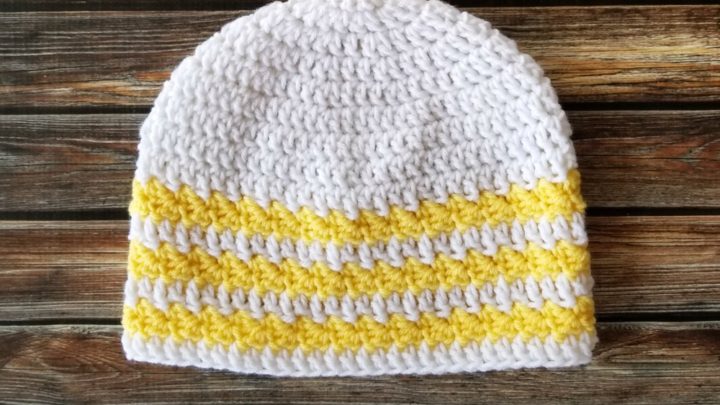
This hat is the 4th pattern in the Crochet Along for a Cause. We are making 1 hat per week to donate to a cancer center, school, or homeless shelter for 10 weeks. There’s always time to join! You can find all the details and hat patterns HERE.
click here to pin for later >>>
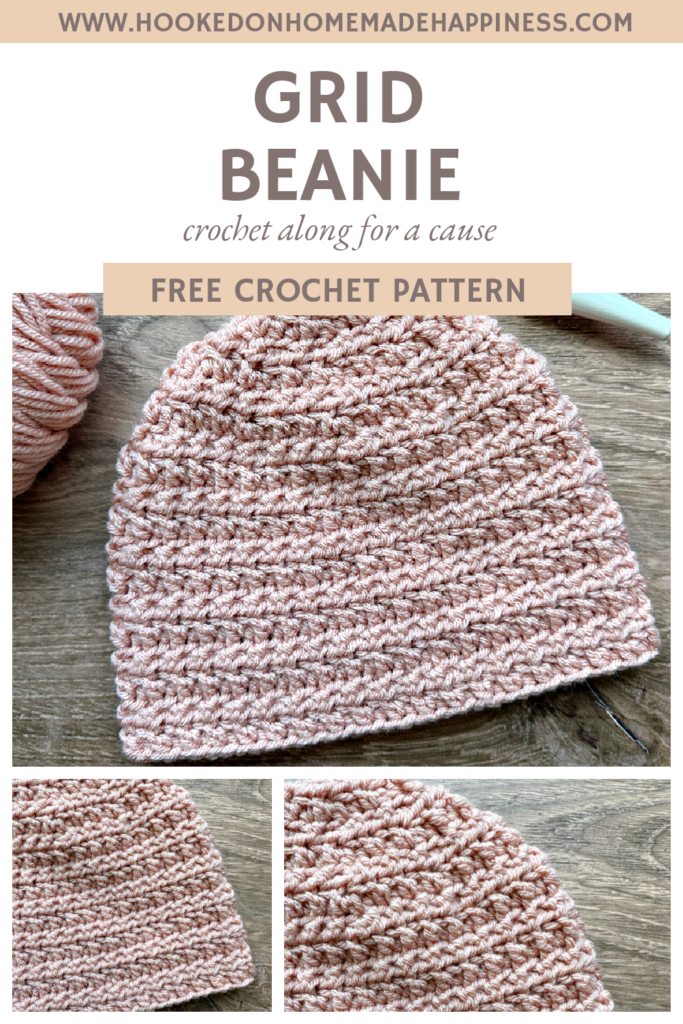
Grid Beanie Crochet Pattern
Get the full pattern below or download the printable PDF for free HERE
PIN for later HERE
Add to your Ravelry Queue HERE
Materials
60g worsted weight acrylic yarn (I used I Love This Yarn from Hobby Lobby)
H/5.0 mm hook
yarn needle
scissors
Level
intermediate
Pattern notes & Stitches to Know
magic ring
ch – chain
sl st – slip stitch
hdc – half double crochet
blo – back loop only
flo – front loop only
· Written in US terms
· ch 2 does not count as hdc
· This hat is made from the top down in joined, turned rounds.
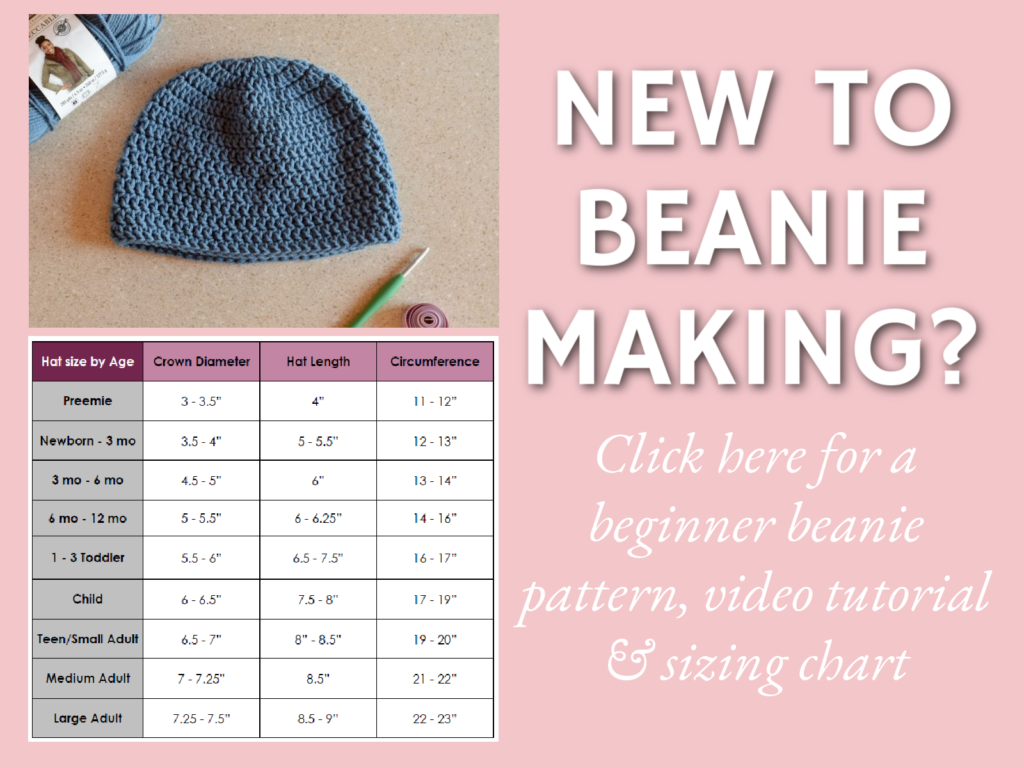
Approx Finished size (child) –
Length: 7.5”
Circumference: 19”
GRID BEANIE CROCHET PATTERN
Make a magic ring
Round 1: ch 2, 9 hdc in ring, join to first hdc with sl st, pull ring closed tight (9 hdc)
Round 2: ch 2, turn, *2 hdc flo, 2 hdc blo* repeat from * to * around, join to first hdc with sl st (18 hdc)
Round 3: ch 2, turn, *hdc blo, 2 hdc flo* repeat from * to * around, join to first hdc with sl st (27 hdc)
Round 4: ch 2, turn, *hdc blo, hdc flo, 2 hdc blo, hdc flo, hdc blo, 2 hdc flo* repeat from * to * around, join to first hdc with sl st (36 hdc)
Round 5: ch 2, turn, *hdc blo, hdc flo, hdc blo, 2 hdc flo* repeat from * to * around, join to first hdc with sl st (45 hdc)
Round 6: ch 2, turn, *hdc blo, hdc flo, hdc blo, hdc flo, 2 hdc blo, hdc flo, hdc blo, hdc flo, hdc blo, 2 hdc flo* repeat from * to * around, join to first hdc with sl st (54 hdc)
Round 7: ch 2, tun, *hdc blo, hdc flo, hdc blo, hdc flo, hdc blo, 2 hdc flo* repeat from * to * around, join to first hdc with sl st (63 hdc)
Round 8: ch 2, turn, *hdc blo, hdc flo, hdc blo, hdc flo, hdc blo, hdc flo, 2 hdc blo, hdc flo, hdc blo, hdc flo, hdc blo, hdc flo, hdc blo, 2 hdc flo* repeat from * to * around, join to first hdc with sl st (72 hdc)
Crown diameter is approx 6.5”.
To adjust sizing, add or take out increase rounds.
Round 9: ch 2, turn, *hdc blo, hdc flo* repeat from * to * around, join to first hdc with sl st (72 hdc)
Round 10 – 20: repeat round 9 (72 hdc)
Fasten off. Weave in the ends.
Looking for more patterns? Follow me on Facebook, Instagram, and Pinterest! Please share a pic of your finished product with me. I’d love to see it!