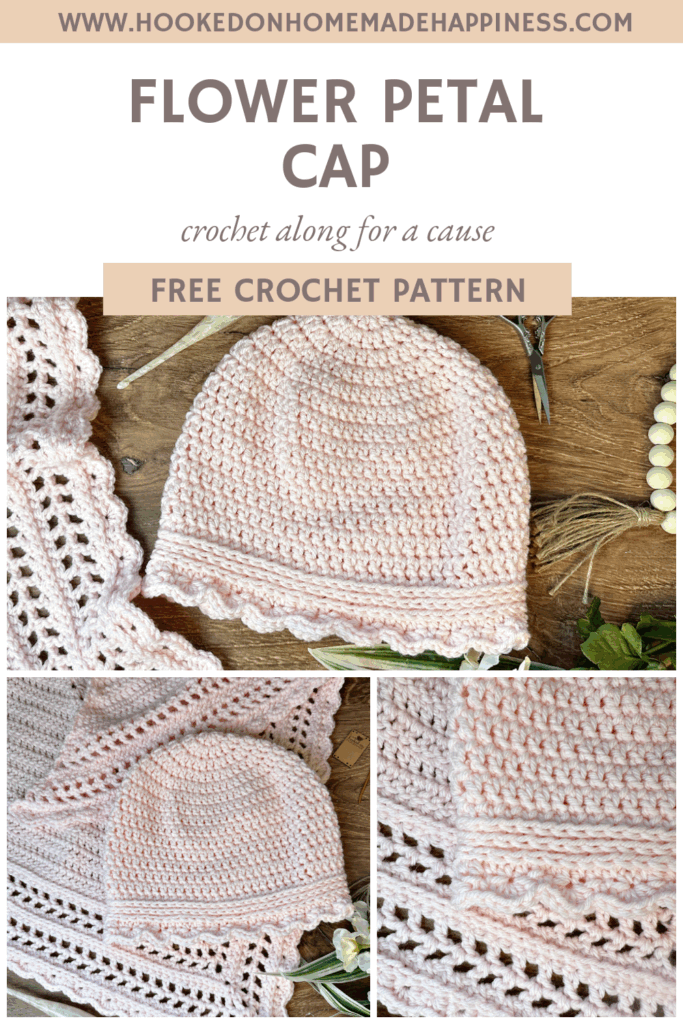
Flower Petal Cap Crochet Pattern (CAL for a Cause)
As part of this year’s Crochet Along for a Cause, I’m excited to share the Flower Petal Cap Crochet Pattern – a beautiful, functional hat pattern designed with care and comfort in mind. Whether you’re crocheting for a loved one or making donation items for cancer centers, this sweet cap is both meaningful and practical. This pattern pairs perfectly with the Flower Petal Prayer Shawl for a beautiful and meaningful set.

A Hat with Purpose
The Flower Petal Cap is more than just a pretty design—it’s thoughtfully created to provide full head coverage, including the ears and back of the neck. It’s soft, cozy, and easy to wear, offering warmth and comfort to anyone going through a difficult time.
This pattern is especially ideal for cancer center donations, as it’s made in a lovely, uplifting pink and finished with a delicate scalloped edge that gives it a gentle, feminine touch.

Features:
- Full coverage: Keeps the entire head, ears, and upper neck warm
- Scalloped edging: A soft, floral-inspired finish around the brim
- Beginner-friendly: Uses basic stitches and simple shaping
- Fast to make: Great for donation batches or thoughtful gifts
- Matching Pattern Available: Pairs perfectly with the Flower Petal Prayer Shawl
Yarn + Construction
The cap is made with soft acrylic or cotton-blend yarns that are gentle on sensitive skin. While it’s shown in a soft pink, you can make it in any soothing or cheerful color for your donations.

This pattern is part of the Crochet Along for a Cause, where we’re making and donating hats, scarves, and shawls to those in need throughout the summer. Whether you’re a longtime participant or just joining in, your handmade contributions matter.
👉 Be sure to check out the matching Flower Petal Prayer Shawl to create a beautiful gift set.

click here to pin this pattern for later >>>
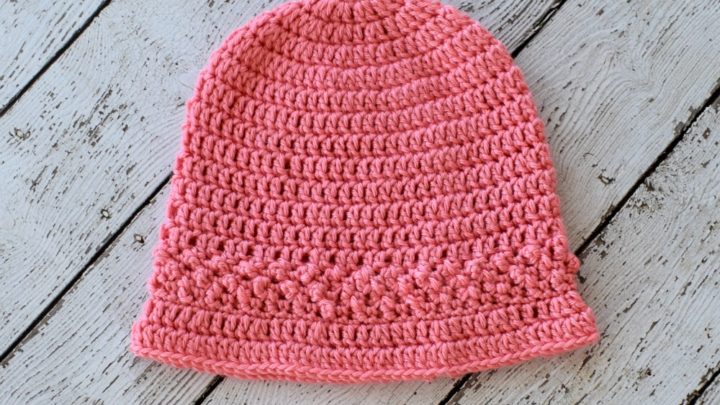
Flower Petal Cap Crochet Pattern
Get the full pattern below or download the ad-free, printable PDF for free HERE
PIN for later HERE
Add to your Ravelry Queue HERE
Materials
worsted weight yarn (I used I Love This Yarn in Soft Pink)
I/5.5 mm
yarn needle
scissors
Level
easy+
Pattern notes & stitches to know
magic loop
ch – chain
sl st – slip stitch
dc – double crochet
hdc – half double crochet
TL – third loop (insert hook into the bar across the back of the hdc, and work stitch)
sc – single crochet
· written in US terms
· ch 2 does not count as dc
· This hat is worked from the top down with joined rounds starting with a magic loop
· The pattern is written in 3 sizes (Child, Teen/Sm Adult, M/L Adult). The pattern is written in these sizes consecutively. Example, when the pattern gives the end of row count ((50, 60, 70) dc) the 50 is for Child, 60 is Teen, and 70 is Adult.
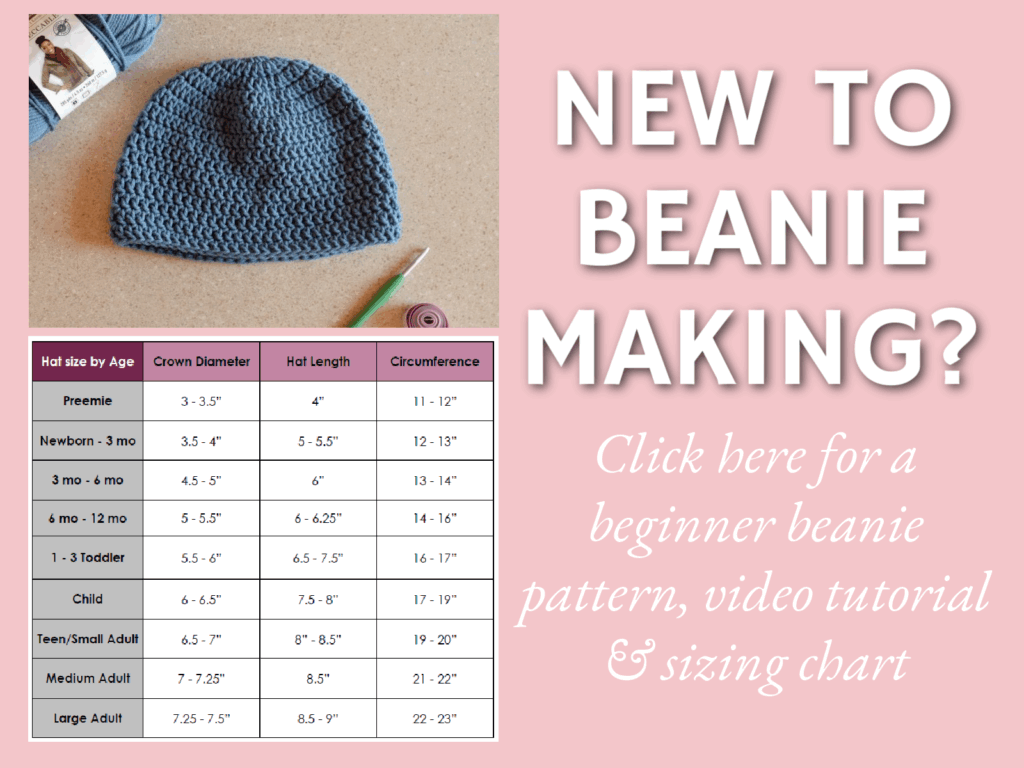
Approx finished size:
Circumference: (19”, 20” , 21”)
Length: (8.5”, 9”, 9.5”)
FLOWER PETAL CAP CROCHET PATTERN
Make a magic loop
Round 1: ch 2, dc 10 into loop, pull loop closed tight, join to first dc with sl st (10 dc)
Round 2: ch 2, 2 dc in each stitch around, join to first dc with sl st (20 dc)
Round 3: ch 2, *dc in 1 stitch, 2 dc in next* repeat from * to * around, join to first dc with sl st (30 dc)
Round 4: ch 2, *dc in 2 stitches, 2 dc in next* repeat from * to * around, join to first dc with sl st (40 dc)
Round 5: ch 2, *dc in 3 stitches, 2 dc in next* repeat from * to * around, join to first dc with sl st (50 dc)
Child size stop increasing here: crown diameter is approx. 5.5”
Skip to arrow.
Round 6: ch 2, *dc in 4 stitches, 2 dc in next* repeat from * to * around, join to first dc with sl st (60 dc)
Teen/Small Adult stop increasing here. Crown diameter is approx. 6.5”
Skip to arrow.
Round 7: ch 2, *dc in 5 stitches, 2 dc in next* repeat from * to * around, join to first dc with sl st (70 dc)
M/L Adult stop increasing here. Crown diameter is approx. 7.5”
Skip to arrow.
—–> For remaining rounds for all sizes: ch 2, dc in each stitch around, join to first dc with sl st ((50, 60, 70) dc)
Repeat to Round (13, 14, 15)
EDGING
Round (14, 15, 16) : ch 1, hdc in each stitch around, join to first hdc with sl st ((50, 60, 70) hdc)
Round (15, 16, 17): ch 1, hdc TL in each stitch around, join to first hdc with sl st ((50, 60, 70) hdc)
Round (16, 17, 18): ch 1, hdc TL in each stitch around, join to first hdc with sl st ((50, 60, 70) hdc)
Round (17, 18, 19): ch 1, *hdc TL in 3 stitches, 2 hdc TL in next* repeat from * to * around until another repeat cannot be made, hdc TL in remaining, join to first hdc with sl st ((62, 75, 87) hdc)
Round (18, 19, 20): ch 1, sc in same stitch, skip 1 stitch, *5 hdc in next, skip 1 stitch, sc in next, skip 1 stitch* repeat from * to * around until another repeat cannot be made, sc in remaining, join to first sc with sl st
Fasten off. Weave in the ends.
Get the matching Flower Petal Prayer Shawl Pattern Here
Looking for more patterns? Follow me on Facebook, Instagram, and Pinterest! Please share a pic of your finished product with me. I’d love to see it!


Made your flower petal cap in lavender. Turned out great. Will be making more of your cap for a cause
Thank you!
Do u have a video for it
No, sorry I don’t
I just found this CAL a couple of weeks ago and am hooked! (no pun intended). It’s so nice that you do this every year. I’m making hats for the local cancer center and homeless shelter there. Thank you so much for helping me give back to the community!
Yay! Thank you!!
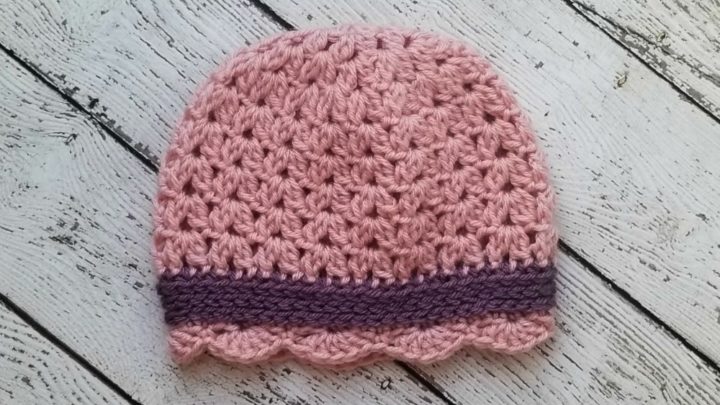
Another absolutely adorable hat for the donation box! I made mine in white. Next time I make this hat, I’m going to try making the “band” in a different color. Thanks so much for these lovely hats.
Thank you so much!! I think that would be so cute 🙂
I would love to make this for my granddaughter. How do I alter the pattern for a toddler 1-3 years old? Thanks in advance
Catherine
Hi! You can take out 1 or 2 increase rounds 🙂
Hey. I just saw this on Pinterest! Love this little hat… would be so cute for little girl. When you responded with take out 1 or 2 increase rounds…. does that mean at end? I’m pretty new to crocheting! If I wanted to make for toddlers/little girls(ages3-8/9) or so, which rounds do I need to skip?
Hi! In the first rounds where you are working 2 stitches in each round are increase rounds. For the 8/9 year old you can probably skip round 6. For the 3 year old I would skip 5 & 6 🙂
Really struggled with round 16 stitch of hdc 3rd loop
Me too! ☹️
Sharon, I think I figured it out. It’s not that you insert the hook into the loop behind the stitch under the top 2 loops and THEN do a hdc. Instead, you just do the hdc in a different place , i.e., you do the hdc in that 3rd loop (the one that sits in the back under the top 2 loops. Those top 2 loops are where you would otherwise normally do a hdc.) Summary: do the hdc in that back, bottom loop. Hope that helps.
Me too. ☹️ I insert the hook into loop behind stitch under top 2 loops per pattern instruction. That leaves me with 2 loops on the hook. Now what – how does one do a HDC if you already have 2 loops on hook instead of 1? Help please! What am I doing wrong? TIA.
Any chance you can send me a video clip of line 16 and 17.
I can’t understand how it is done. I was good up until then.
I’m new at this.
Carolyn
I’m making hats for people with cancer. I love the flower petal hate….my problem is the seam shows….how do I make the hat without the seam?
Hi! Yes, the seam will show with anything made in joined rounds 🙂