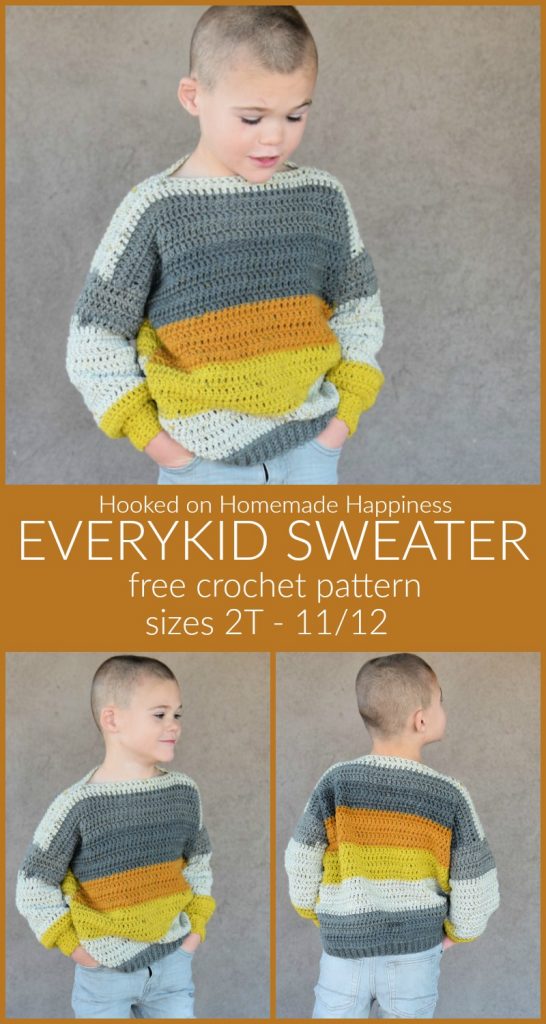
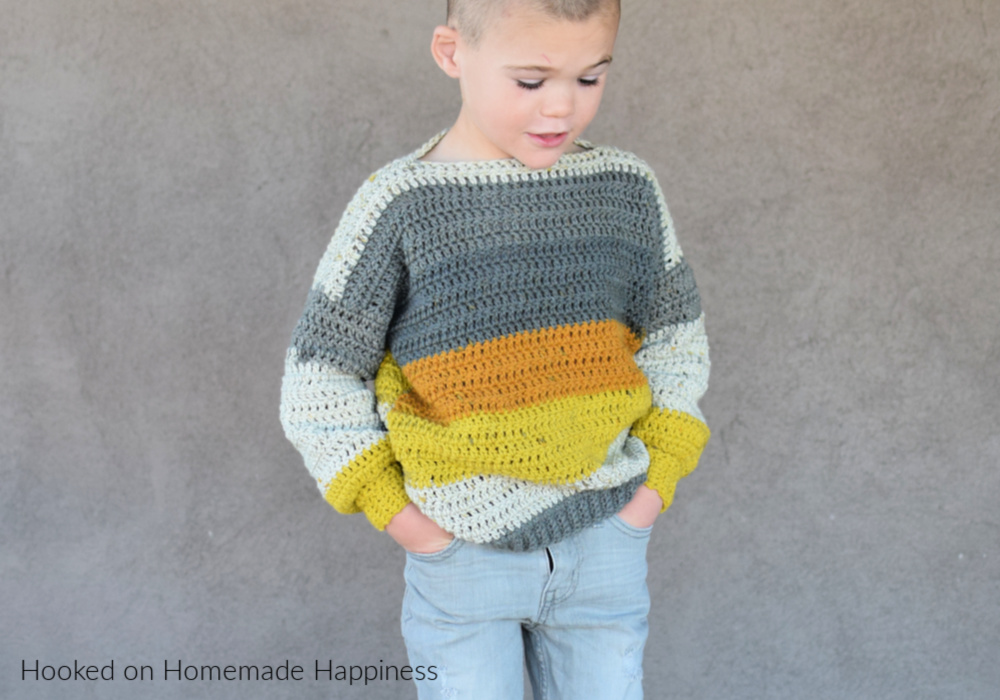
The Everykid Crochet Sweater Pattern is written in sizes 2T – 11/12 and can be made for boys or girls! This sweater is basically the same as my EVERYGIRL CROCHET SWEATER pattern, just smaller 😉
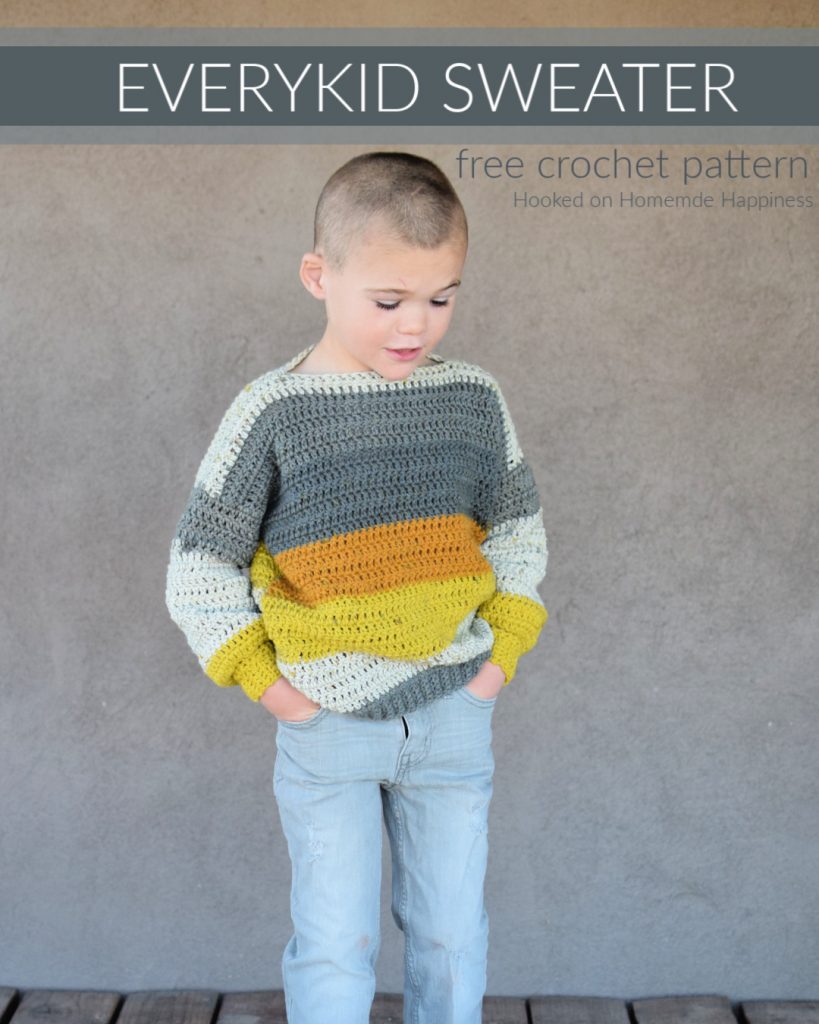
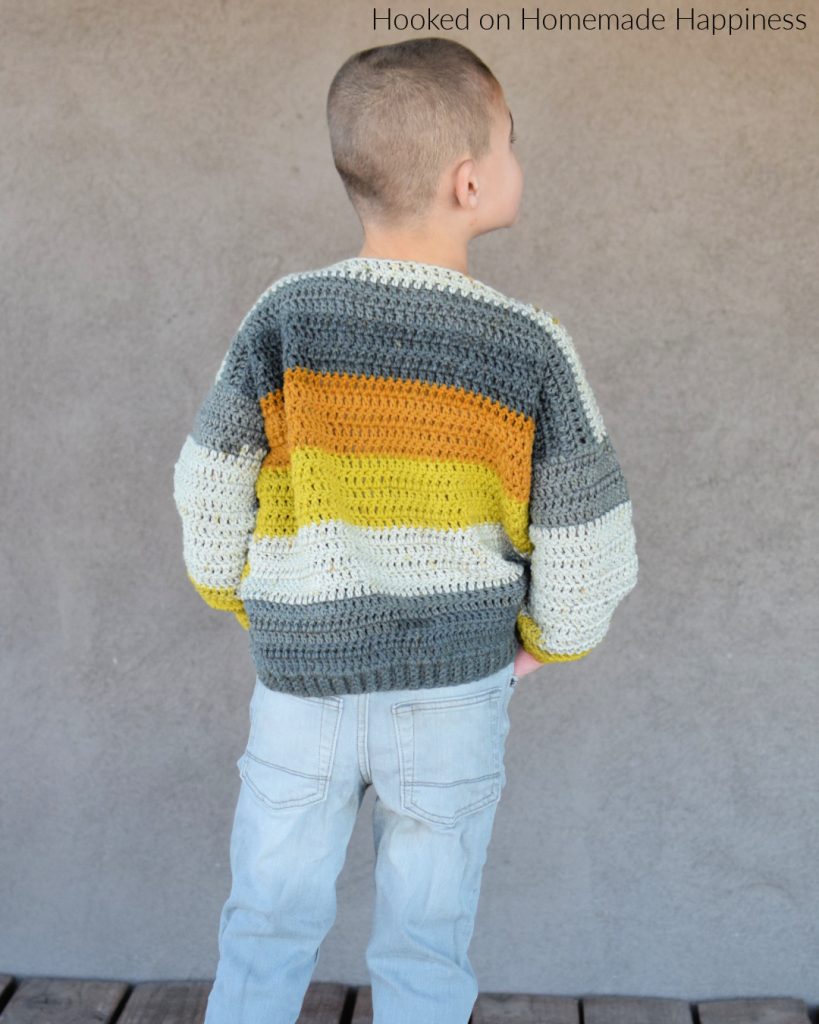
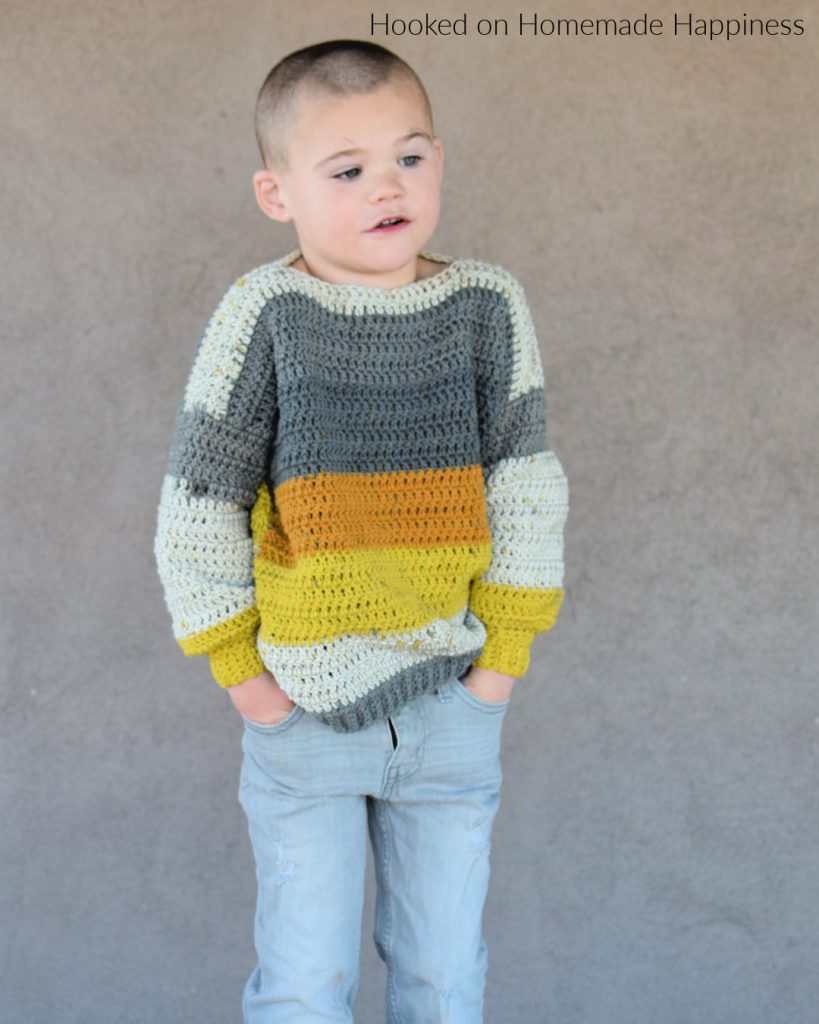
Honestly, I used some leftover Caron Cakes that I had my stash foreverrrrrrr. I think they were sitting there just waiting to become this easy & cute sweater! I used under 2 Caron Big Cakes to make this sweater in size 6.
More Homemade Happiness:

Carson Dress // Sweetheart Sweater // Chunky Raglan
Everykid Sweater Crochet Pattern
– Get the free pattern below or purchase the ad-free, printable PDF in my Etsy Shop or Ravelry Shop
– PIN for later HERE
– Add to your Ravelry Queue HERE
Materials
Caron Cakes (approx. 1 skein for 2T, 3T – 2 skeins for 4T, 5T, 6/6X – 3 skeins for 7/8, 9/10, 11/12)
H/5.0 mm hook
yarn needle
scissors
Level
easy+
Pattern notes & stitches to know
ch – chain
sl st – slip stitch
sc – single crochet
sc blo – single crochet back loop only
dc – double crochet
sc2tog – single crochet 2 together
· written in US terms
· ch 1 does not count as sc
· ch 2 does not count as dc
· This sweater is made with 2 panels sewn together. Each panel starts at the bottom with the ribbed edging. Then the panels are sewn together across each shoulder and each side with a whip stitch.
Gauge: 11 dc x 8 rows = 4” x 4”
Sizes:
2T, 3T, 4T, 5T, 6/6X, 7/8, 9/10, 11/12 – The pattern is written in these sizes consecutively. Example, when the pattern gives the end of the row count as (43, 46, 49, 52, 55, 58, 61, 64) 43 is for 2T, 46 is 3T, 49 is 4T, 52 is 5T, 55 is 6/6X, 58 is 7/8, 61 is 9/10, and 64 is 11/12.
This sweater is oversized with generous positive ease.
Approx Finished Size (sizes can be easily adjusted within pattern):
Chest: 2T (32”) 3T (33”) 4T (34)” 5T (35”) 6/6X (36”) 7/8 (37”) 9/10 (38”), 11/12 (39”)
Length: 2T (13”) 3T (14”) 4T (15”) 5T (16”) 6/6X (17”) 7/8 (18”) 9/10 (19”) 11/12 (20”)
Armhole: 2T (4.5”) 3T (4.75”) 4T (5”) 5T (5.25”) 6/6X (5.5”) 7/8 (6”) 9/10 (6.5”) 11/12 (7”)
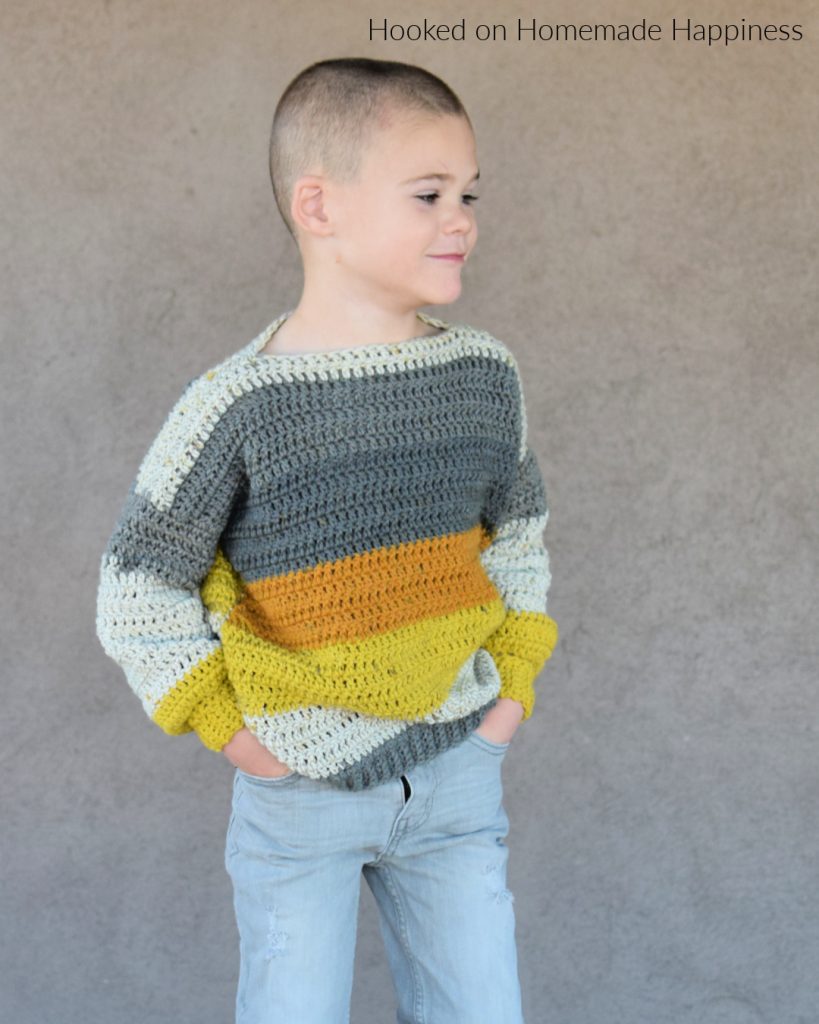
Size 6/6X pictured on 5.5 yr old.
EVERYKID SWEATER CROCHET PATTERN
FRONT & BACK PANELS (make 2)
Ch 6 (leave a long end for sewing)
Row 1: sc in 2nd ch from the hook and in each ch across (5 sc)
Row 2: ch 1, turn, sc in first stitch, sc blo in next 3, sc in last (5)
Repeat Row 2 to Row 43, 46, 49, 52, 55, 58, 61, 64 – or until desired width
The ribbing is the width of the sweater, easily adjust the width by adding or taking out rows.
Now you will turn and work across the long edge of the ribbed band
Row 1: ch 1, sc evenly across working 1 sc in the end of each row (43, 46, 49, 52, 55, 58, 61, 64 sc)
Row 2: ch 2 turn, dc in same stitch and in each stitch across (43, 46, 49, 52, 55, 58, 61, 64 dc)
Repeat Row 2 to Row 22, 24, 26, 28, 30, 32, 34, 36 (43, 46, 49, 52, 55, 58, 61, 64 dc) – or until desired length
Fasten off. Leave a long end for sewing.
SEWING
Lay both panels on top of each other with the long ends on opposite corners.
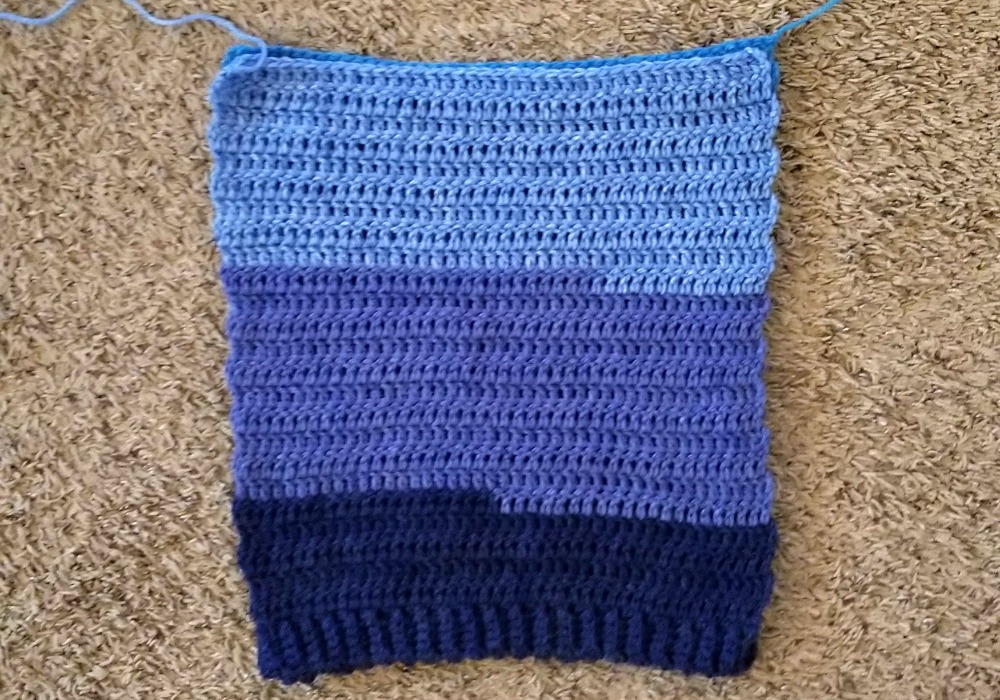
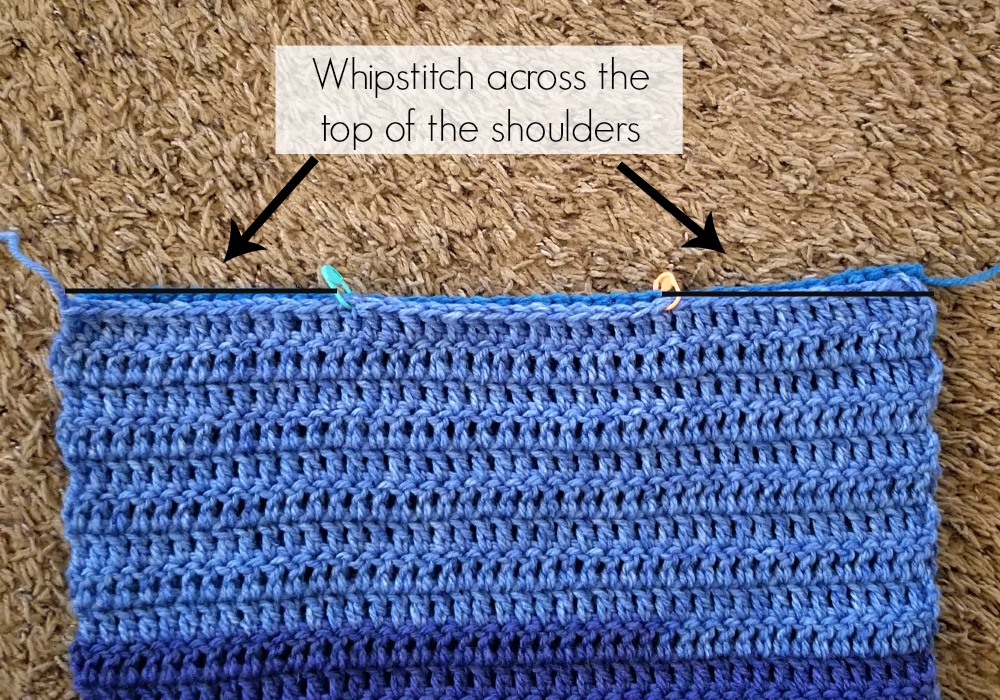
Using one long end and your yarn needle, whip stitch the shoulders closed leaving an opening for the neckline.
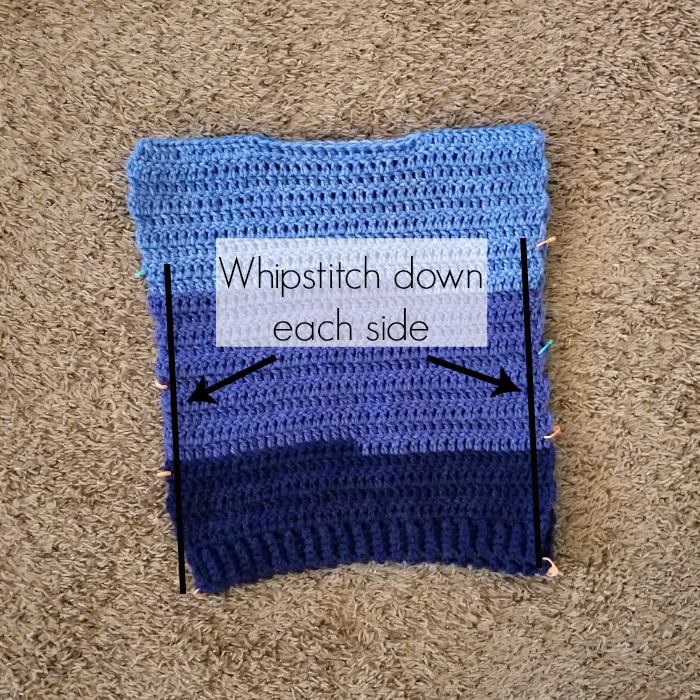
Whip stitch along the sides, leaving a (4.5, 4.75, 5, 5.25, 5.5, 6, 6.5, 7 in) space at the top armholes.
SLEEVES
Join yarn to the bottom of an armhole
Round 1: ch 1, sc evenly around, working 2 sc in the end of each row, join to first sc with sl st
Round 2: ch 2, turn, dc in each stitch around, join to first dc with sl st
Repeat Round 2 to Round 14, 15, 16, 17, 18, 19, 20, 21 – or until desired length
Round 15, 16, 17, 18, 19, 20, 21, 22: ch 1, turn, sc2tog around, join to first sc2tog with sl st
Round 16, 17, 18, 19, 20, 21, 22, 23: ch 1, turn, sc in each stitch around, join to first sc with sl st
CUFF RIBBING (optional)
(photos are from a different sweater)
ch 6
Row 1: sc in 2nd ch from the hook and in each ch across, sl st to the last round of the sleeve (5 sc)
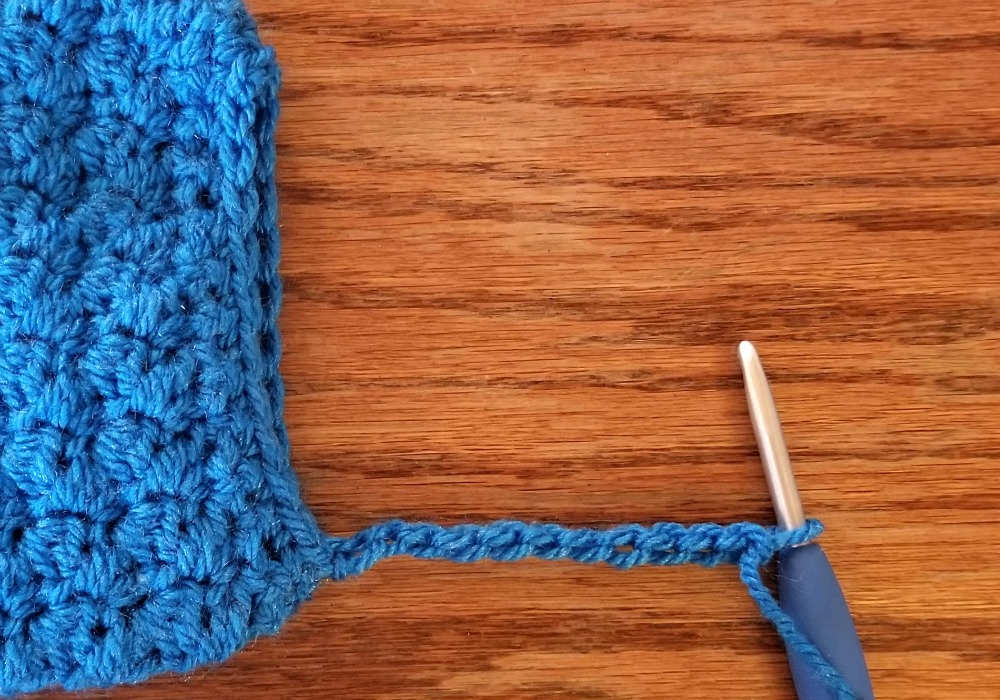
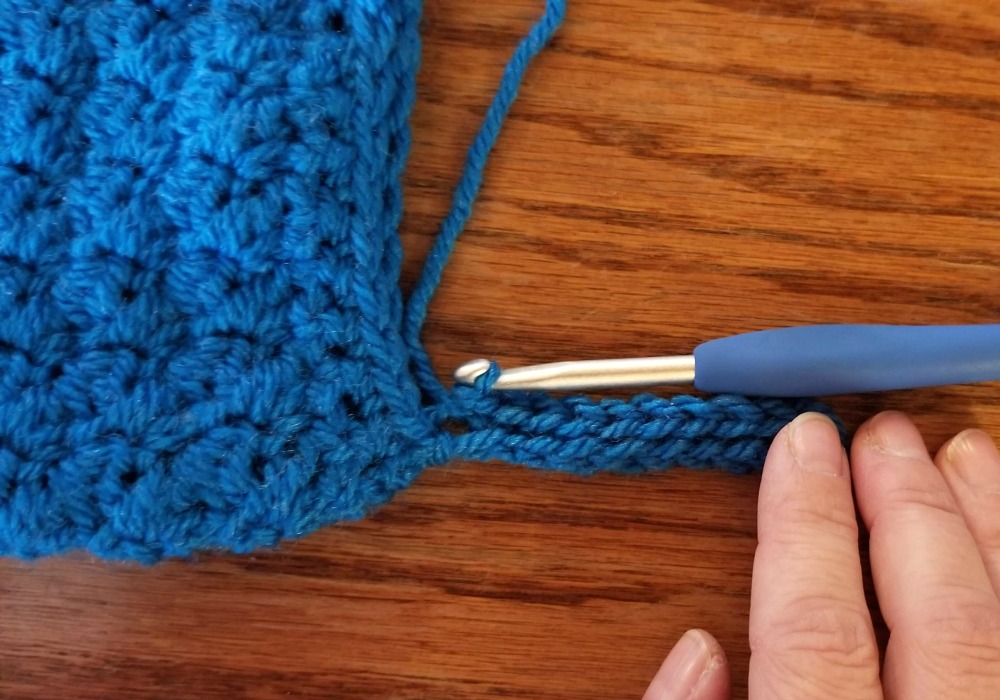
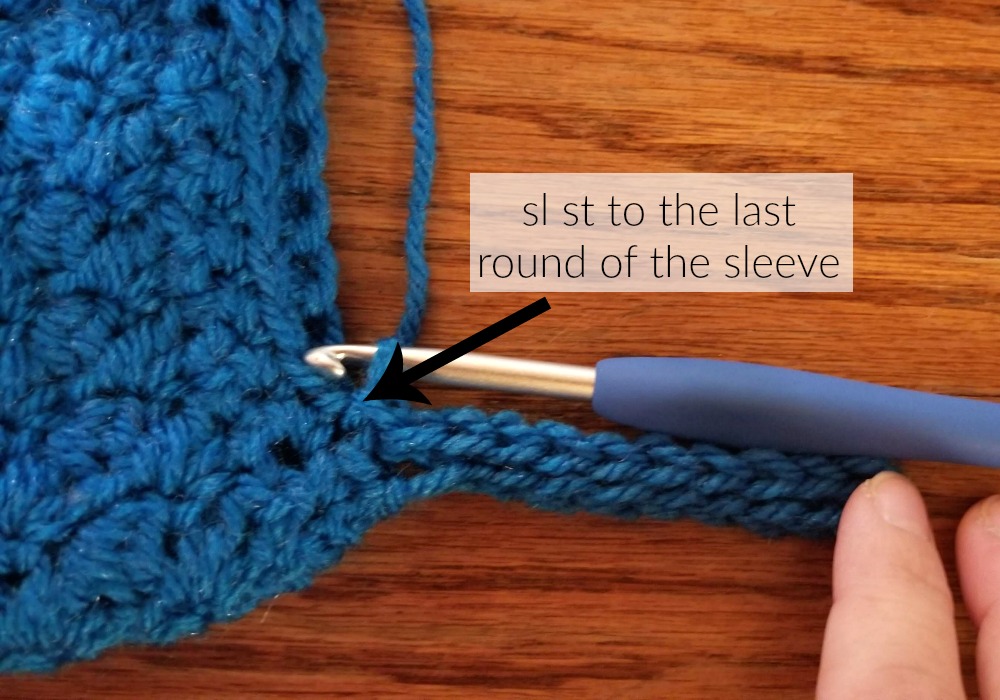
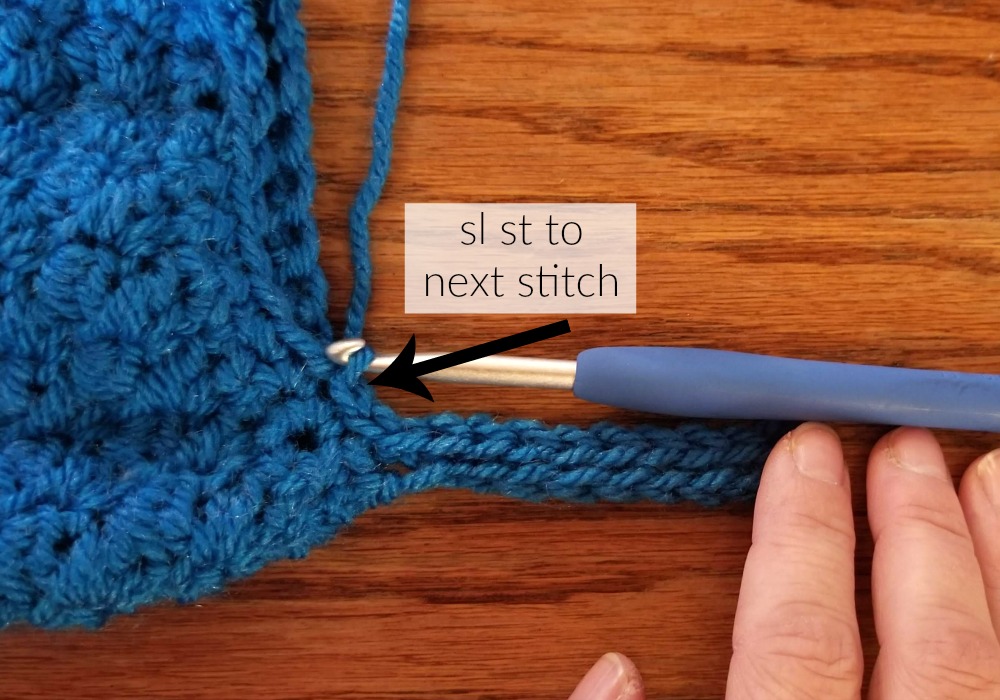
Row 2: sl st to the next stitch in the last round of the sleeve, turn, sc in first stitch, sc blo in next 3, sc in last stitch (5)
Row 3: ch 1, turn, sc in first stitch, sc blo in next 3, sc in last, sl st to next stitch in the last round of the sleeve (5)
Repeat row 2 & 3 until you work all the way around the sleeve. Sew the cuff closed with a whip stitch
Fasten off, weave in the ends.
Repeat for other sleeve.
And you’re done!! I hope you love this cute sweater!
Looking for more patterns? Follow me on Facebook, Instagram, and Pinterest! Please share a pic of your finished product with me. I’d love to see it!




Nice simple style..must make
I’m a little confused on the sleeves…can you explain? Are you starting these on their own or starting from one of the panels and then working around? Also, when sewing the panels together, how much opening do you leave for the neckline? I’m making the 9/10 size. Thank you!
Hi! You will sew the front and back together leaving an opening for the arms. Then you’ll work around that opening to start the sleeves and then joining to work in the round. For the neckline, I don’t remember exactly how much I left open. I’m thinking about 8 inches? Hope that helps!!
Thank you, that did help for the neckline. I did one sleeve and I must confess, not sure how long to make it and it looks a little short. Any tips? Do you have a video tutorial for this one? Thanks!!
Okay here’s my confusion regarding the sleeves you’re supposed to crochet row two you’re supposed to repeat it until row 15 if you’re doing a 3T which is what I’m doing then then it says row 15 to 23 decrease all the way around then it says row 16 to 23 single crochet so I’m confused are those 16 to 23 depending on the size you’re doing do you only do one row of single crochet how many rows does the 3T have does it have 23 rows in the sleeves or does it end it row 17 that that’s very confusing all those numbers none of them are in parentheses so does that mean none of that pertains to a particular size and if that’s the case you’ve got three different steps for row 15 so I’m confused about that I I’m at row 15 and I can’t go any further cuz I don’t understand it thanks for all your help I love the pattern but can you help me with that so I can finish I don’t know what I’m supposed to do I’m doing a 3T and I’m ready I’ve crocheted 14 rows for both on each sleeve now I should crochet row 15 and then what decrease row 16 all the way around and then row 17 to single crochet all the way around and then what about 18 19 20 21 22 23 does 3T not have six more 23 rows I don’t understand it
Those are the row numbers for each size. So for 3T you will be looking at the 2nd number in the sequence. You will repeat round 2 to round 15.
Round 16: ch 1, turn, sc2tog around, join to first sc2tog with sl st.
Round 17: ch 1, turn, sc in each stitch around, join to first sc with sl st.
Stop here.
Then continue on to the cuff.
Okay so row 15 is a repeat of Row 2 which is double crochets so row 16 how do you do single crochet two together if they’re double crochet in the previous row?
It doesn’t matter what the previous round is to make sc2tog.
You will insert your hook into the next stitch, pull up a loop, insert hook into next stitch, pull up a loop, yarn over, pull through all loops on hook.
Thanks for all your help Brianne I don’t know why I my brain thought you couldn’t do two single crochets together in a double I love this pattern I hope my granddaughter likes it I’m done with everything except for the very end of the sleeves thank you so much Brianna for all your patience and help
You’re welcome! Let me know if you need anything else 🙂
Hello I’m confused on the sleeve ribbing. My sleeves were 40 dc and with the sc2tog it was 20- I hope LOL
So I’m not sure if I’m slip stitching too many times but how many rows should the sleeve ribbing be- 20 or 40? I’m currently heading toward 40 as I’ve been slip stitching at end of same row then slip stitching to next row and then turning to start next.
Hi! It should be 20 rows 🙂 I would guess you are accidentally slip stitching into the previous stitch. It’s easy to do since the slip stitch can be hard to spot 🙂
Hi! What colour of cake did you use for this?
This one is called Honey Glaze 🙂
So excited to make this! If I am only using 1 Caron cake for a 3T how can I make sure that the colors line up on the front and back; at least the neck line and ribbed bottom? Will I need to unravel, cut, and tie to get the color change?
Hi! If you want the colors to line up you will probably have to cut the yarn at the color change. You shouldn’t have to unravel it though. If you start from the center, it’s pretty easy to pull out a bit of the cake without making a mess of it 🙂
What is the Yardage for the caron cakes yarn used!?!?!?!?!? This yarn cakes come in many diffenent sizes. Yikes!!! Please help?
Hi! It’s just the basic Caron Cake. They are 200g/383yd 🙂
I see measurements for finished sweater with chest size, length, arm holes…but do you also have arm length measurements too?
Hi! Sorry, I don’t
Hi Breann, I just finished making this for my granddaughter in Size 10 – 12. Really happy with how it turned out. I’m going to add a little charm to the bottom of the rib to personalise it for her and also to let her know which side is the front. Thanks so much for this pattern
Yay! Thank you!
Do you have a baby version of this? I wanted to make a 6-9 month size? I dont have the baby here to use to measure as a starting point lol 😂
Hi! I don’t. But this might help you 🙂 https://www.craftyarncouncil.com/standards/baby-size-chart
Okay the ribbing confuses me how to count it do you only count the high ridges because if I count the high ridges and between each Ridge I’ve crocheted 46 which is for the three key but then when I go to do the single crochet across each end I end up with six single crochets so I don’t understand that part cuz if I stop at 46 there’s a whole part of it the ribbing left to add the single crochet so it doesn’t make any sense I don’t understand what I’m doing wrong and the same thing happened with the adult one which I have abandoned because I don’t think I have enough to make the adult one with this but I do to make a 3T for my granddaughter but I’m not doing something right regarding anything apparently
So I used voice to text and it didn’t clearly throw in the correct wording. if I count a ridge and a smooth part and a ridge for all the rows I’ve got 46 rows for the ribbing and then when I try and do the single crochet at the end of each ribbing, it’s confusing because I count 56 single crochet? if I stop when I’m counting at 46 I’ve still got a whole bunch of the ribbing that doesn’t have single crochet on each end? so I don’t know what I’m doing wrong? it’s very confusing to me. I wish you had a video to show you the ribbing what actually constitutes the r o w When you’re counting it. and you said something about looking at two to count something but I couldn’t figure that out? Does that mean every two is one row? I don’t understand it without looking? if I had a visual Maybe?
Hi! You are going to crochet along the long side of the ribbing. I have a video for the adult version here: https://youtu.be/hSfsGEiU9fY?si=cFuEtOIzYQrPurHo
Okay here’s my question can I do this to overcome my problem with the ribbing so if the 3T has x amount of stitches I don’t have the pattern in front of me so let’s say for a 3T after you do that ribbing you need 60 single crochets can I chain however many stitches for whatever size single crochet across the chain and start doing the sweater panels and then when I’m done with the panels add the ribbing because I’ve seen your video where you add ribbing after you’ve made something and that makes sense to my brain
Sure, you can do that 🙂