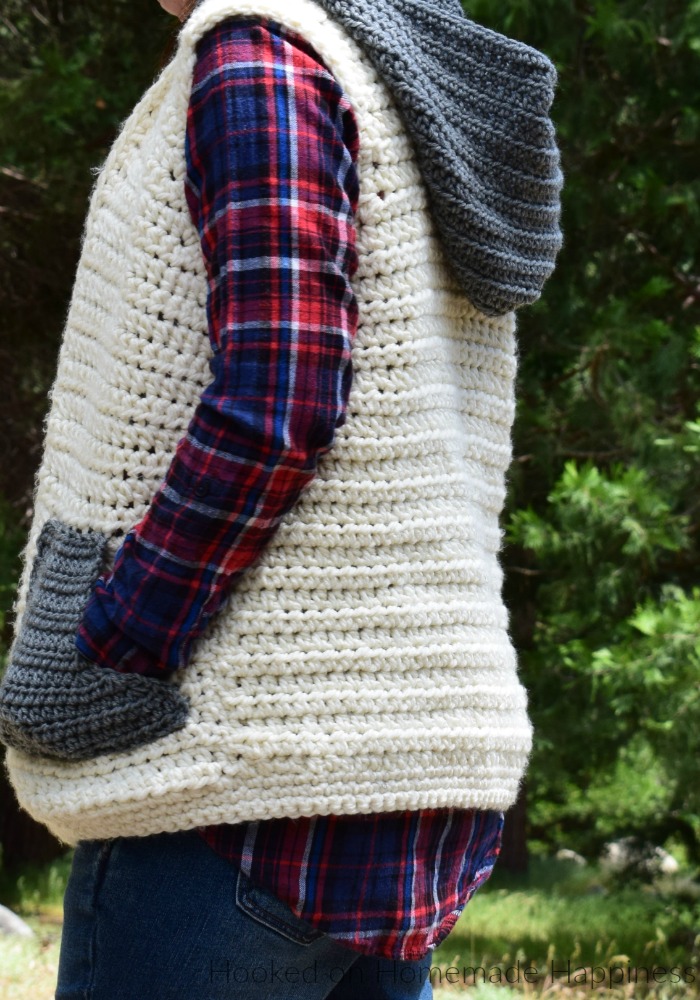
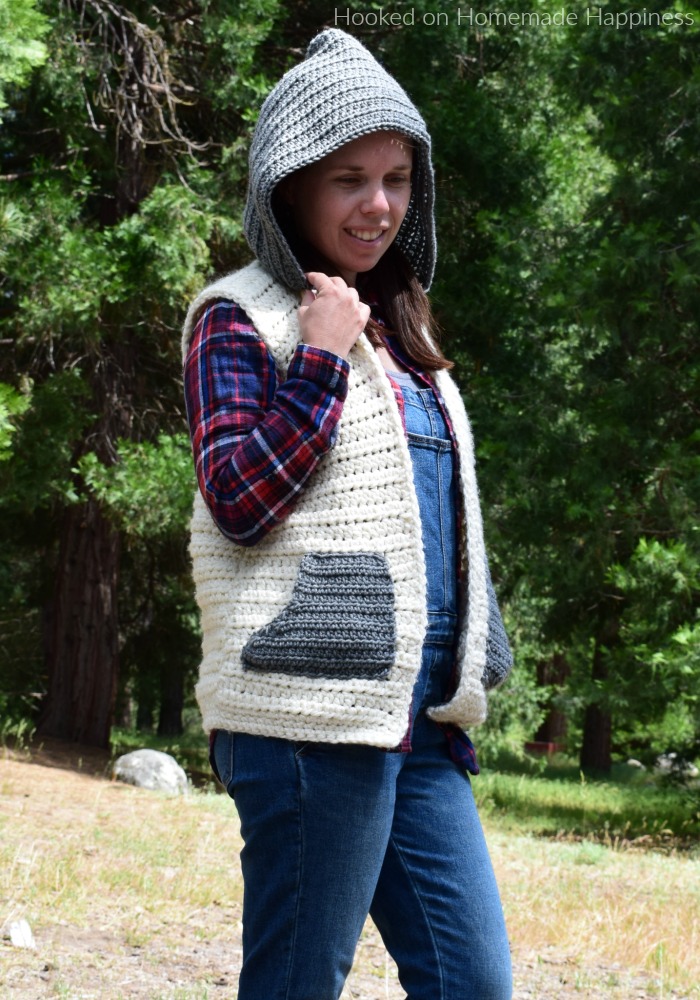
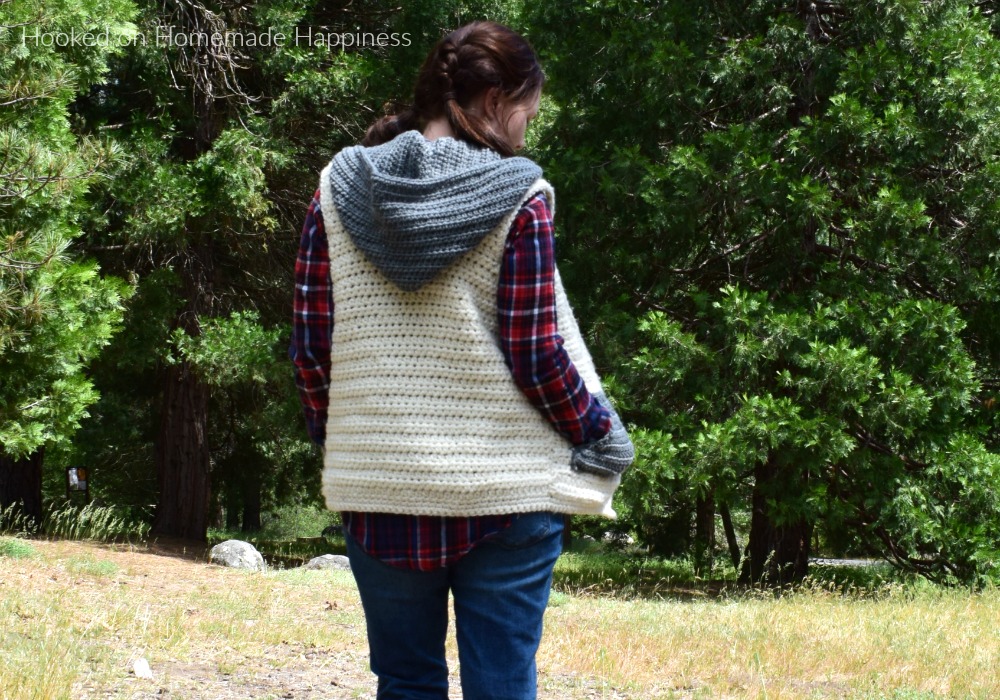
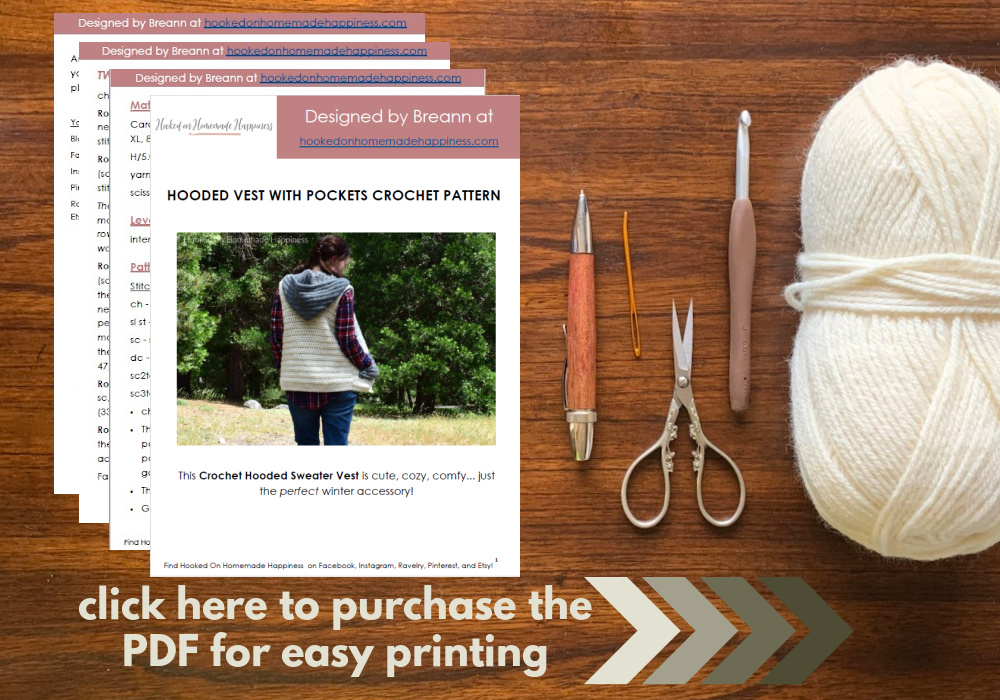
This Crochet Hooded Sweater Vest is cute, cozy, comfy… just the perfect winter accessory!
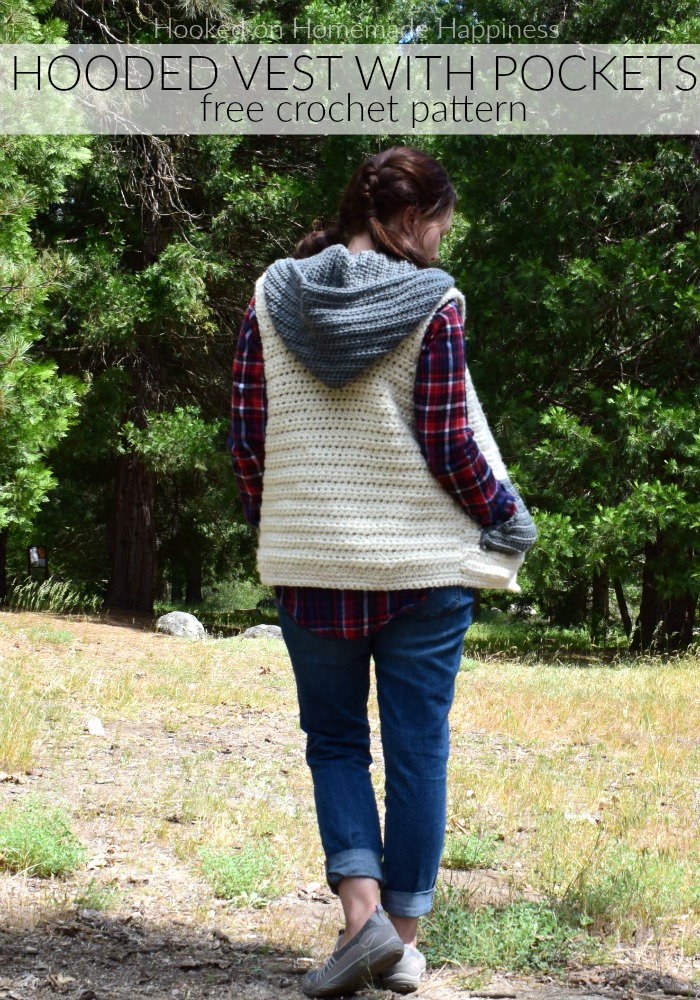
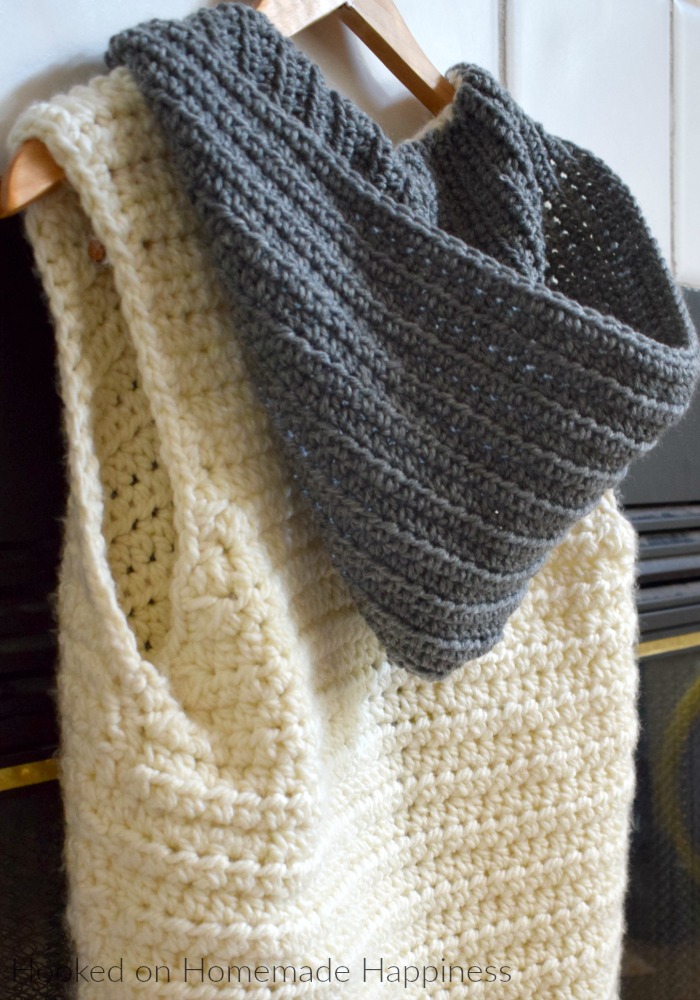
It’s quite possibly my favorite piece I’ve ever made! It’s been living in my head for a few months and I’m so excited to see it come to fruition. I used my favorite bulky yarn, Loops & Threads Charisma. It’s super soft and squishy. Plus it’s so reasonably priced! Win-win!
click here to pin for later >>>
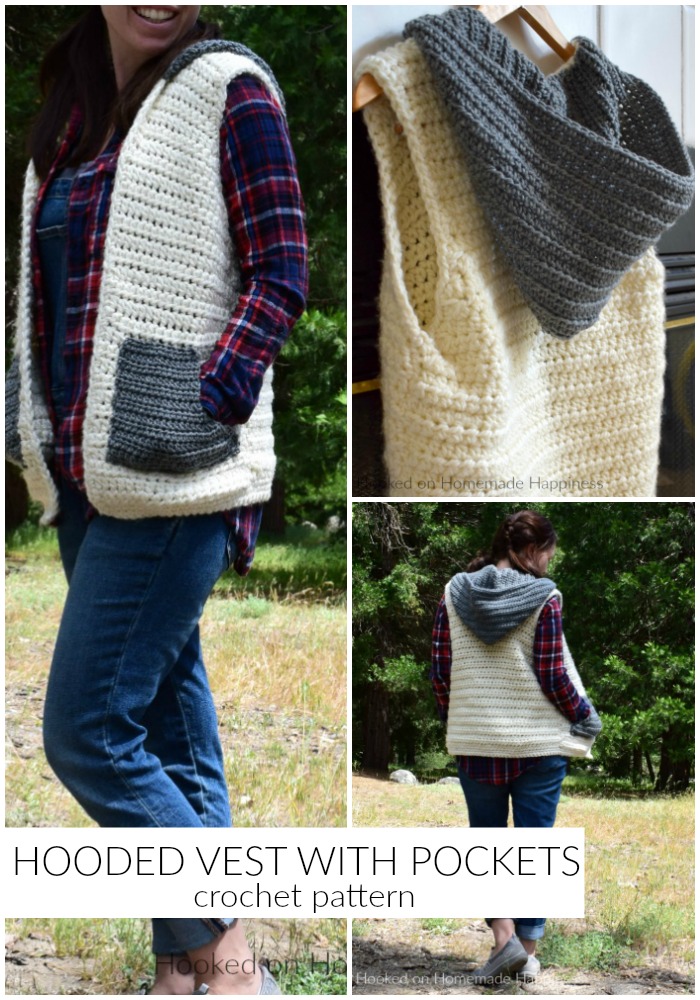
Crochet Hooded Sweater Vest
Get the free pattern below or purchase the ad-free, printable PDF in my Ravelry Shop
PIN for later HERE
Add to your Ravelry Queue HERE
Materials
Bulky weight (5) acrylic yarn (I used Loops & Threads Charisma in Off White) – (500g for S, 600g for M, 700g for L, 800g for XL, 900g for 2X, 1000g for 3X)
200g worsted weight yarn (I used Craft Smart Value n Gray)
L/8.0 mm hook
H/5.0 mm hook
yarn needle
scissors
stitch markers
Level
intermediate
Pattern notes & stitches to know
sl st – slip stich
ch – chain
sc – single crochet
hdc – half double crochet
hdc2tog – hdc 2 together (yarn over, insert hook into stitch, pull up a loop, yarn over, insert hook into next stitch, pull up a loop, yarn over, pull through all loops on hook)
hdc3tog -hdc 3 together (*yarn over, insert hook into stitch, pull up a loop* repeat 2 more times, yarn over, pull through all loops on hook)
· written in US terms
· ch 2 does not count as hdc
· ch 1 does not count as sc
· Gauge: 8 hdc x 7 rows = 4” x 4”
Sizes:
(S, M, L) (XL, 2X, 3X) – The pattern is written in these sizes consecutively. Example, when the pattern gives the end of row count ((40, 44, 48) (52, 56, 60) hdc) the 40 is for S, 44 is M, 48 is L, 52 is XL, 56 is 2X, 60 is 3X.
This sweater is a loose fit with 4” positive ease.
Approx Finished Size:
Bust: S (38”) M (42”) L (46”) XL (50”) 2X (54”) 3X (58”)
Length: S (24”) M (24”) L (25.25”) XL (25.25”) 2X (26.5”) 3X (26.5”)
Armhole Width: S (9”) M (9”) L (10.5”) XL (10.5”) 2X (12”) 3X (12”)
Size Small pictured. I am 5’0” with 34” bust
HOODED SWEATER VEST WITH POCKETS CROCHET PATTERN
Starting with Off White and 8.00 mm hook, ch (42, 46, 50) (54, 58, 62)
Row 1: hdc in 3rd chain from the hook and across ((40, 44, 48) (52, 56, 60) hdc)
Row 2 – Row 19: ch 2, turn, hdc in each stitch across ((40, 44, 48) (52, 56, 60) hdc)
Shaping for the armholes begins in the next row.
Row 20: ch 2, turn, hdc2tog, hdc across to the last 2 stitches, hdc2tog ((38, 42, 46) (50, 54, 58) hdc)
Row 21: ch 2, turn, hdc2tog, hdc across to the last 2 stitches, hdc2tog ((36, 40, 44) (48, 52, 56) hdc)
Row 22: ch 2, turn, hdc2tog, hdc across to the last 2 stitches, hdc2tog ((34, 38, 42) (46, 50, 54) hdc)
Row 23: ch 2, turn, hdc2tog, hdc across to the last 2 stitches, hdc2tog ((32, 36, 40) (44, 48, 52) hdc)
Row 24: ch 2, turn, hdc2tog, hdc across to the last 2 stitches, hdc2tog ((30, 34, 38) (42, 46, 50) hdc)
Row 25: ch 2, turn, hdc2tog, hdc across to the last 2 stitches, hdc2tog ((28, 32, 36) (40, 44, 48) hdc)
Row 26: ch 2, turn, hdc2tog, hdc across to the last 2 stitches, hdc2tog ((26, 30, 34) (38, 42, 46) hdc)
Row 27 – Row (34, 34, 36) (36, 38, 38): ch 2, turn, hdc in each stitch across ((26, 30, 34) (38, 42, 46) hdc)
The front panel begins in the next row. One side of the front is made first, then rejoin to make the other side. You will only work partway across the row.
Row (35, 35, 37) (37, 39, 39): ch 2, turn, hdc in (11, 13, 15) (17, 19, 21) stitches, hdc2tog ((12, 14, 16) (18, 20, 22) hdc)
Row (36, 36, 38) (38, 40, 40) – Row (42, 42, 46) (46, 50, 50): ch 2, turn, hdc in each stitch across ((12, 14, 16) (18, 20, 22) hdc)
Row (43, 43, 47) (47, 51, 51): ch 2, turn, 2 hdc in first stitch, hdc in remaining stitches across ((13, 15, 17) (19, 21, 23) hdc)
Row (44, 44, 48) (48, 52, 52): ch 2, turn, hdc in each stitch across to last stitch, 2 hdc in last ((14, 16, 18) (20, 22, 24) hdc)
Row (45, 45, 49) (49, 53, 53): ch 2, turn, 2 hdc in first stitch, hdc in remaining stitches across ((15, 17, 19) (21, 23, 25) hdc)
Row (46, 46, 50) (50, 54, 54): ch 2, turn, hdc in each stitch across to last stitch, 2 hdc in last ((16, 18, 20) (22, 24, 26) hdc)
Row (47, 47, 51) (51, 55, 55): ch 2, turn, 2 hdc in first stitch, hdc in remaining stitches across ((17, 19, 21) (23, 25, 27) hdc)
Row (48, 48, 52) (52, 56, 56): ch 2, turn, hdc in each stitch across to last stitch, 2 hdc in last ((18, 20, 22) (24. 26. 28) hdc)
Row (49, 49, 53) (53, 57, 57): ch 2, turn, 2 hdc in first stitch, hdc in remaining stitches across ((19, 21, 23) (25, 27, 29) hdc)
Row (50, 50, 54) (54, 58, 58) – Row (69, 69, 73) (73, 77, 77): ch 2, turn, hdc in each stitch across.
Fasten off. Weave in the ends.
Lay the piece with the side just made on the right. Rejoin yarn in row (35, 35, 37) (37, 39, 39) in the stitch right next to the hdc2tog
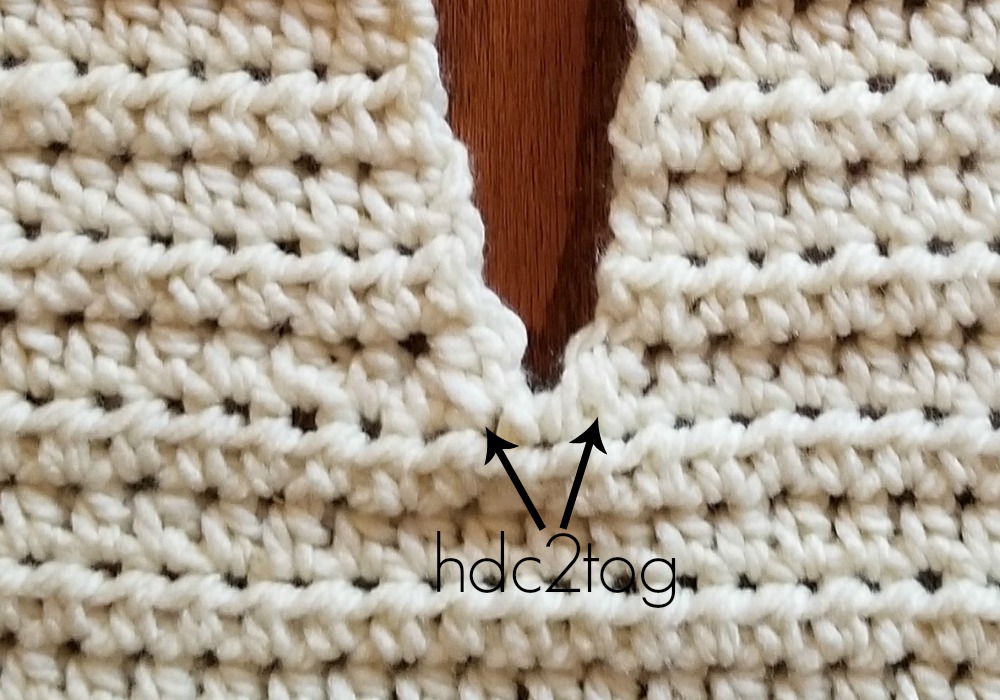
Row (35, 35, 37) (37, 39, 39): ch 2, hdc2tog, hdc in remaining stitches((12, 14, 16) (18, 20, 22) hdc)
Row (36, 36, 38) (38, 40, 40) – Row (42, 42, 46) (46, 50, 50): ch 2, turn, hdc in each stitch across ((12, 14, 16) (18, 20, 22) hdc)
Row (43, 43, 47) (47, 51, 51): ch 2, turn, hdc in each stitch across to last stitch, 2 hdc in last ((13, 15, 17) (19, 21, 23) hdc)
Row (44, 44, 48) (48, 52, 52): ch 2, turn, 2 hdc in first stitch, hdc in remaining stitches across ((14, 16, 18) (20, 22, 24) hdc)
Row (45, 45, 49) (49, 53, 53): ch 2, turn, hdc in each stitch across to last stitch, 2 hdc in last ((15, 17, 19) (21, 23, 25) hdc)
Row (46, 46, 50) (50, 54, 54): ch 2, turn, 2 hdc in first stitch, hdc in remaining stitches across ((16, 18, 20) (22, 24, 26) hdc)
Row (47, 47, 51) (51, 55, 55): ch 2, turn, hdc in each stitch across to last stitch, 2 hdc in last ((17, 19, 21) (23, 25, 27) hdc)
Row (48, 48, 52) (52, 56, 56): ch 2, turn, 2 hdc in first stitch, hdc in remaining stitches across ((18, 20, 22) (24. 26. 28) hdc)
Row (49, 49, 53) (53, 57, 57): ch 2, turn, hdc in each stitch across to last stitch, 2 hdc in last ((19, 21, 23) (25, 27, 29) hdc)
Row (50, 50, 54) (54, 58, 58) – Row (69, 69, 73) (73, 77, 77): ch 2, turn, hdc in each stitch across.
Fasten off. Weave in the ends.
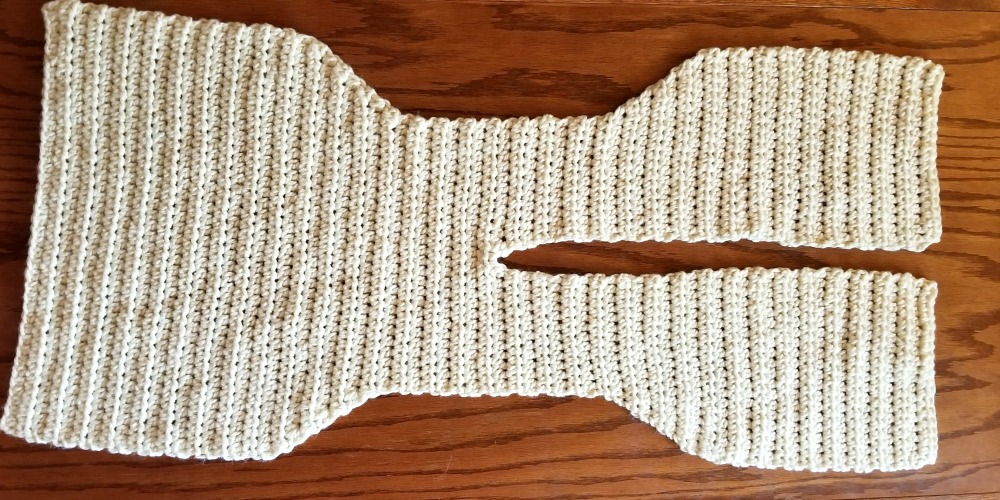
SEWING
Fold down the top half, lining up each row. Using your yarn needle and a piece of yarn twice the length your going to sew, whip-stitch down each side, leaving a space at the top for armholes.
Fasten off, weave in the ends. Turn vest right side out.
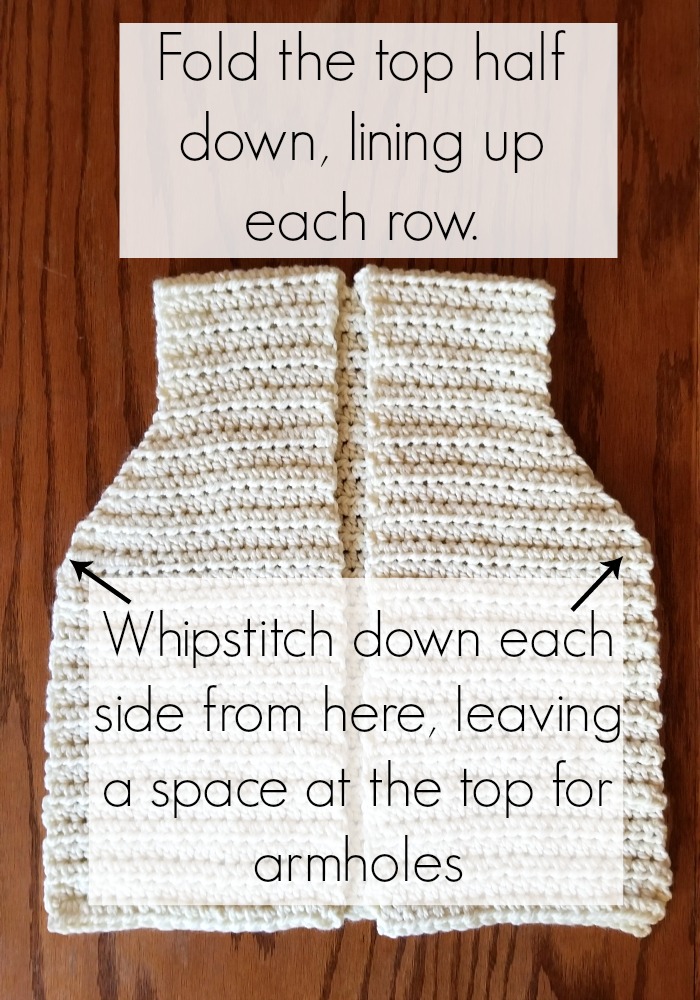
Fasten off, weave in the ends. Turn vest right side out.
EDGING
ARMHOLE
Join yarn in the armhole, ch 1, sc evenly around, join to first sc with sl st. Fasten off, weave in the ends.
Join yarn to the opposite armhole and re-peat pattern above.
ALONG THE BOTTOM
Join yarn to bottom corner
Row 1: ch 1, sc around the bottom to opposite corner
Row 2: ch 1, turn, sc in each stitch around to the opposite corner
Row 3: ch 1, turn, sc in each stitch around to the opposite corner, 3 sc in corner stitch, continue around the collar, 3 sc in last stitch, join to first sc with sl st
Fasten off, weave in the ends
POCKETS (make 2)
With gray and H/5.0 mm hook, ch 24
Row 1: hdc in 3rd ch from the hook and across (22 hdc)
Row 2 – 3: ch 2, turn, hdc in each stitch across (22 hdc)
Row 4: ch 2, turn, hdc3tog, hdc across in remaining stitches (20 hdc)
Row 5: ch 2, turn, hdc in 17 stitches, hdc3tog (18 hdc)
Row 6: ch 2, turn, hdc3tog, hdc across in remaining stitches (16 hdc)
Row 7: ch 2, turn, hdc in 14 stitches, dc2tog, (15 hdc)
Row 8: ch 2, turn, hdc2tog, hdc in remaining stitches (14 hdc)
Row 9 – 13: ch 2, turn, hdc in each stitch across)
Fasten off, leave a long end for sewin
Join yarn to the opposite armhole and repeat pattern above.
HOOD
In gray and H/5.0 mm hook ch 52
Leave a long end for sewing.
Row 1: hdc in 3rd ch from hook, 2 hdc in next, *hdc, 2 hdc in next* re-peat from * to * across (75 hdc)
Row 2 – 22: ch 1, hdc in each stitch across (75 hdc)
Fasten off, weave in the last end.
Fold rectangle in half, use the beginning end to sew up the back of the hood.
Turn vest and hood inside out. Attach hood to the top of the vest, use your stitch markers to secure it evenly around. Use a piece of yarn twice as long as the area sewing, whipstitch the hood to the vest.
Fasten off, weave in the ends. Turn vest and hood right side out.
SEWING
Place the pockets on the front panels. Use stitch markers to secure them to the front. Using the long end, whipstitch the pockets to the front.
Line the hood along the top of the vest. Line up the center back of the hood to the top center of the back of the vest and then the end of the hood lined up 3 inches from the top of the shoulder. Bunch it up slightly. Use stitch markers to keep it in place. Use the long end to sew the hood to the poncho with a whip stitch.
Looking for more patterns? Follow me on Facebook, Instagram, and Pinterest! Please share a pic of your finished product with me. I’d love to see it!




Very Nice! Hope to start on this soon.
Awesome!
Hello, this pattern looks really beautiful. I was just wondering if the chain two at the beginning of each row counts as a half double crochet.
No the ch 2 does not count as a stitch
If i want to add long sleeves to it, can i just do it the regular way? Is there any tricks i should be aware of?
Hi! I think you can join your yarn to the bottom of an armhole and then make the sleeves in rounds. If you use half double crochet, make sure to turn after each round. (half double crochet seam will go sideways otherwise 🙂 )
Do you have 2x size in this vest pattern?I would greatly appreciate it.
Not right now, sorry!! But I do plan to add sizes through 3X 🙂
Would you happen to have a xxl pattern for this?
Hi!
I am starting your hooded sweater vest and trying to get the gauge correct before making. (This is my first wearable). I moved up to a 9 (m/n) hook and my rows are still off by almost an inch.
Any suggestions on how to get the gauge before making. Thank you! Love your patterns!
Thank you! Brenda
Hi! I would go up one more hook size 🙂
Thank you for replying!
Hi! Another question if possible… I am up to a size 10 hook and was close to the gauge listed. I know what the length is, but can you tell me what the length is from where you work on the arm holes? This would be for a size small. My first wearable.
Thank you again!
Could I use size g hook and ch and 20 stitches longer 2xl shirt?
Hi! I’m not sure how using a G hook would affect the pattern without doing it myself. Sorry!
That’s ok no problem.i am getting ready to try I hook.and I going to try to add sleeves also.
If you ch 52 for large do you think 64 would be for 2x?
Hi! Yes, I think that would be a good start. This will roughly be your width. So try it out, and see if the width will work for you 🙂
Wow! That looks hard!
It’s not as hard as you think! If you try it, let me know & I’ll answer any questions ?
When do you plan on adding more sizes?
When you fold in half to whipstitch, the rows do not line up evenly. Shouldn’t there be 43 rows on each half? There’s only 34 on the front? How do you line it up to sew together without adding more rows to front panel? Thank you
Hi! What size are you making?
Beautiful.
I would like to make an xl-1x. How many do I chain? And any other suggestions you can make.
You can chain any even number. I would chain the width you want. Then, when you go to do the front, remember to only crochet to the middle of the row. Hope this helps!
Thank you.
Love the sweater vest. I am having problems as to how to connect the hoodie and the sweater. Please help
Hello 🙂
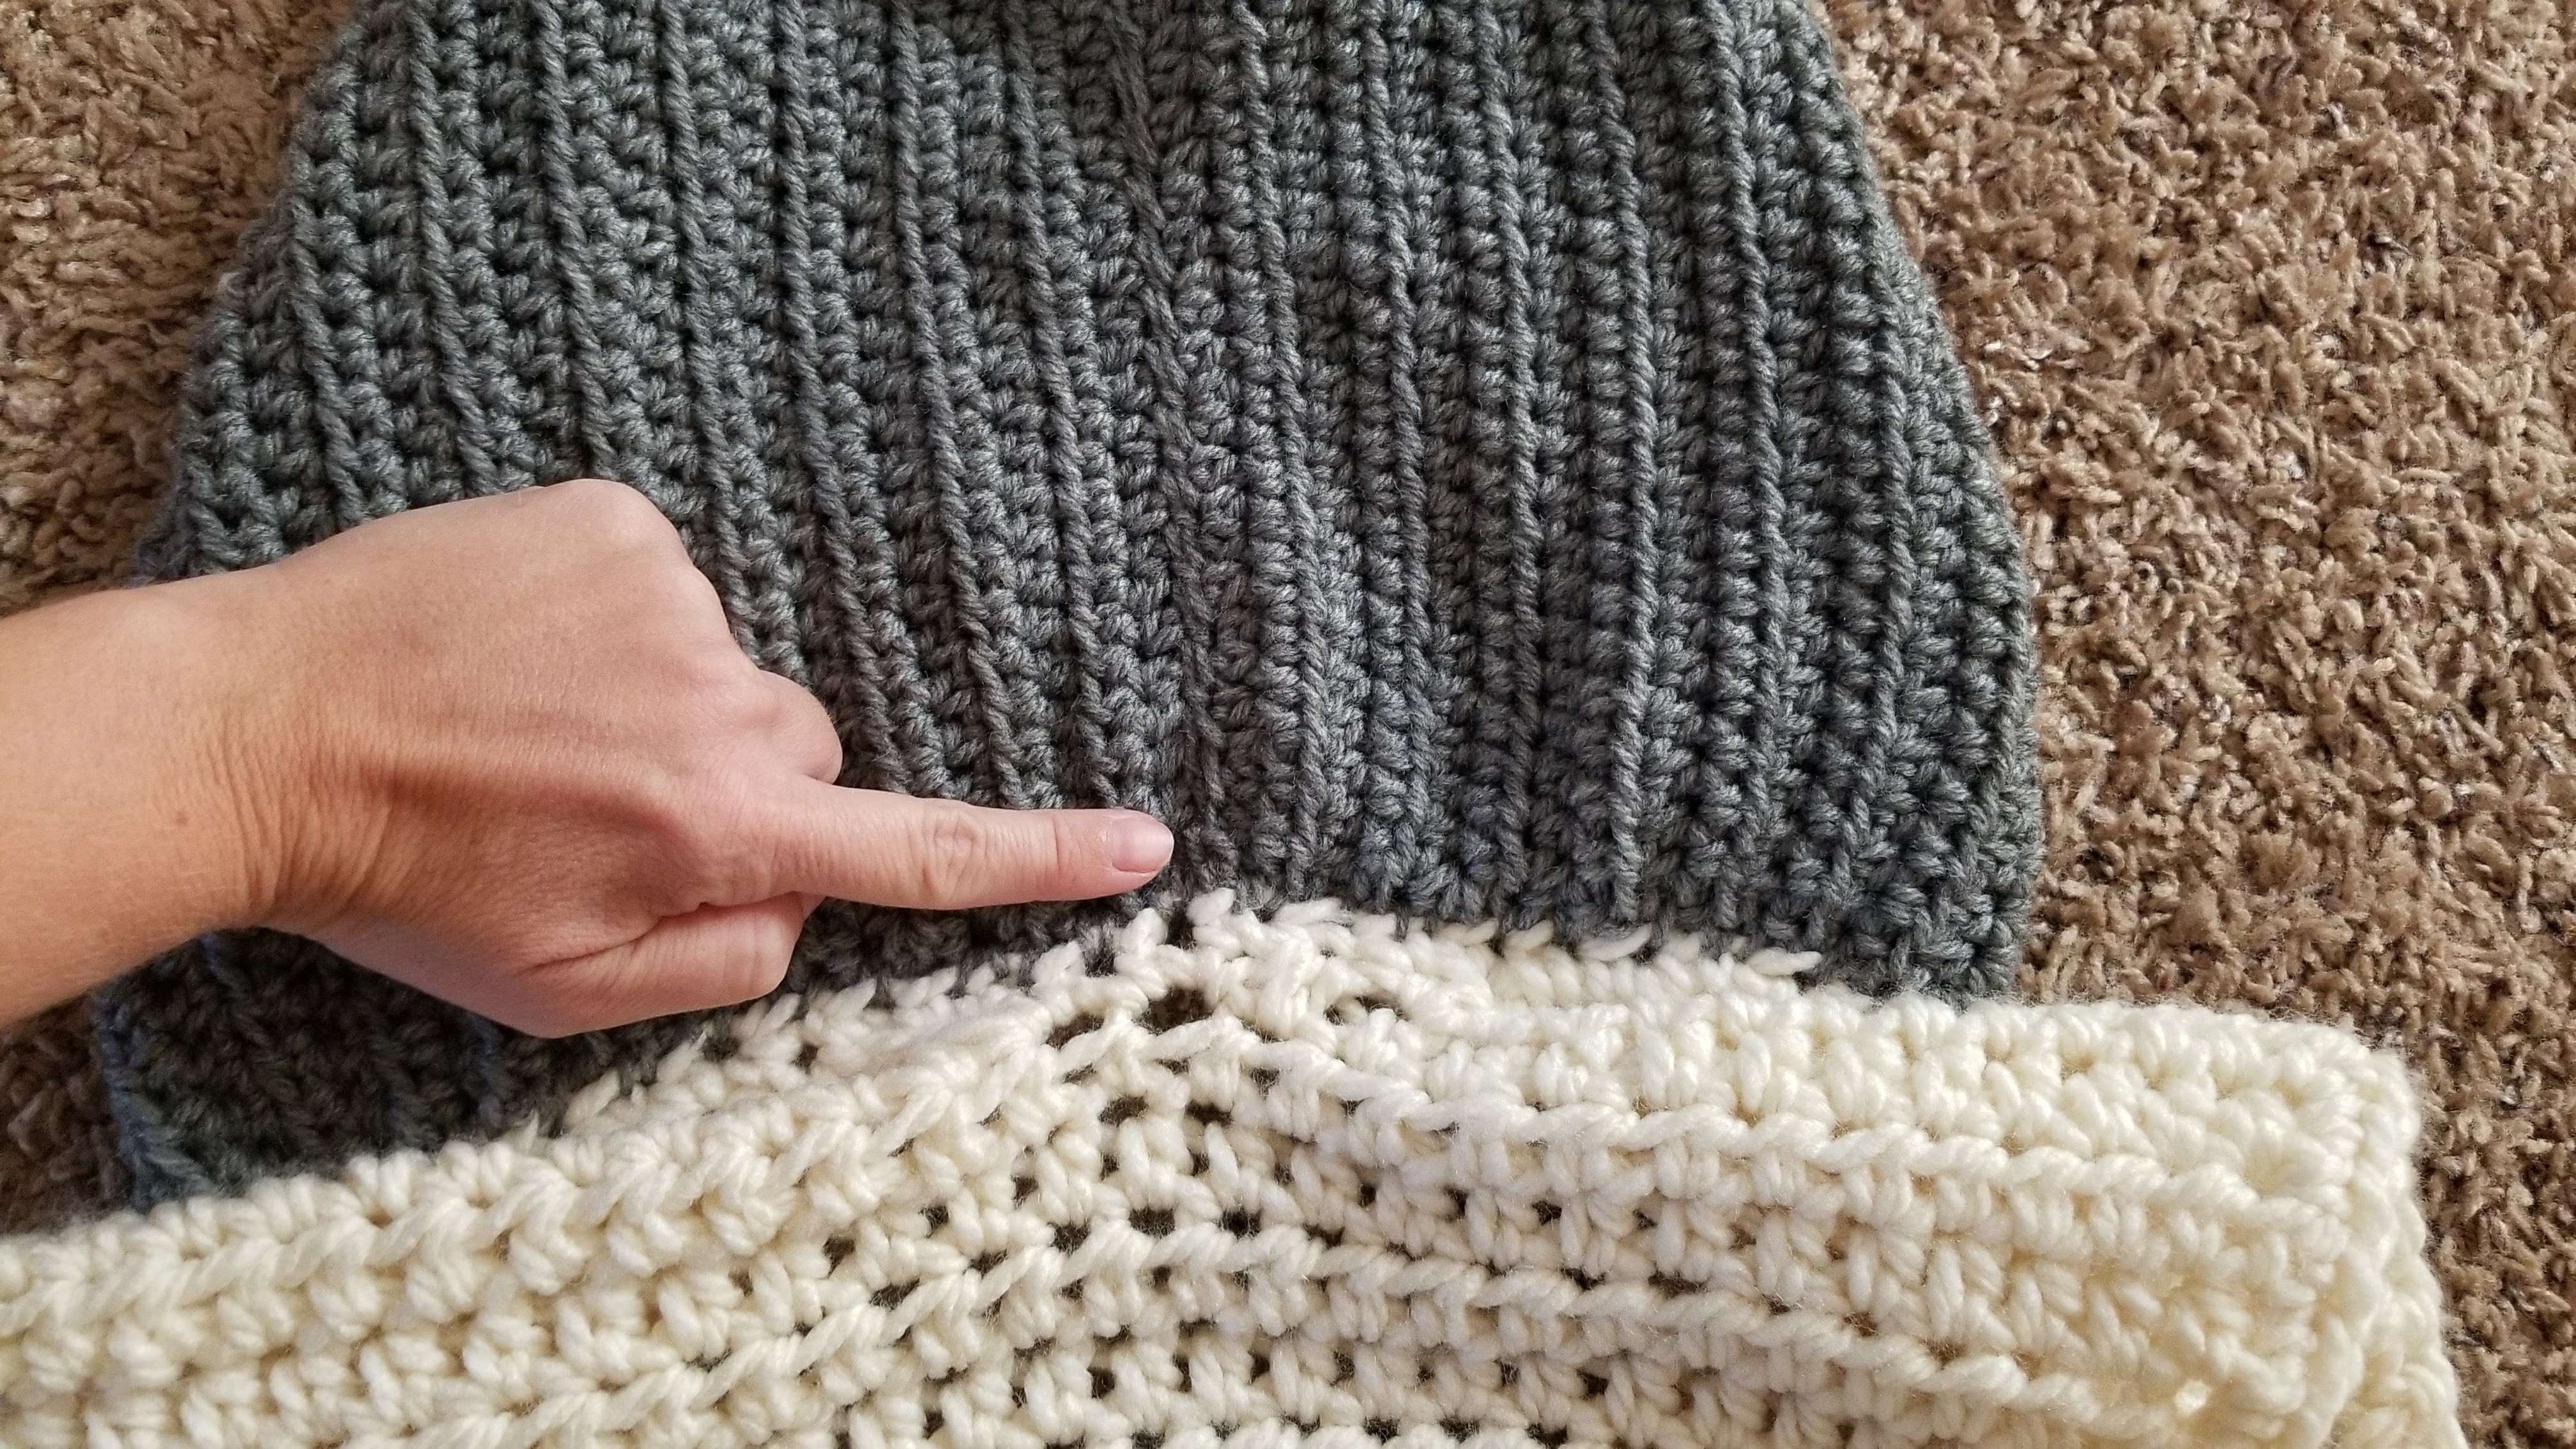
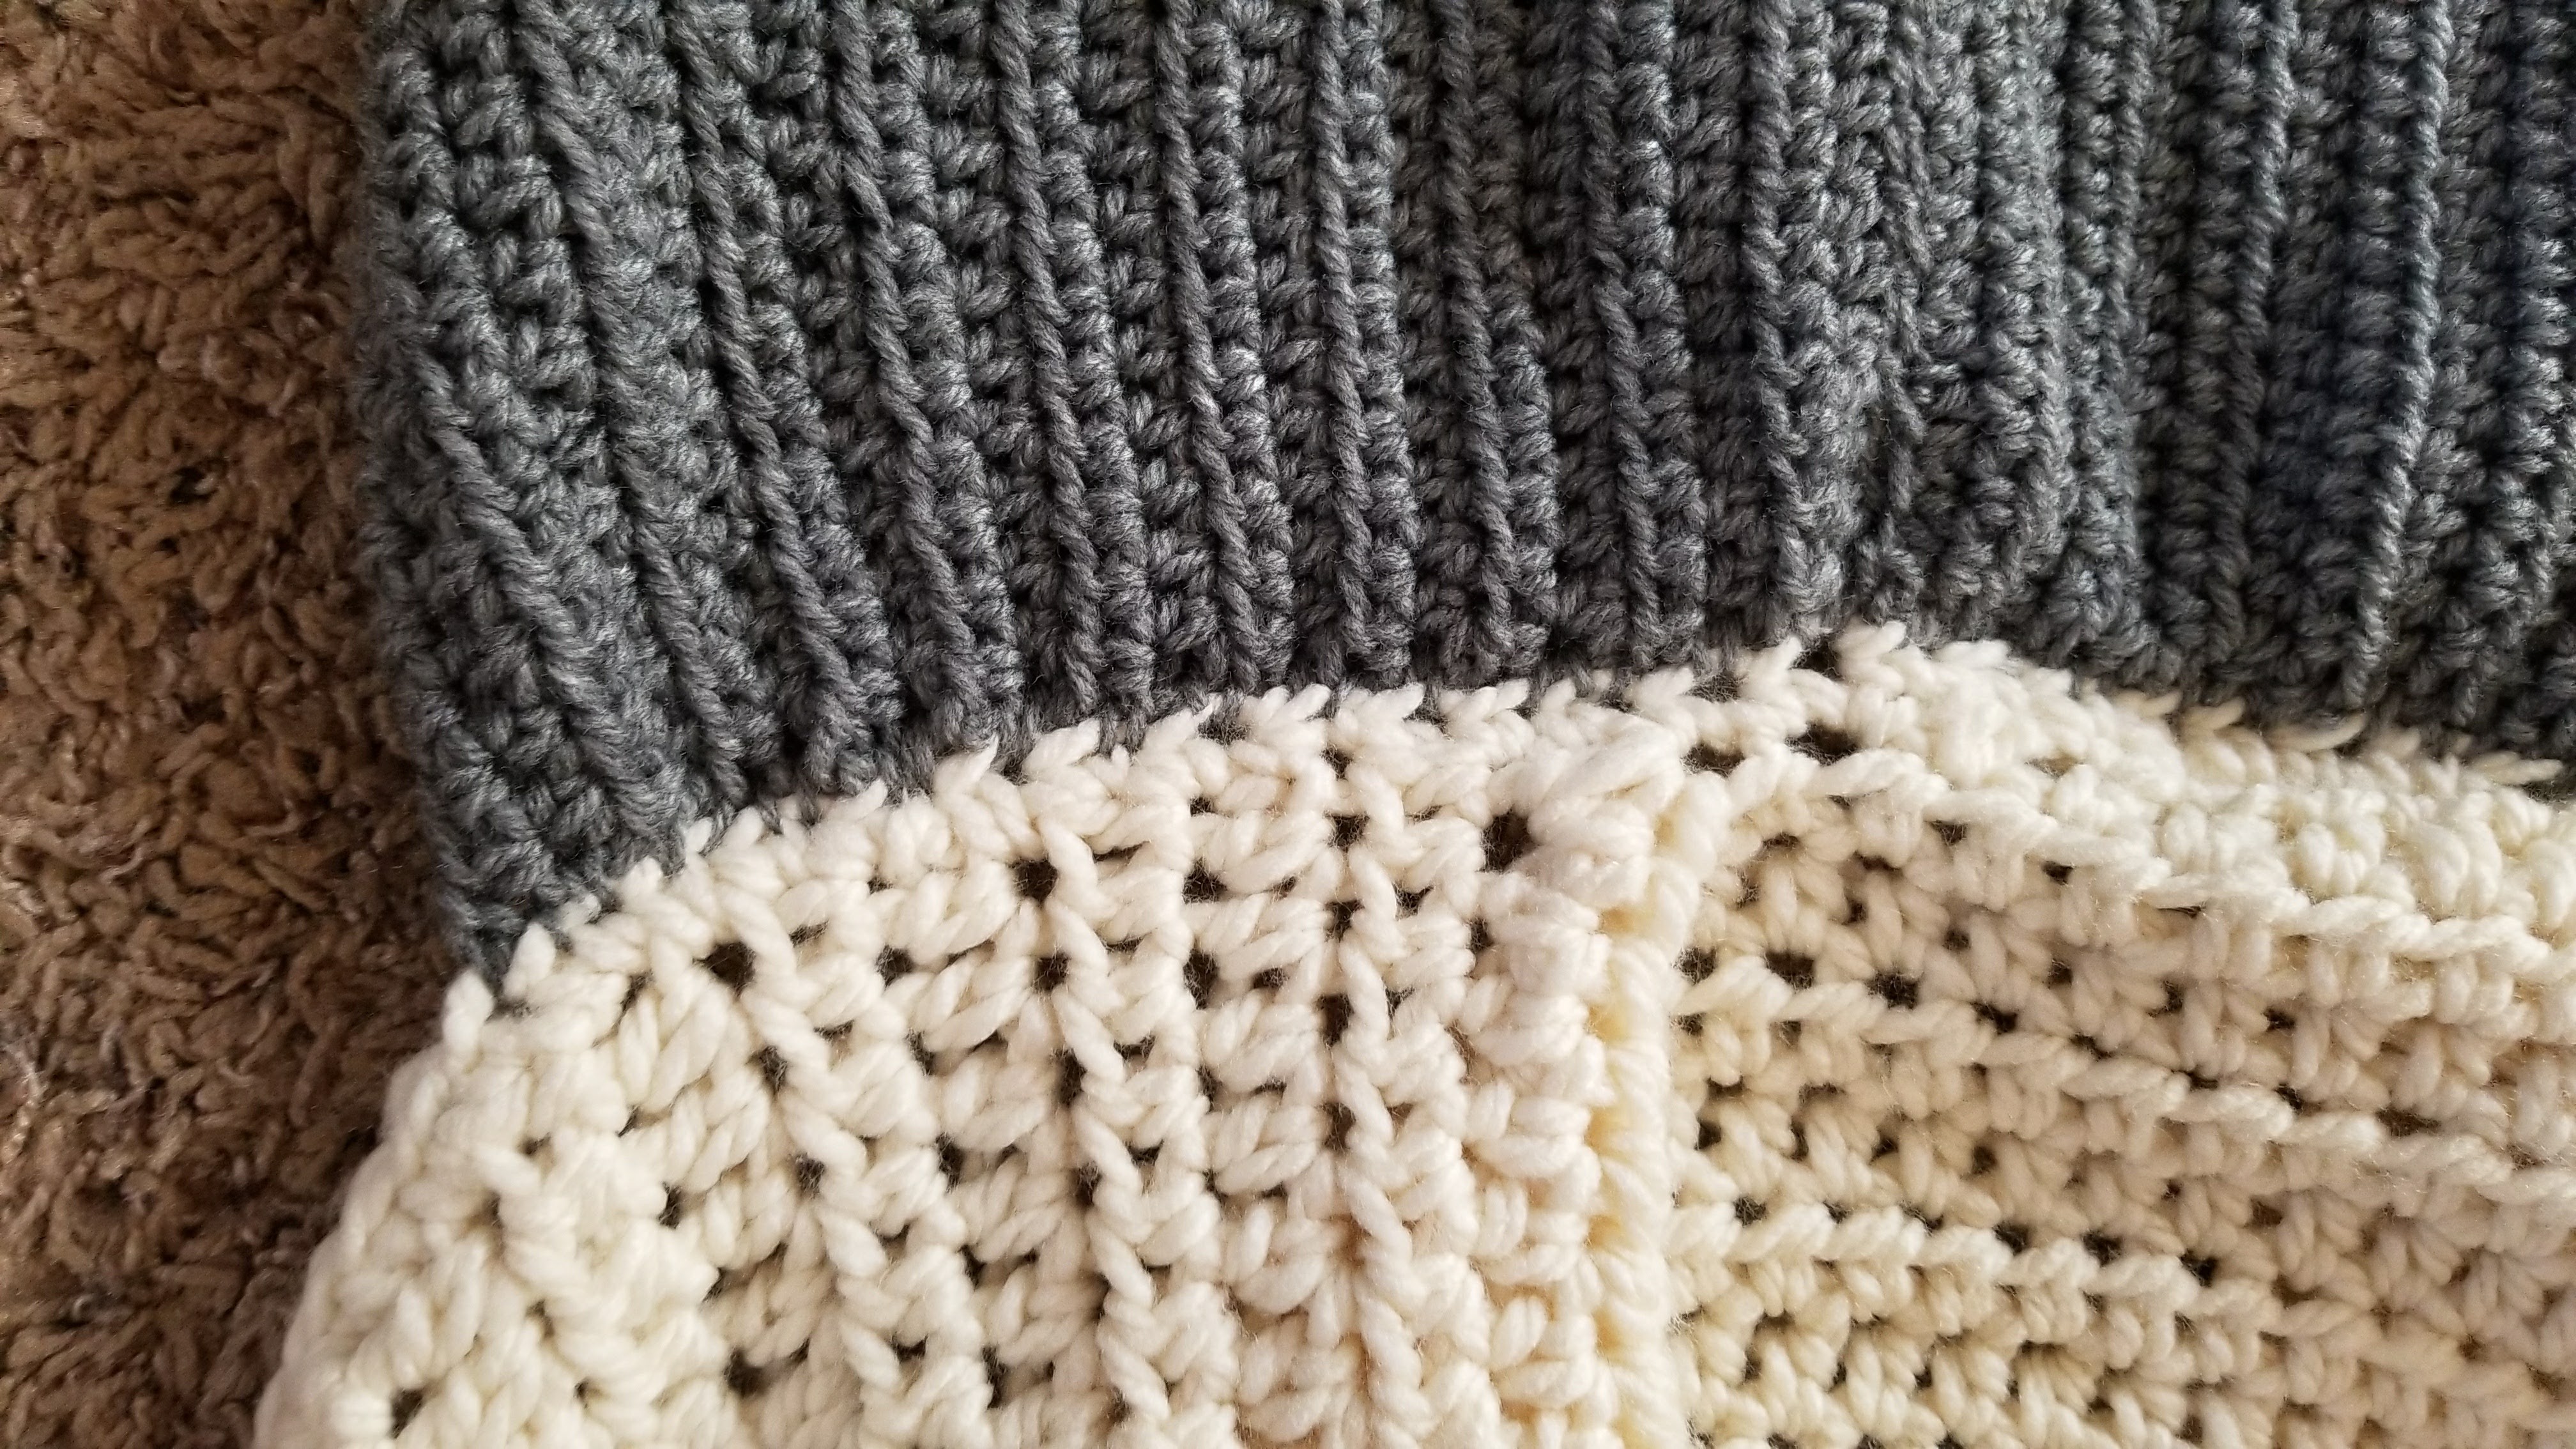
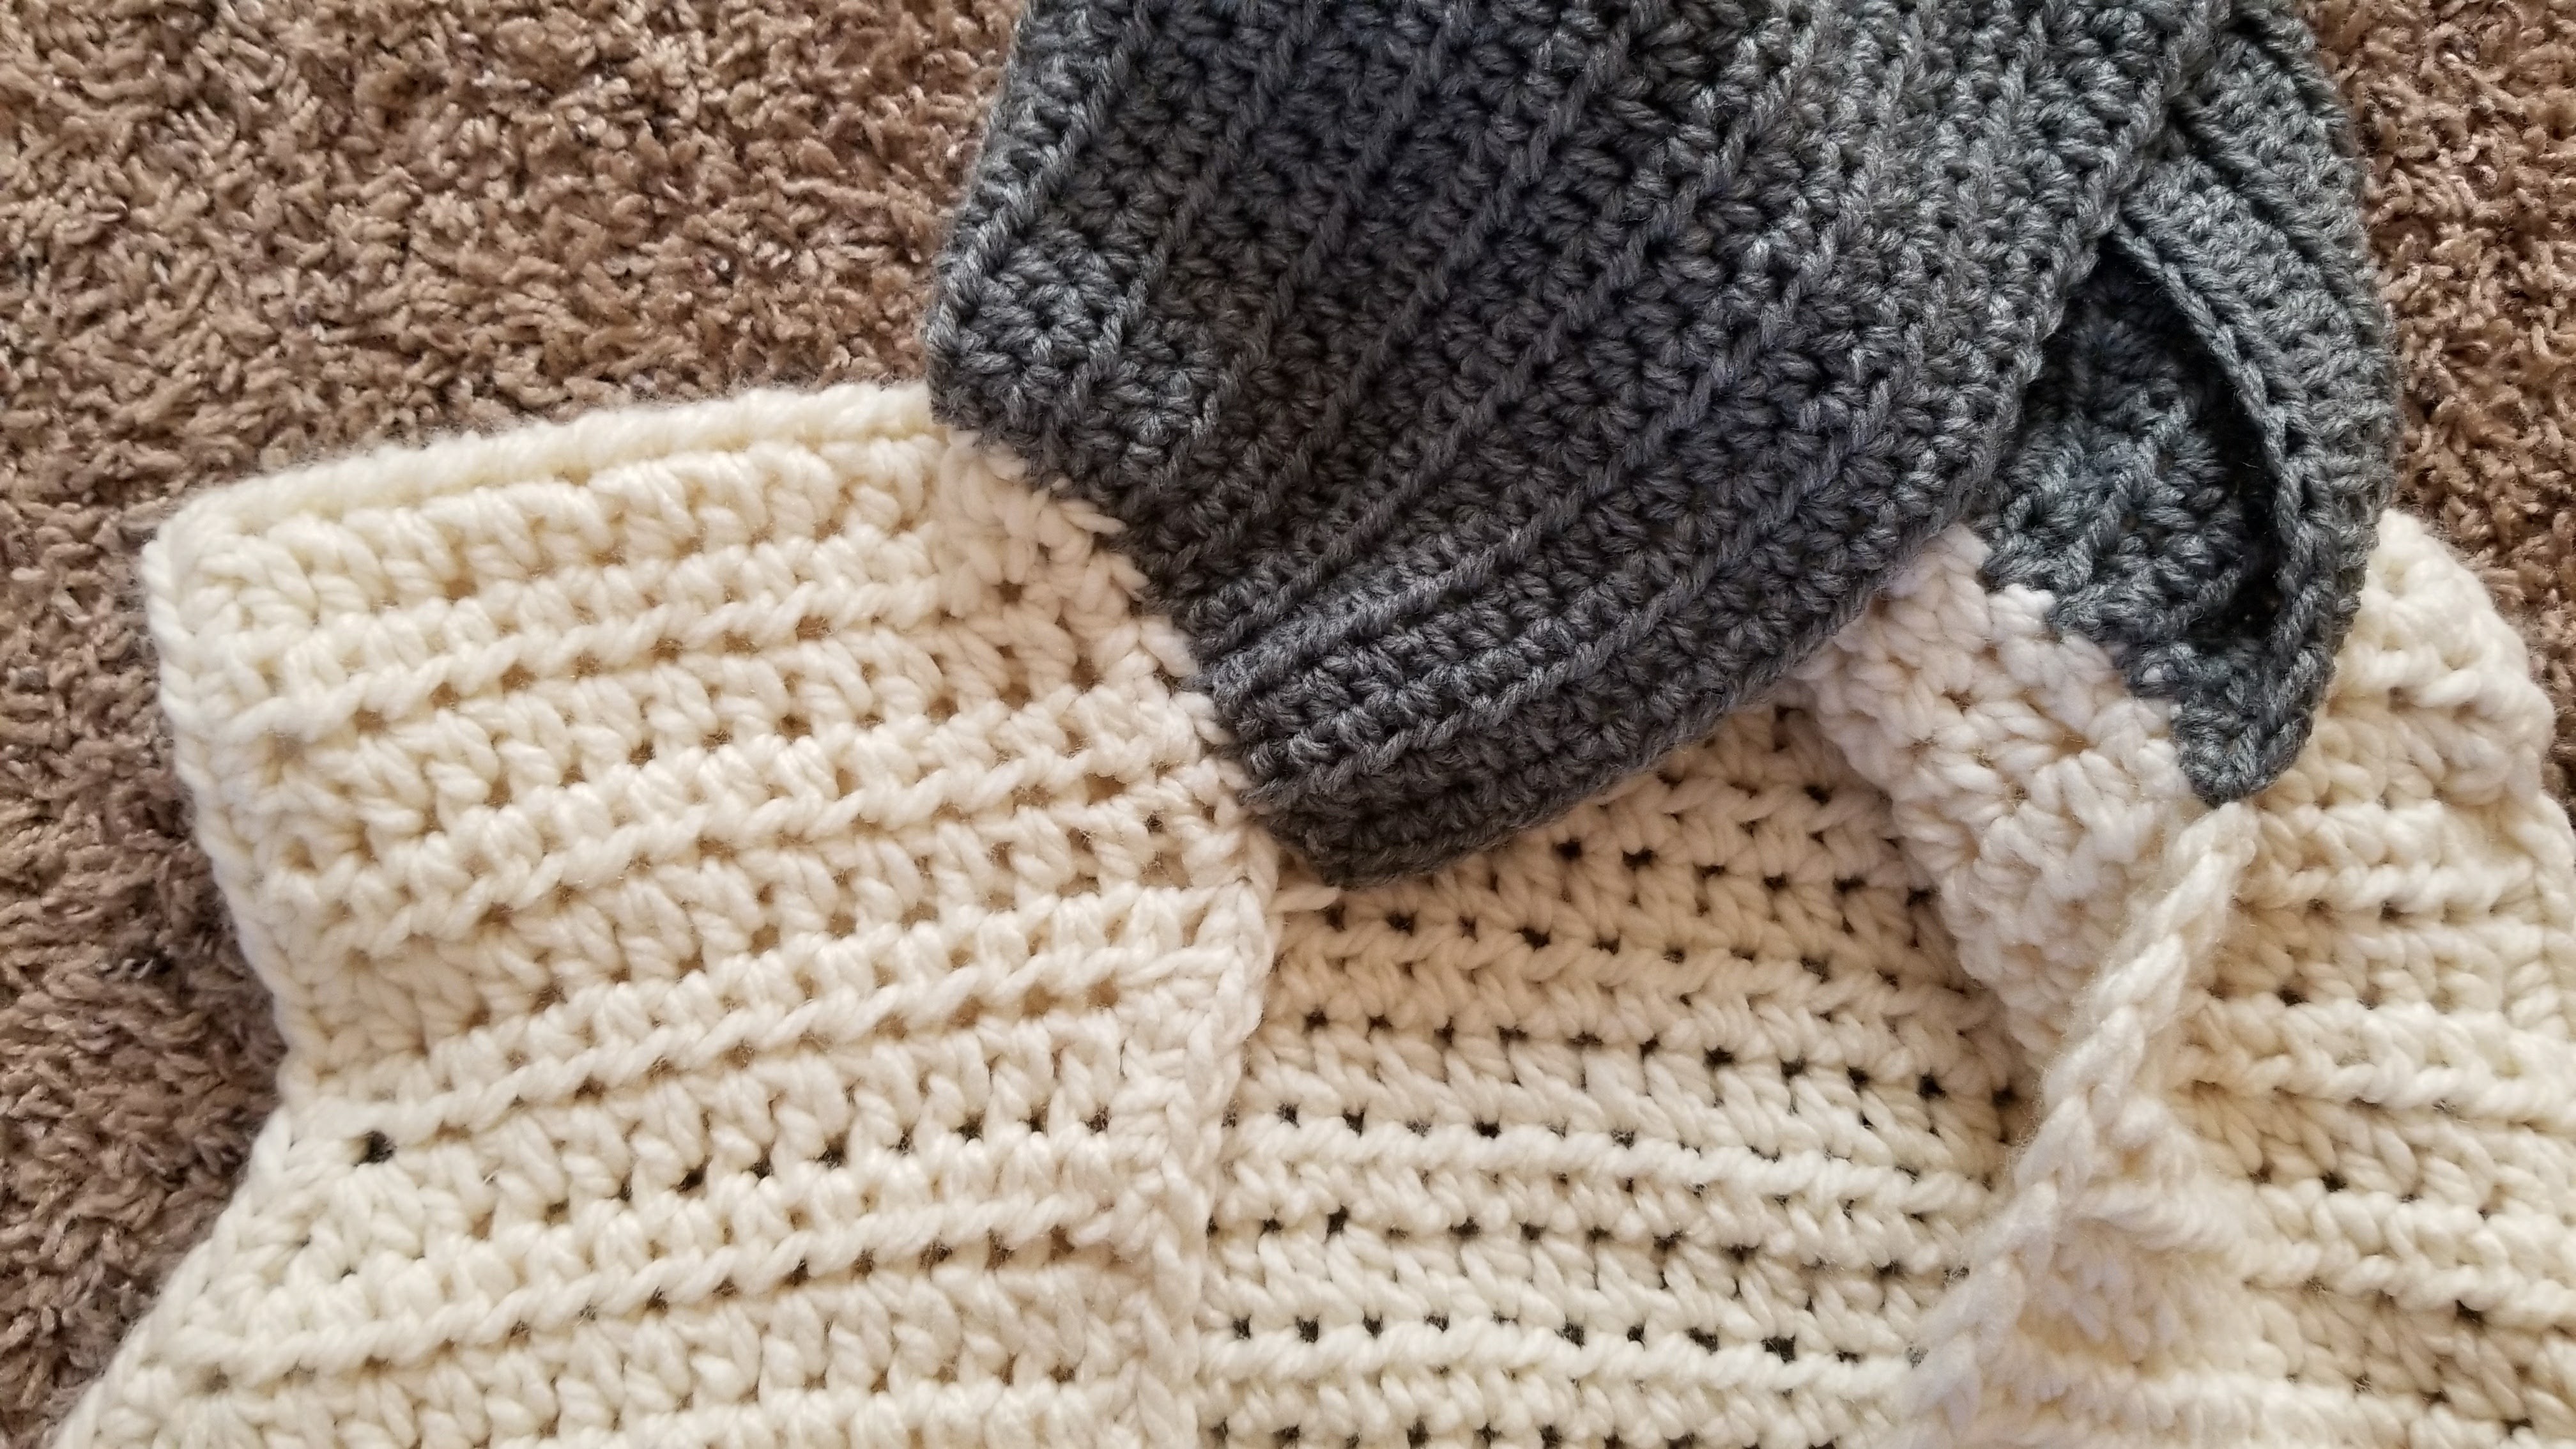
After I made the hood, I lined up the center seam of the hood with the middle of the collar and secured it with a stitch marker
Then I secured the rest of the hood evenly around the collar
Then I sewed it using a whip stitch. I hope this helps! 🙂
Thank you so much. Yes it does. Will send pic when I have it finished
Thank you for the photos on attaching the hoody, I was stumped, now I can finish
Cannot wait to try this for my granddaughters. And maybe myself. Thank you
I like this vest and being able to make a hood for it is 2X as nice! Thank you for the pattern!
What is your stitch gauge? Need that to be accurately sized.
Can you please specify stitch guage and yarn yardage and weight. Pattern is incomplete without these details. Would like to be able to choose other yarns if can’t find this one at my local store.
Hi Breann, thanks for sharing this beautiful vest pattern. It’s really easy to follow and i enjoy making the vest. Nonetheless, I was making one in size L and found the front to be shorter by about 5 – 6 rows, the pattern indicated 77 rows in total for L, if the back ends on 42 rows, the total rows for front and back should be 84 – 85 in total so both side are even in length. You may want to update it. Thanks again for this great pattern!
Oops!! Thank you!! Fixed 🙂
So how can I make this wonderful pattern into a 2XL.
Please help Breann, I’m making the vest I got from you, but having problems connecting at the part for hood. Where yarn reconnects. HELP!!!!!!!!
Hi ? Are you working on the vest or the hood right now?
Hello Breann, my name is O.G. I’m looking for someone to crochet a sweater from a pattern I purchased on Etsy. Is this your cup of tea? Thanks.
o.gibbs@yahoo
hello Brean! I’m trying to work with 6mm chrochet hook and bulky yarn. Pardon me if i’m asking too simple questions cause this is my 2nd piece of crochet I’m trying to accomplish now. How much chains should I start with to achieve size in between S or M for the vest? Though today I will start accordingly with your L size pattern hoping it will achieve not smaller than S. Do you have any advice?
I think I got the gauge figure out. I won’t be following the L size pattern gauge 🙂
Hi! I would say it all depends on your gauge. I would grab a shirt that’s the size you want and chain until it’s a few chains larger than the width of the shirt. I hope that makes sense!
Hey Brean. Yes that’s what I did and it turn out perfect. It’s been my 6th day now. I’m done with the back vest. I’m so excited getting it on the front vest! Surely there are couple of mistakes made especially during the decreasing on the back vest but I think it would make up for it once the ends are weaved 🙂
Awesome!!
Do you rember how many you chained for 2xl ?i am going to us shirt then I figure 10 extra Che for the few sets.but. Would like to use g hook.cause that’s the hook I have always used.sorry if I am bothering you.
Hi! I’m sorry, I don’t have this pattern for 2XL at the moment 🙁 I’m hoping to add sizes soon!
I love this pattern, it is just what I have been looking for, can I use 4 worsted wt yarn? Would that make it too small? Thank you, Mary
Hi! You could try making the next size bigger with a smaller yarn. See how that works? When you do the base ch, measure it to make sure it’s the width you want.
Hello I’m tryng to make this and I really need help with it. So I’m doing size M and I’m at 39. How does the front and back connect?
Hi! You continue with the next row. Hdc in 14 stitches, then hdc2tog over the next 2 and this is the end of the row. Ch 1 and turn. Hope this helps!
Hi! I really love your patterns! I started with the buffalo plaid cowl and now I’m trying this one, but I’m having a bit of trouble…I checked my gauge and using an 8 mm hook, 9 hdc is 4 inches like it says, but 5 rows is only about 3 inches. My tension is a little off because I don’t usually work with bulky yarn. Does this mean I should add extra rows? Any help is greatly appreciated. Thank you!
Hi! You could add rows or you could go up a hook size 🙂
I am working on 2xl one.but if it don’t turn out I will just wait on you when you make2xl pattern I will make it again.will it be on this s
Same site?
Have you made bigger sizes yet?If so what site you putting it on?
Not yet 🙂 It will be updated here and in my Etsy shop and Ravelry shop
Love it Hope I will be able to make this
You have great patterns
I plan to start this soon, but I would like to add buttons so it can be closed. Would that work, or do I need to somehow modify do there is overlap between the two front pieces?
Hi! It depends on the fit, I think. You can add some rows to the middle if needed to add to the buttons.