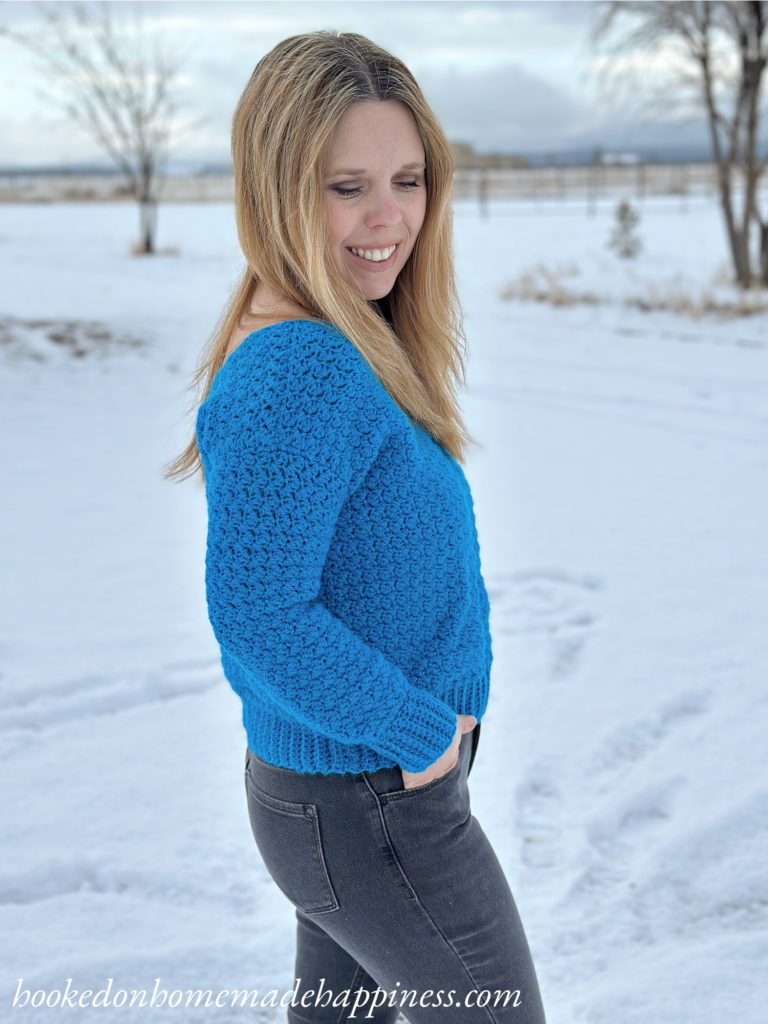
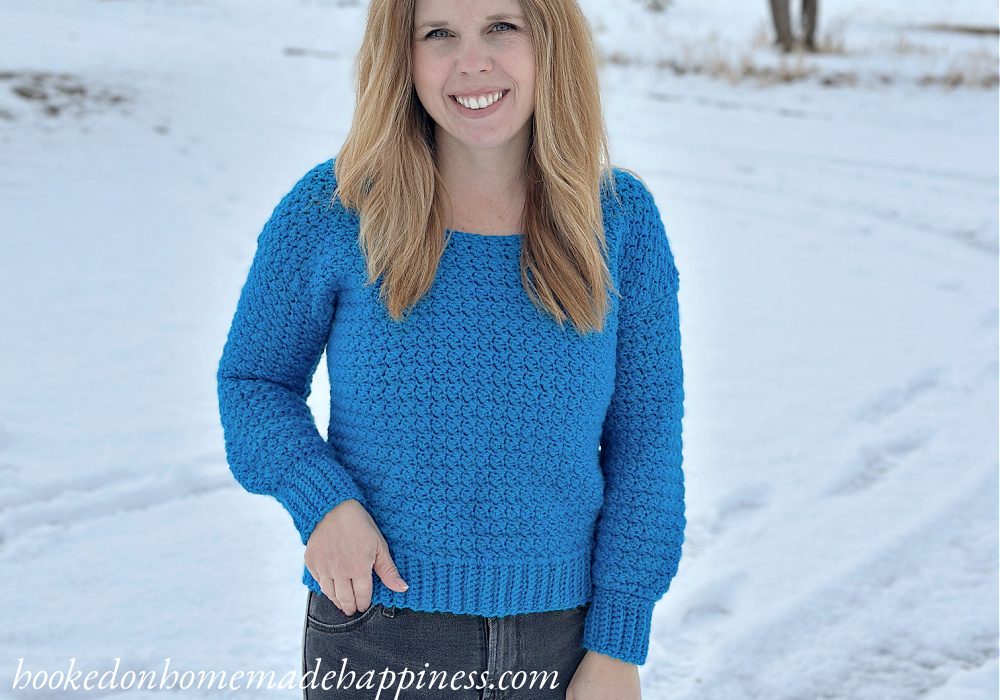
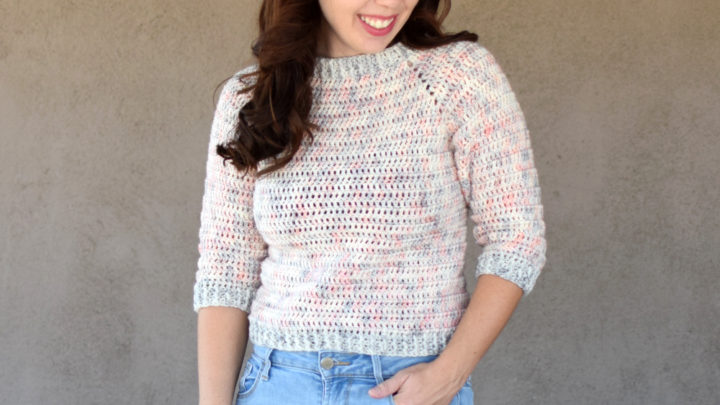
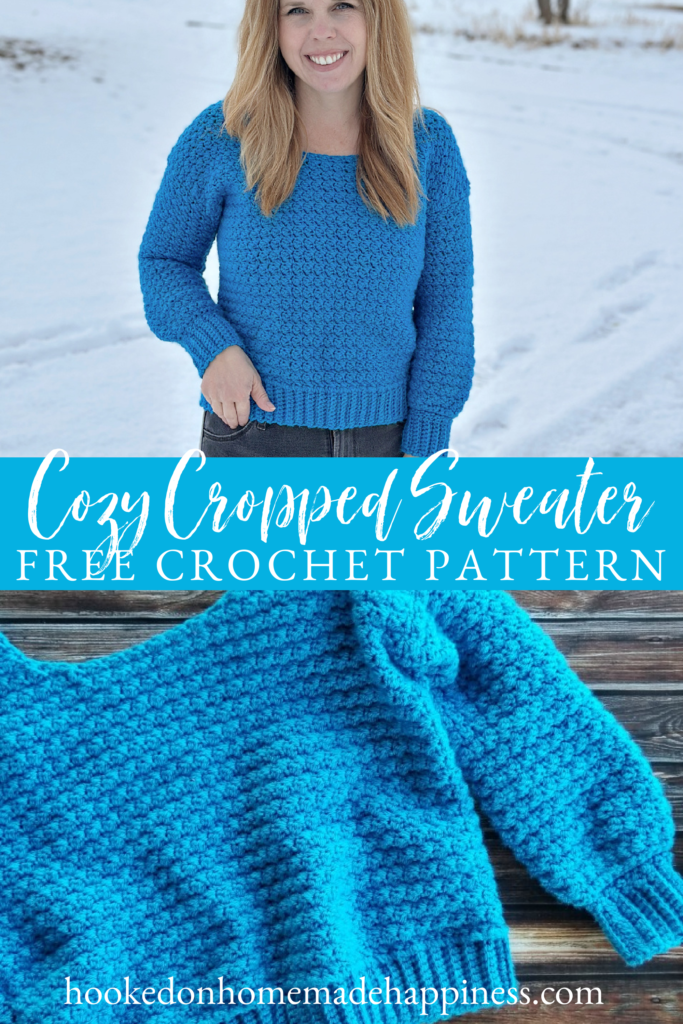
Do you love the feeling of snuggling up in a cozy sweater on a chilly day? What if you could combine that snug sensation with the trendy and stylish look of a cropped top? Look no further, because we have the perfect solution for you: a crochet sweater pattern that is both warm and fashionable. The Cozy Cropped Sweater Crochet Pattern is made with one of my favorite stitches, the Suzette Stitch. It creates a sturdy and beautiful texture. Because of the tight stitch, this little sweater is surprisingly warm and cozy!
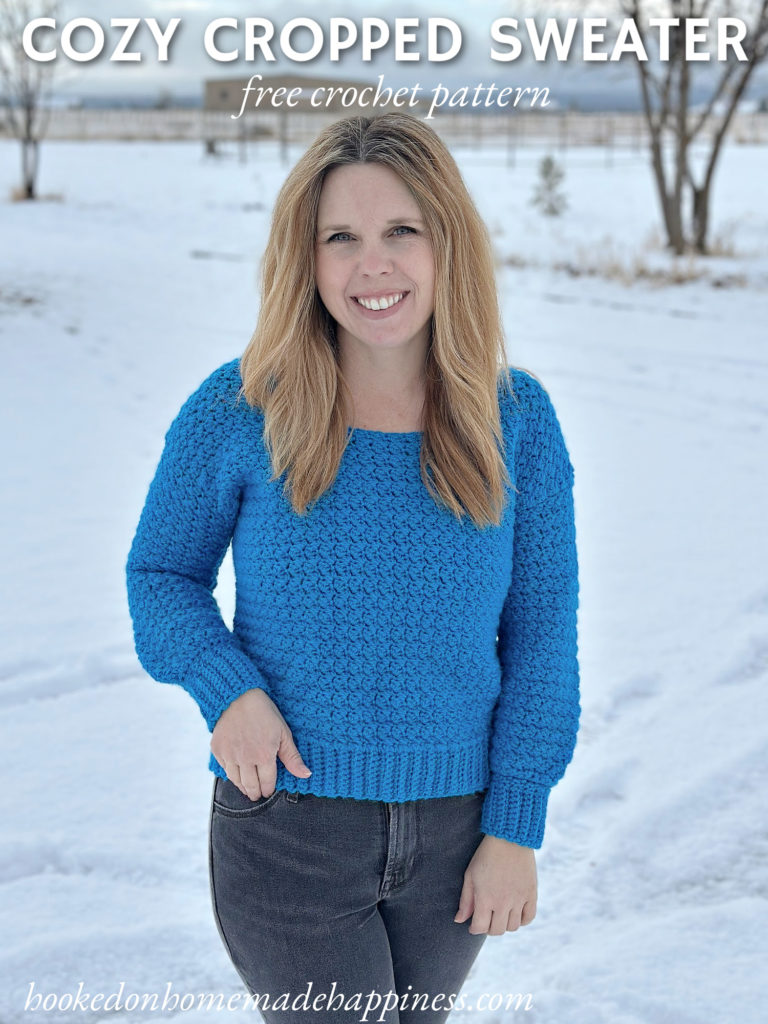
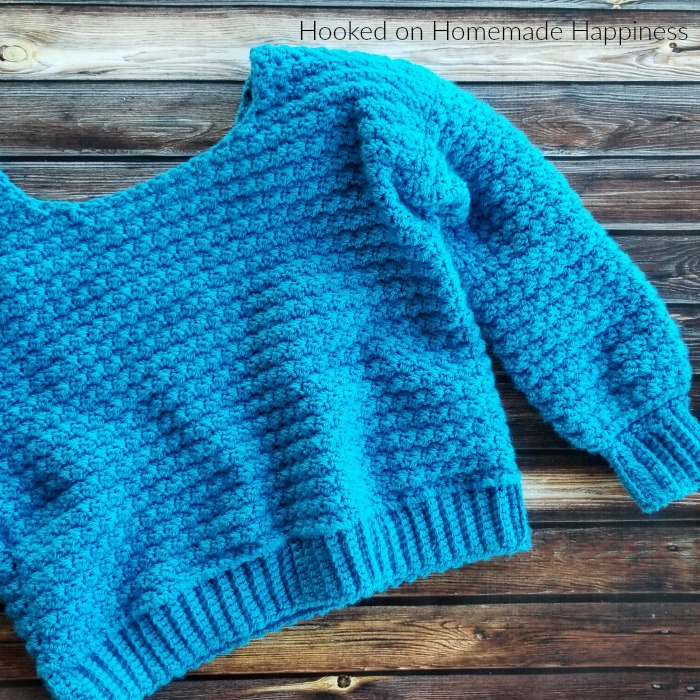
The Suzette (or Sedge) Stitch
The Suzette (or sedge) crochet stitch is a simple yet elegant stitch pattern that creates a dense, textured fabric. It is made using a combination of single crochet (sc) and double crochet (dc) stitches, worked into the same stitch, followed by skipping a stitch and repeating the pattern across the row.
What I love about this stitch:
- Texture: Soft, dense, and slightly bumpy.
- Stretch: Minimal stretch, making it ideal for sturdy projects.
- Best Uses: Blankets, washcloths, scarves, and thick sweaters.
It’s a beginner-friendly stitch that works up quickly and looks beautiful in both solid and variegated yarns!
More Homemade Happiness
Choosing Your Yarn
For the yarn I used Paintbox Simply Aran. Paintbox is one of my favorite yarn brands! They have SO MANY color options available and you just can’t beat the price. It’s a soft, durable acrylic for under $5 a skein. Score! Any acrylic, worsted weight yarn will work great for this sweater. Choosing an acrylic worsted weight yarn for a sweater is a practical and budget-friendly option, especially for beginners or those looking for easy-care garments. Acrylic yarn is soft, lightweight, and comes in a wide range of colors and textures, making it versatile for different styles. It is also machine washable and durable, making it ideal for everyday wear. Consider a high-quality acrylic blend for added softness and breathability, ensuring comfort while maintaining warmth.
click here to pin this pattern for later >>>
Cozy Cropped Sweater Crochet Pattern
Get the free pattern below or purchase the ad-free, printable PDF in my Etsy shop or Ravelry Shop!
PIN for later HERE
Add to your Ravelry Queue HERE
Materials
Worsted weight yarn (approx. 450g (500g) [550g] {600g}) I used Paintbox Simply Aran in Kingfisher Blue
H/5.0 mm hook
Yarn needle
Scissors
Level
intermediate
Pattern notes & stitches to know
ch – chain
sc – single crochet
sc blo – single crochet back loop only
dc – double crochet
sc2tog – single crochet 2 together
sc3tog – single crochet 3 together
Approximate Finished Size:
Bust: S (36”) M (39”) L (42”) XL (45”)
Width across the back: S (18”) M (19.5”) L (21”) XL (22.5”)
Length: S (18.5”) M (19.75”) L (21”) XL (22.25)
Sleeve: S (15”) M (16”) L (17”) XL (18”)
Armhole: S (7.5”) M (8”) L (9.5”) XL (10”)
Gauge: 11 dc x 7 rows = 4” x 4”
COZY CROPPED SWEATER CROCHET PATTERN
Pattern written in S, M noted in ( ), L noted in [ ], XL noted in { }
ch 11
The pattern starts with the ribbed edge
Row 1: sc in 2nd ch from the hook and in each ch across (10)
Row 2: ch 1, turn, sc in first stitch, sc blo in 8 stitches, sc in last (10)
Repeat row 2 to Row 61 (65) [69] {73}
Next you will work along the long end of the ribbed edge
Row 1: ch 1, turn, sc evenly across working 1 sc in the end of each row (61 (65) [69] {73})
Row 2: ch 1, turn, (sc, dc) all in first stitch, skip 1 stitch, *(sc, dc) all in next stitch, skip 1 stitch* repeat from * to * across, sc in last stitch (61 (65) [69] {73})
Row 3: ch 1, turn, (sc, dc) all in first sc, skip next dc, *(sc, dc) all in next sc, skip next dc* repeat from * to * across, sc in last sc (61 (65) [69] {73})
Repeat row 3 to Row 41 (43) [45] {47}
The next row starts the neckline ending with 1 sc3tog
NOTE: for the sc3tog, work these in 3 consecutive stitches, do not skip dc when working the sc3tog
Row 42 (44) [46] {48}: ch 1, turn, (sc, dc) all in first sc, skip next dc, *(sc, dc) all in next sc, skip next dc* repeat from * to * 9 (10) [11] {12} more times, sc3tog (23 (25) [27] {29})
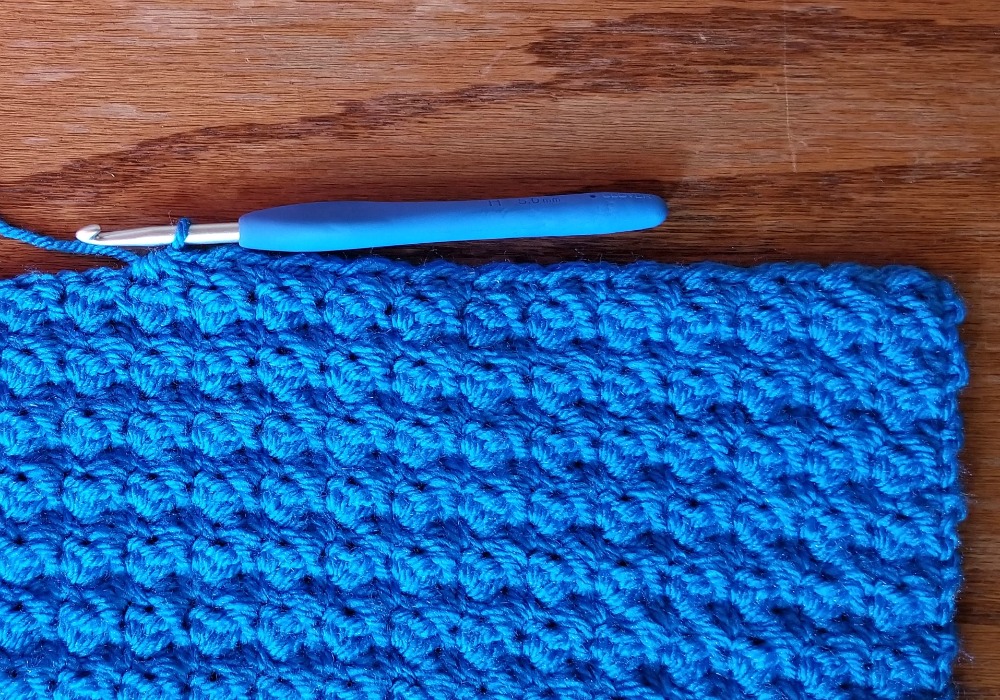
Row 43 (45) [47] {49}: ch 1, turn, sc3tog, dc in same stitch, skip next dc, *(sc, dc) all in next sc, skip next dc* repeat from * to * across (21(23) [25] {27})
Row 44 (46) [48] {50}: ch 1, turn, (sc, dc) all in first sc, skip next dc, *(sc, dc) all in next sc, skip next dc* repeat from * to * across to the last 3 stitches, sc3tog (19 (21) [23] {25})
Row 45 (47) [49] {51}: ch 1, turn, (sc, dc) all in first sc, skip next dc, *(sc, dc) all in next sc, skip next dc* repeat from * to * across, sc in last sc (19 (21) [23] {25})
Repeat previous row to Row 52 (56) [60] {64}
Fasten off, leave a long end for sewing
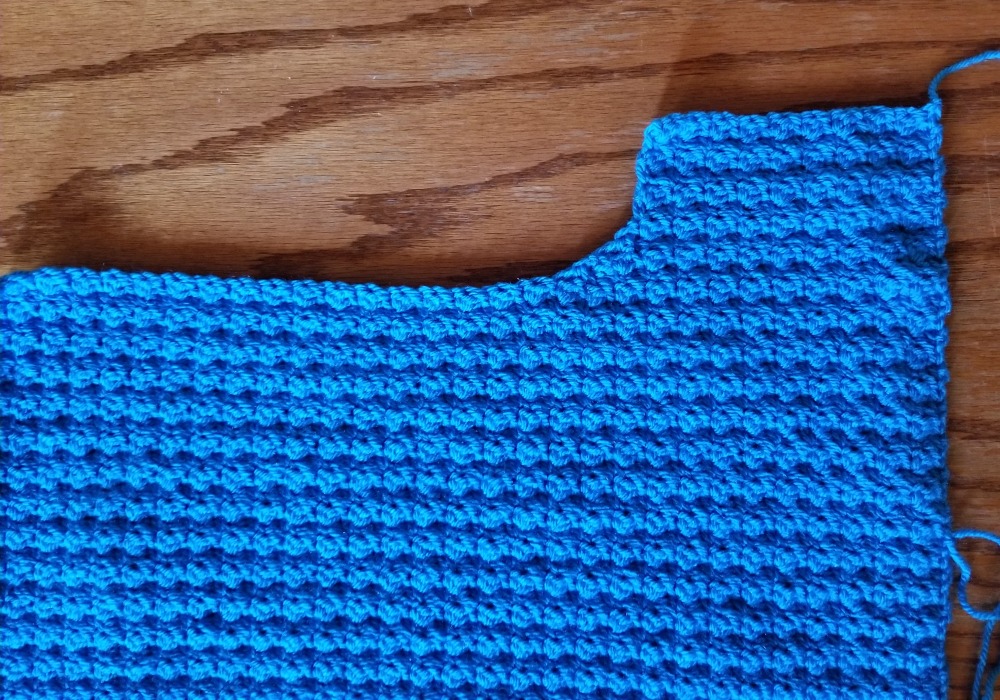
Rejoin yarn 25 (27) [29] {31} stitches in from the left on row 42 (44) [46] {48}
Row 42 (44) [46] {48}: ch 1, sc3tog, dc in same stitch, skip next dc, *(sc, dc) all in next sc, skip next dc* repeat from * to * across (23 (25) [27] {29})
Row 43 (45) [47] {49}: ch 1, turn, (sc, dc) all in first sc, skip next dc, *(sc, dc) all in next sc, skip next dc* repeat from * to * across to the last 3 stitches, sc3tog (21 (23) [25] {27})
Row 44 (46) [48] {50}: ch 1, sc3tog, dc in same stitch, skip next dc, *(sc, dc) all in next sc, skip next dc* repeat from * to * across (19 (21) [23] {25})
Row 45 (47) [49] {51}: ch 1, turn, (sc, dc) all in first sc, skip next dc, *(sc, dc) all in next sc, skip next dc* repeat from * to * across, sc in last sc (19 (21) [23] {25})
Repeat previous row to Row 52 (56) [60] {64}
Fasten off, leave a long end for sewing
Repeat pattern for back.
SEWING
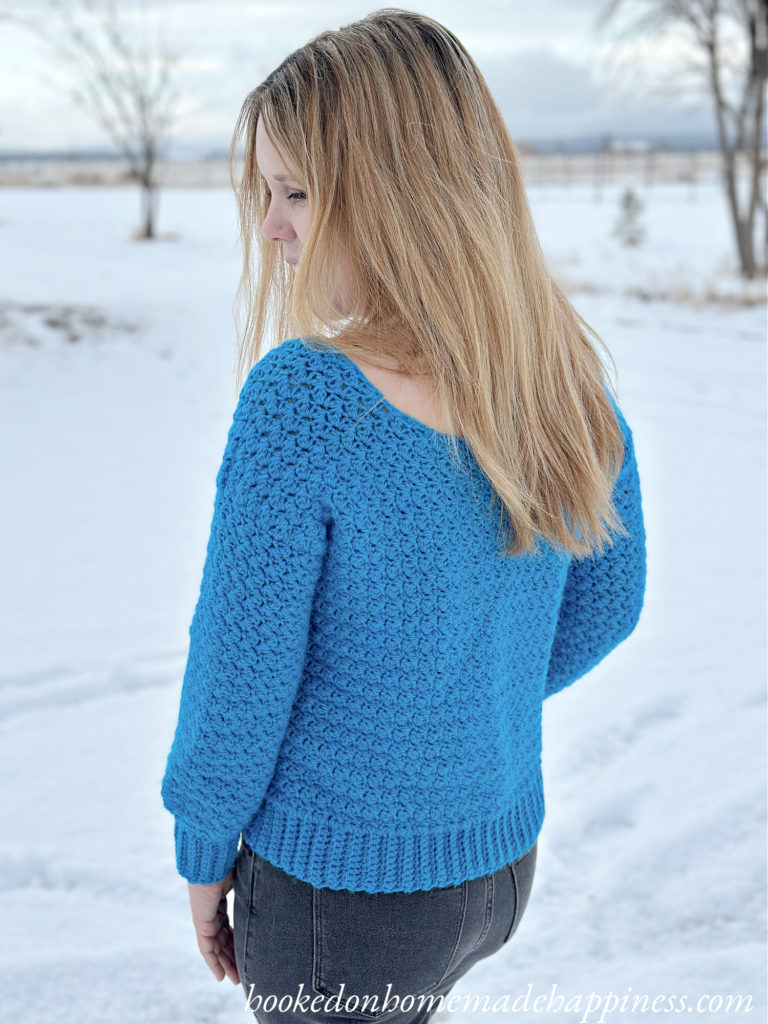
Lay both pieces together. Use the long ends and yarn needle to sew the shoulders closed with a whip stitch. Use the long end and yarn needle to whip stitch the sides closed, leaving 7.5 (8) [8.5] {9} inches at the top for arm holes. (or desired armhole width)
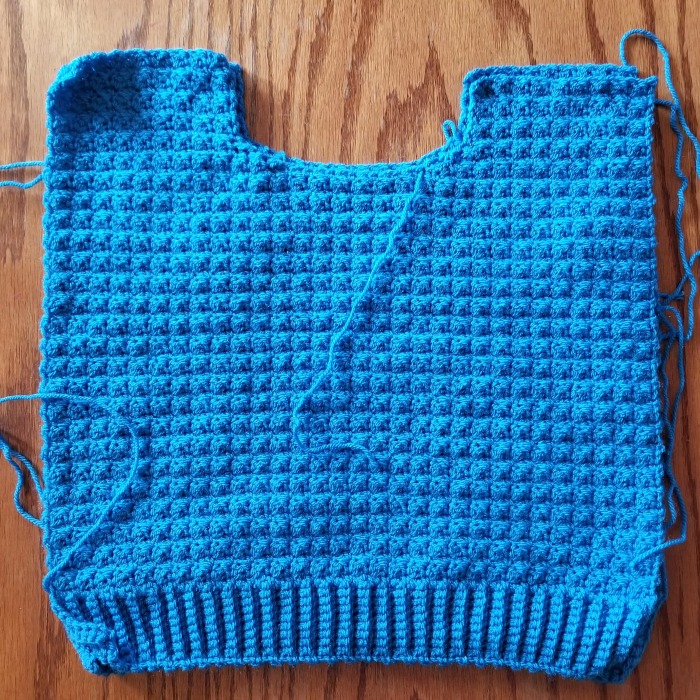
Weave in all the ends. Turn right side out.
SLEEVES
Join yarn to the bottom of an armhole
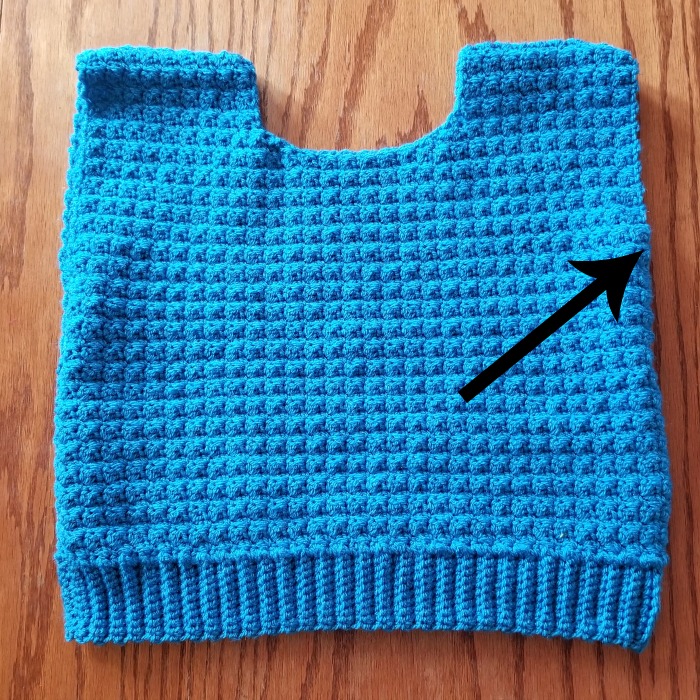
Round 1: ch 1, sc evenly around (be sure this is an even number), join to first sc with sl st
Round 2: ch 1, sc2tog, dc in same stitch, skip 1 stitch, *(sc, dc) all in same stitch, skip 1 stitch* repeat from * to * around to the last 3 stitches, sc3tog, join to first sc2tog with sl st
Round 3: ch 1, turn, sc3tog, dc in same stitch, skip next dc, *(sc, dc) all in next sc, skip next dc* repeat from * to * around to last 3 stitches, sc3tog, join to first sc3tog with sl st
Round 4: repeat round 3
Round 5: ch 1, turn, (sc, dc) all in first sc, skip next dc, *(sc, dc) all in next sc, skip next dc* repeat from * to * around to the last, sc in last stitch, join to first sc with sl st
Repeat round 5 to Round 39 (42) [45] {48}
Round 40 (43) [46] {49}: ch 1, turn, *sc, sc2tog* repeat from * to * around, join to first sc with sl st
Round 41 (44) [47] {50}: ch 1, turn, sc in each stitch around, join to first sc with sl st
Do not fasten off
CUFF
ch 11
Row 1: sc in 2nd ch from the hook and in each ch across, sl st to the last round of the sleeve (10 sc)
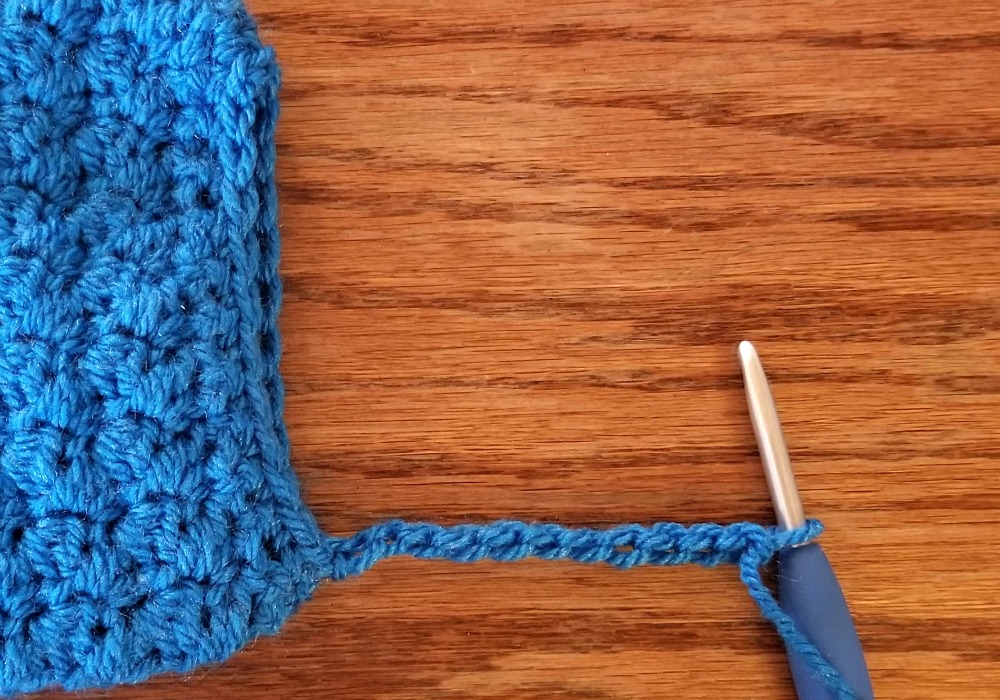
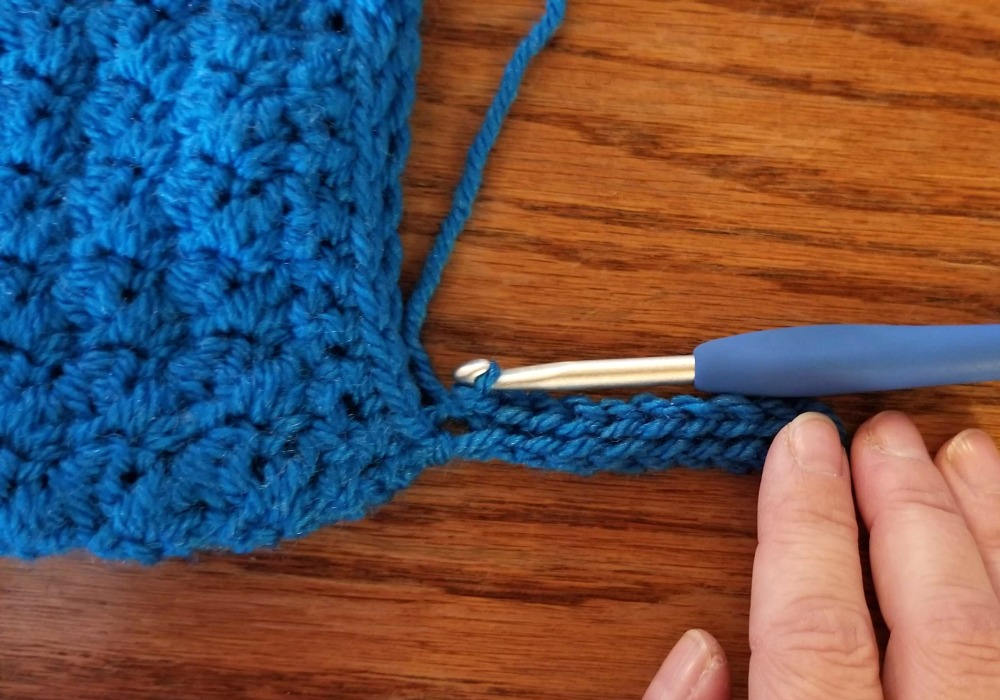
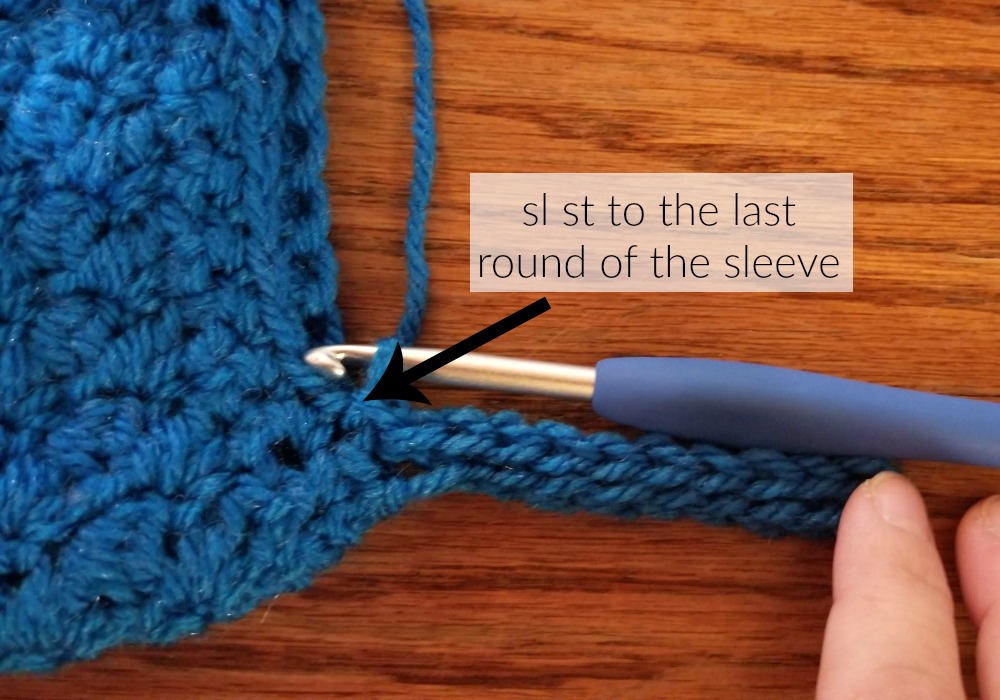
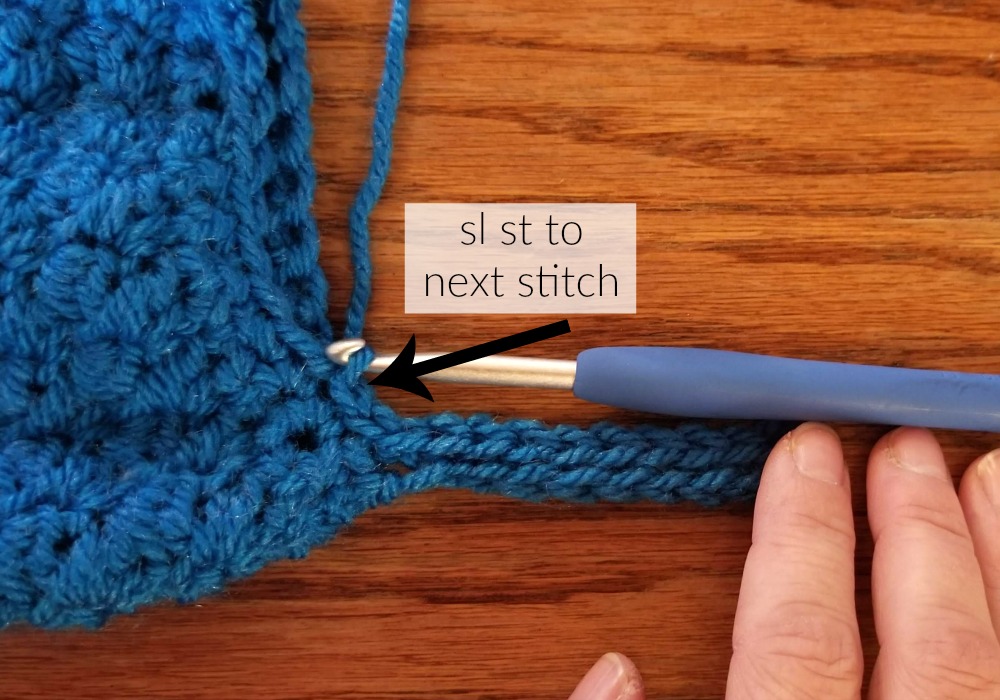
Row 2: sl st to the next stitch in the last round of the sleeve, turn, sc in first stitch, sc blo in next 8, sc in last stitch (10)
Row 3: ch 1, turn, sc in first stitch, sc blo in next 8, sc in last, sl st to next stitch in the last round of the sleeve (10)
Repeat row 2 & 3 until you work all the way around the sleeve. Sew the cuff closed with a whip stitch
Fasten off, weave in the ends.
Repeat for other sleeve.
And you’re done with your new sweater! I hope you love it!
Looking for more patterns? Follow me on Facebook, Instagram, and Pinterest! Please share a pic of your finished product with me. I’d love to see it!





This is super cute! My next project!
Thank you!
I really loved making this sweater. However I found the neck opening to large and it kept dropping off my shoulders. I was going you may have some suggestions as to how I can rectify this issue
Hi! You can join yarn to the inside of the collar and work some single crochets around to tighten it 🙂
Thank you for your advice. I added 5 rows of sc and it worked a treat
Awesome!!
Hi! I love the design! It’s supeeeeer cute! I have a question though. On row Row 42 (44) [46] {48}. What do you mean by “sc3tog (23 (25) [27] {29})” does that mean I sc3tog 27 (I’m doing the large) chains together? Or up to 27? And after I reach the 27 what do I do next? Thank you!!
Hi! That is the stitch total for the row 🙂 you will only do 1 sc3tog
Hi Breann! Thank you for the pattern, I’m at the same row 42 now, but still a little confused. I am doing the Medium and have done:
ch1, turn, (sc,dc) all in first sc, skip next dc, *(sc,dc) all in next sc, skip next dc* repeated 10 times to get a total of 11. After 1 sc3tog, do I continue with the same repeat till the end? It would give me a total of 32 stitches. Thanks for your help!
Hi! You do the repeat 11 times, then do 1 sc3tog. That’s the end of the row. Then turn 🙂
Hi Breann,
I’m making the cozy cropped sweater in size S. I’m having difficulty with the sleeves. I’ve finished Round 4 and the diameter of the sleeve is way too small for me. I have 32 stitches in Round 1. Clearly, that’s too few. Can you give me an idea of how many stitches I should have in Round 1?
Thanks,
Donna
Hi! We’re moving and everything is packed away, so unfortunately I can’t check how many stitches I had. But you can go back to round 1 and add a few stitches until it’s the right size for you 🙂
Hi Breann, I made this for my eldest granddaughter and am sooo happy with how it turned out. I also made your Everday Sweater for her younger sister. Thanks so much for these great patterns as they are the first two garments I’ve ever crocheted 😀m
That’s awesome! Thank you so much!
Heya, so I’m using Caron one-pound yarn and a H/5.0mm hook to make this. And the ribbed band at the beginning at 69 ros/L size only reaches halfway around my middle. Do I need to just keep going till it fix? Or am I missing something?
Hi! Yes, you can add until it’s the width you are looking for (you need an odd number of rows). Keep in mind that it will widen as you do the body of the sweater 🙂
Hi Breanna
Really wanting to start this sweater but can I add to the length? Am wanting to make one in DK would it work if I just sized up? Thanks you
Hi! To add length you can continue the pattern repeat before starting on the neckline 🙂 To make it with DK yarn, I would first start with making a gauge swatch to see how it matches up with what’s in the pattern. Hope this helps!