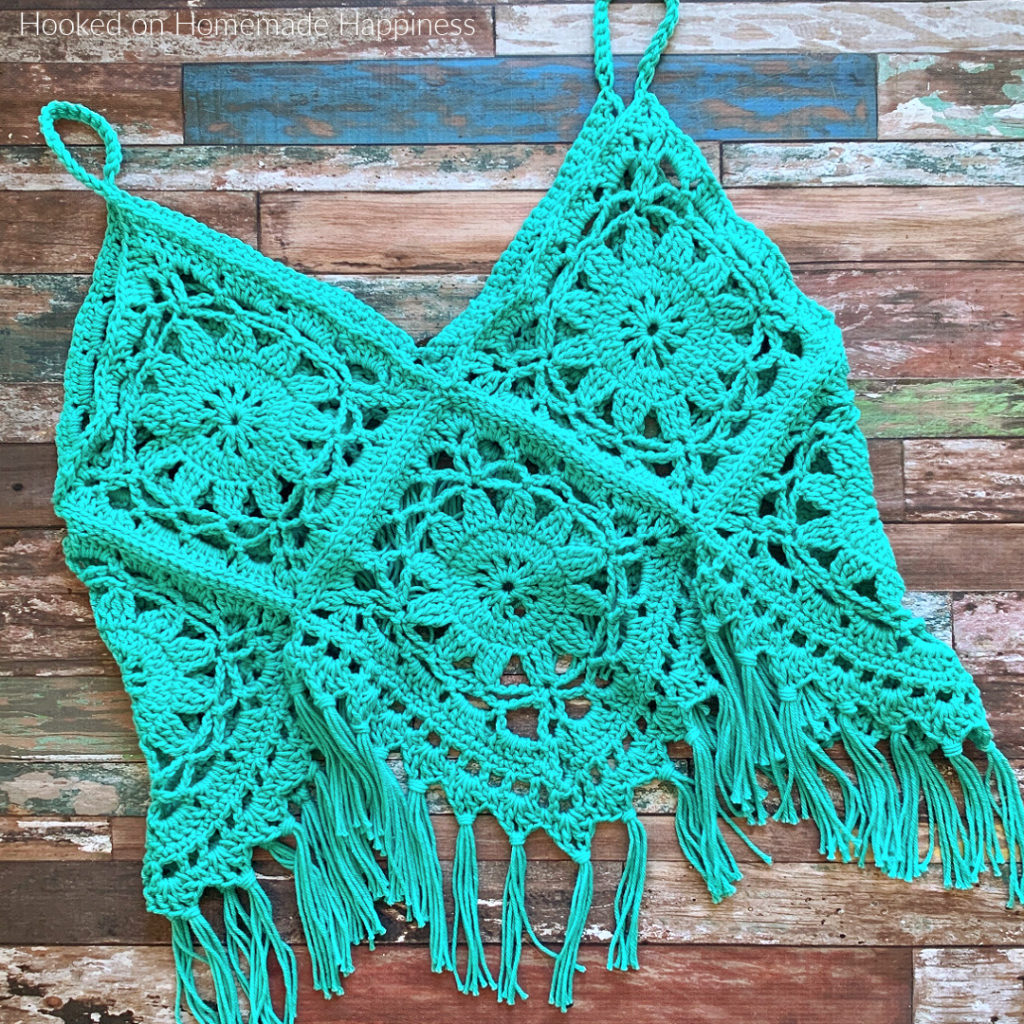
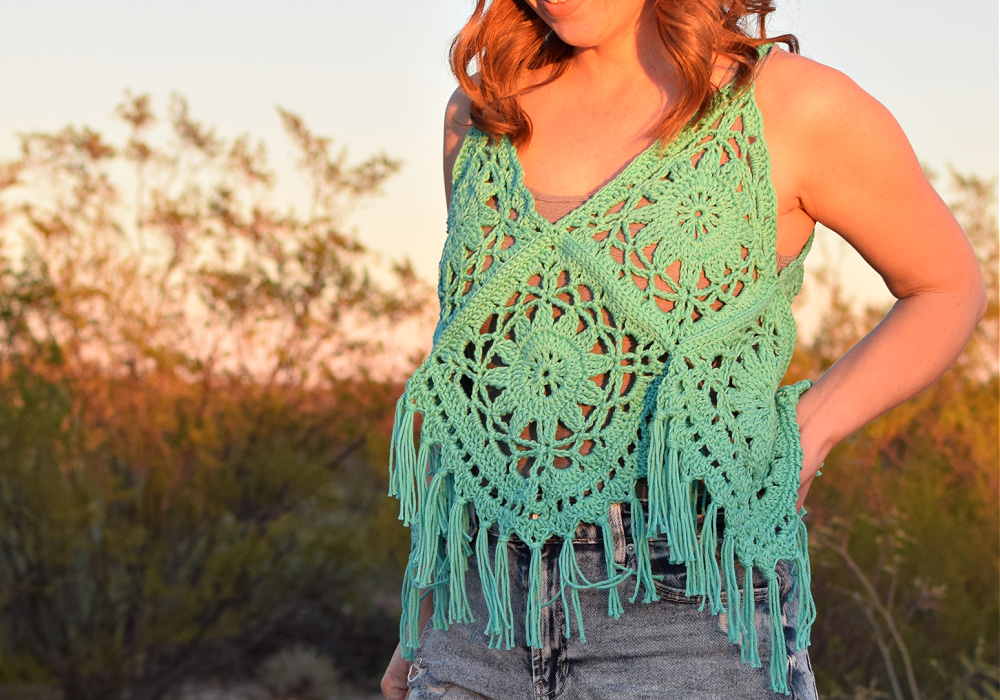
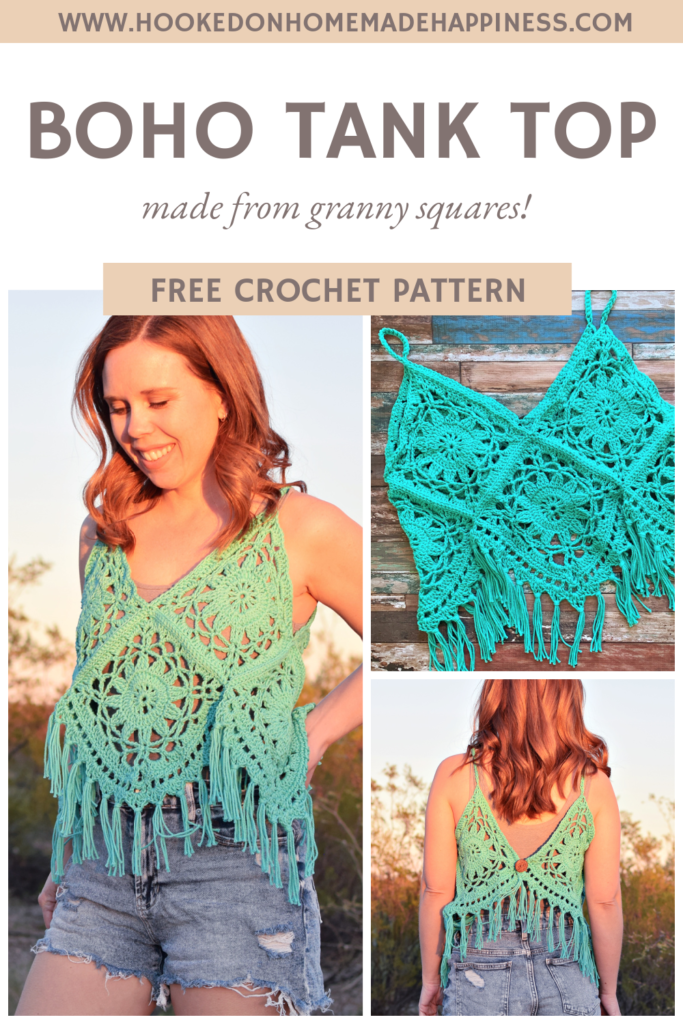
Are you ready to channel your inner bohemian spirit and create a unique piece for your wardrobe? Crochet this fun, funky, fringe-y Crochet Boho Tank Top Pattern. With just a hook and yarn, you can create a stunning piece that will add a touch of bohemian flair to your wardrobe. Whether you’re a beginner or a seasoned pro, you will be able to crochet a one-of-a-kind Crochet Boho Tank Top Pattern!

Choosing Your Yarn
For this top I used CotLin from WeCrochet. This is a DK (3) weight cotton, linen blend yarn. I absolutely love using this yarn for summer and spring projects. It’s so lightweight and breathable, it’s perfect for crocheting summer garments. I’ve used this yarn in a few spring and summer patterns: Mandala Summer Bolero, Bahama Blouse, Garden Party Top, and Spring Breeze Poncho. Any DK weight yarn, cotton, acrylic, or wool, will work for this top.
Crocheting Your Squares
Gotta love the granny square, right? There are endless styles and then even more endless beautiful things you can make with them. I made this cute boho style tank with some granny squares. Any granny square pattern would work. I wanted a pretty spring-y, flowery square. There is a full video tutorial for this top, including a detailed tutorial on this square pattern.
Assembling Your Top
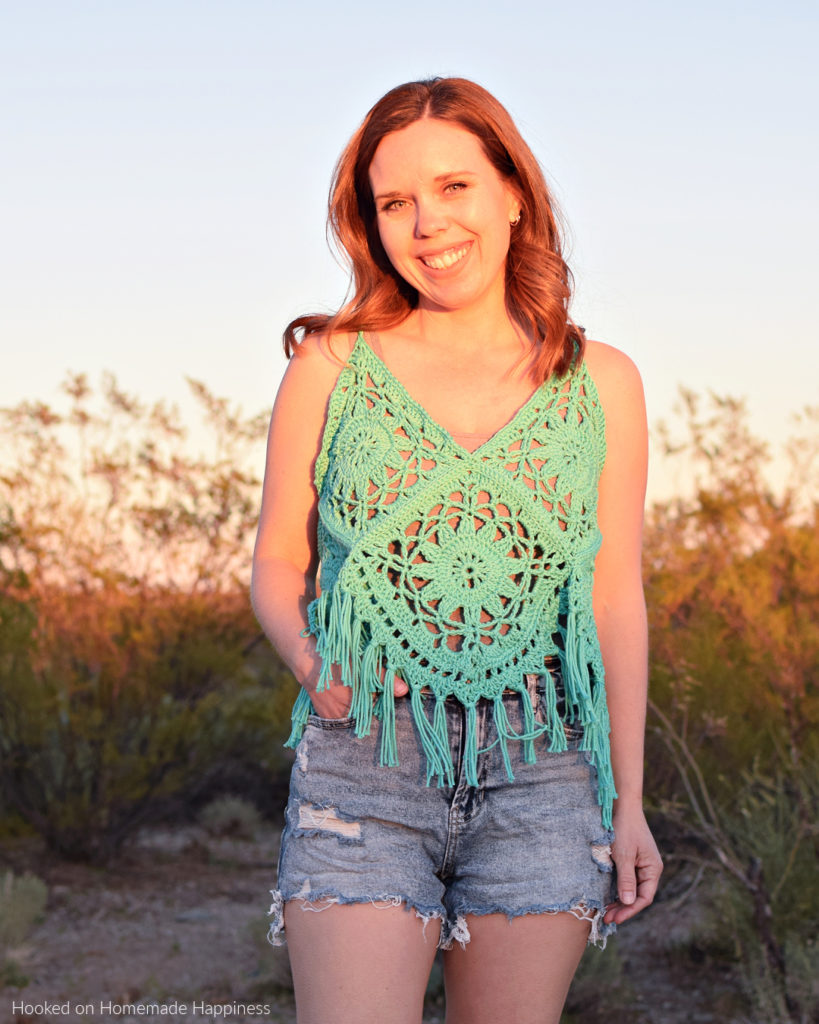
By arranging just 7 squares in 2 rows you can create this cute and fun top. I used a simple slip stitch to sew the squares together, then added the strap, border, fringe, and button closure. All of these steps are included in the detailed video tutorial.
click here to pin for later >>>
Boho Tank Top Crochet Pattern
Get the full pattern below or purchase the ad-free, printable PDF in my Ravelry Shop
Pin for later HERE
Add to your Ravelry Queue HERE
Materials
200g/380 yds Dishie from WeCrochet in Mint (or any worsted weight cotton)
4.5mm hook
yarn needle
scissors
1″ button
Level
intermediate
Pattern Notes & Stitches to Know
ch – chain
sl st – slip stitch
sc – single crochet
dc – double crochet
tr – treble crochet
tr2tog – treble crochet 2 together
tr3tog – treble crochet 3 together
fsc – foundation single crochet
· written in US terms
· ch 4 counts as dc + ch 1
· ch 3 counts as dc
· Pattern is made of 7 granny squares sewn together. Then straps and fringe is added.
· Gauge: each square is 6”
Sizes:
This pattern is written in one size. To make the top larger, add an additional round or two to each square.
Approx Finished Size:
Bust: 36”
Length (from strap to bottom – not including fringe): 19.5”
Size Small pictured. I am 5’0” with 34” bust
BOHO TANK TOP CROCHET PATTERN
>>>WATCH THE FULL VIDEO TUTORIAL HERE<<<
The pattern starts with making the granny squares (make 7)
ch 5, sl st to first ch to make a ring, work round 1 into ring
Round 1: ch 4, *dc, ch 1* repeat from * to * around 10 more times, join to first ch 3 with sl st (12 dc, 12 ch-1)
Round 2: ch 3, 2 dc in ch-1 space, *dc in next stitch, 2 dc in ch-1 space* repeat from * to * around, join to first ch 3 with sl st (36 dc)
Round 3: ch 4 (counts as tr), tr2tog over next 2 stitches, ch 4, *tr3tog over next 3 stitches, ch 4* repeat from * to * around, join to first ch 4 with sl st (12 tr3tog)
Round 4: *ch 5, sl st to first ch to make a loop (this will be a corner), [ch 5, sl st to next tr3tog] 3 times* repeat from * to * around, join to bottom of first ch 5 (12 ch-5, 4 corner loops)
Round 5: sl st to top of loop, *ch 5, sl st to first ch to make a loop, [ch 5, sl st to next ch-5 space] 4 times* repeat from * to * around, join to bottom of first ch 5 (16 ch-5, 4 corner loops)
Round 6: ch 3, *(dc, ch 3, 2 dc) in same ch-5 space, 5 dc in each ch-5 space across to corner* repeat from * to * around, (note: for remaining corners work (2 dc, ch 3, 2 dc), join to first ch 3 with sl st (96 dc)
Fasten off. Weave in the ends.
To make the top larger, add an additional round or two to each square
Fasten off, weave in the ends.
Make 7 squares. I steam blocked my squares overnight before assembling them together.
CONSTRUCTION
Once you have 7 squares made, line them up like this:
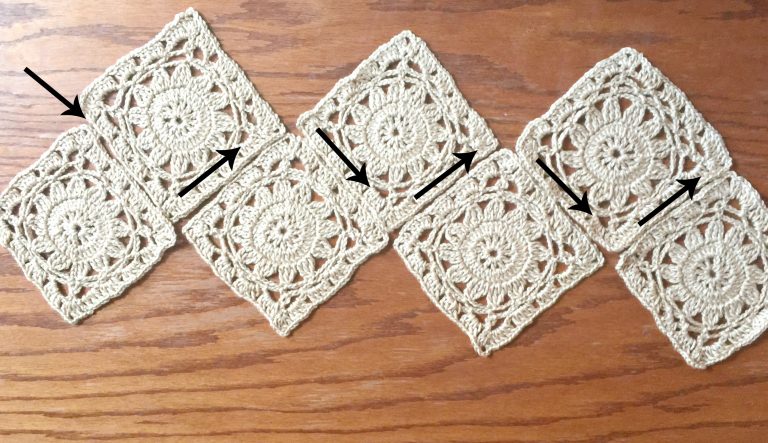
Crochet them together by slip stitching the back loops together. Put first two squares together, right side facing out, insert hook through first back loops of both and slip stitch, continue following the arrows until it’s all one piece.
Turn your work so there are four squares across the top.
EDGING
Join yarn to the right-most corner.
Round 1: sc in each stitch across to the next ch-3 space, sc in ch-3 space, work 20 fsc, sc in next ch-3 space in the next square (this is the first strap). Continue to sc in each stitch in the next valley to the next ch-3 space, sc in ch-3 space, work 20 fsc, sc in next ch-3 space in the next square (this is the next strap). Sc around in remaining stitches, join to first sc with sl st
Row 2: (this row is working only along the bottom to the opposite corner) ch 4, turn, skip 1 stitch, dc in next, *ch 1, skip 1 stitch, dc in next* repeat from * to * across to the opposite corner
Row 3: ch 1, turn, *sc in next ch-1 space, (2 dc, ch 2, 2 dc) in next ch-1 space* repeat from * to * across
Fasten off. Weave in the ends.
Add fringe in each ch-2 space along the bottom. I used three 10” strands in each. Trim to your liking.
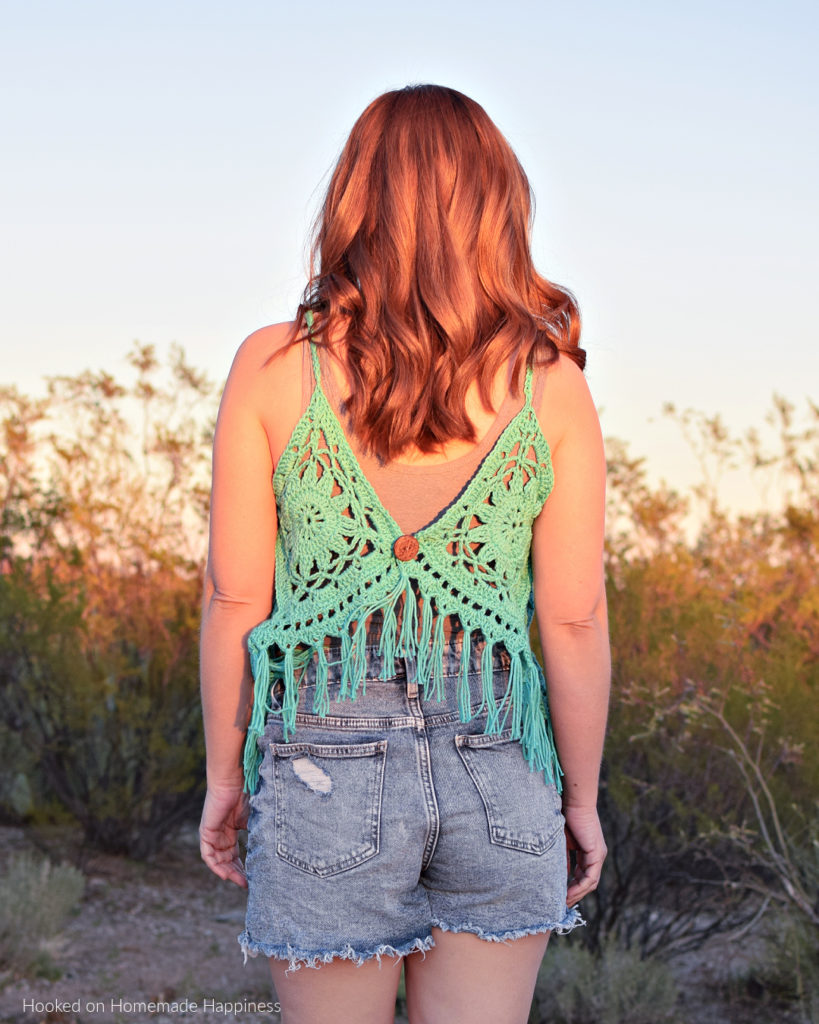
Add a button to one corner on the back. The opposite ch-space as the buttonhole.
And you’re done! I hope you love this stylish, boho style tank top.
Looking for more patterns? Follow me on Facebook, Instagram, and Pinterest! Please share a pic of your finished product with me. I’d love to see it!





I’ve used a G and an H hook. My squares are only coming out 7 inches max. Any thoughts? Beside makING 10 squares instead of 7. Thank you
You could add a round of hdc in each stitch with (hdc, ch 2, hdc) in each corner. Also, if you block them it will make them a bit larger. Hope this helps!! ?
I don’t understand “add a round of hdc in each stitch”. Please advise!
half double crochet in each stitch around
Hi Breann,
I am loving this pattern. It is such a cute and fun top.
I have made a couple and am getting a different size, when I block the squares for the s/m I can make them 7″ what size should the l/xl squares be?
You are such a gifted person creating all these patterns.
Thank you for sharing them!!
Lisa
Hi! Each square should be approx 1″ bigger
and thank you 🙂
But when you do that you get more than 96 hdc. Do you mean we are to skip the chain stitch in the previous row?
Hi, I would like to make this top, however in round 2,I do not understand what you mean by dc on top of dc.
Please help.
Hi! Work the stitch in the double crochet 🙂
I would love to make this, but I too don’t understand round 2? Do we dc into the chain stitches or into “the same stitch?” A photo would be really helpful! Thank you!
The same stitch as the turning ch (the turning ch from the previous round)
I
This means you just add a hdc stitch in every stitch for that row!
The pattern calls for 7 squares, but the top photo shows 5? Are 7 squares for a large size
There are 5 in the picture 🙂
At the end of the Second round I end up with 32, don’t know what I’m doing wrong.
Hi! I wonder if you are accidentally skipping some stitches around 🙂
Love this pattern is was hopping to download it.
Thank you so much! 🙂 You can purchase a PDF copy in my Etsy shop here: https://www.etsy.com/listing/514111542/boho-tank-crochet-pattern-crochet-top?ref=shop_home_feat_3
Love the pattern and I just wanted to thank you for your hard work in creating the clear and easy instructions! Wonderful idea that I will enjoy again and again with a variety of granny squares ?
I’m so happy you like the pattern! Thank you ?
fun pattern made it and added to my Ravelry page thanks for sharing!
That’s awesome!! Thank you 🙂
Beautiful pattern. My squares are coming out a bit small. I used a 5.00mm hook also. Anything I can do to make them a bit larger?
Hi Bri, you could add a row of hdc around the outside (with hdc, ch 2, hdc in the corners). Hope this helps 🙂
So,when your adding the part before you add the fringe, do you start in the corner of the square where the straps come from? Or start at the top of one of the 3 squares at the bottom?
You start at the outside corner of one of the 3 squares at the bottom
I’m really struggling with row 5. Where do you attach to the chain 5?
Hi Traci, attach to the middle of the chain from the previous row. Does this answer your question?
Thank you. Love this pattern
Hi, can you help me on joining the boho top into a dress please ???
Hi! What do you mean? Are you making more squares to turn it into a dress? Or sewing it to a dress?
Beautiful
Hei
Why i get only 8 dc on the 2 round ???
Do you know how I could make this in a child size?
Hello! Actually, I’m hoping to get a child size pattern made up fairly soon. I’m thinking you could use a traditional granny square and just make it smaller. Maybe 4 – 5 inches? I hope this helps 🙂
Thank you! I’m going to try! 🙂
Hi thank you for sharing this lovely pattern, i just wondered if you could advise the measurements for the granny squares to make sure mine are coming out the right size ?? thank you
Hi ? Approximately 7 inches
thank you so much 🙂
Is this 7″ sides or diagonal (corner to corner). Also is that for the s/m size?
Great pattern by the way!
7″ each side. It’s a S/M. And thanks! ?
Hi, can this be made longer?
Yes, you can make the squares larger by adding rows of hdc to the outside.
Hi, when joining the squares should I place them face down?
Thanks in advance for the help!
They should be right side up 🙂
Thank you for posting this pattern. This was very simple to make. Needed a crochet vest for 70’s costume party.
That’s so awesome!! I’d love to see the costume ;D
Thank you very much for the pattern. I love it. I´m using a traductor because I’m spanish. But I think I’ll do it. Greetings from Madrid.
That’s awesome! 🙂
I love this pattern!! Your instructions were so easy to follow. How could we make this a pullover as opposed to a vest. I’m thinking just add another square on the short side. What do you think? I can’t find one anywhere in English!
Thanks Breann
Thank you so much! And yes, I think if you added another square and sewed them all it would work 🙂
Thank you very much for this pattern. These granny squares look so delicate and turn out the same everytime and your pattern is easy to follow. My daughter wants me to make her one too. Thanks again xx
Thank you so much!!
Hi!! I love this pattern and I’m enjoying making it, just wondering what the equivalent uk or Europe sizes were to s/m l/xl? Thankyou 🙂
Hi! I’m sorry, but I really don’t know.
To make a large size each side must be approx. 8in? And can any granny square design be used?
Yes ?
I just finished this and it turned out so cute! I used 100% cotton by Lily Sugar and Cream medium weight yarn . Will try another one with a sport yarn. Perfect summer beach top! Thank you for sharing your lovely pattern!
That’s awesome! Thank you so much 🙂
Lovely patern and perfect instractions!!!!!It’s my first summer top for present .I loved it!!!!Thank you!!!
Yay! Thank you so much!
Love this pattern! Just made one for my sister for her birthday!
Is there anyway to make this a size smaller?
Hmm… I think you could use sport weight yarn and a 4.0 mm hook
I made this for my daughter. Where do I share photos?
Hi! You can share on my social media 🙂 I don’t think there is a way to upload photos here
How do I make this a little longer? I need to make it for my daughter and she wants it to cover to her waist. Thank you
Hi! I think you can add another row of squares.
another row of squares… to make it longer… so seven more ?
I think 3 or 5 should do it. Depending on how you want to lay them out
Love this so much! I included the link in my boho crochet pattern roundup! http://kaijumaddy.com/2018/06/23/11-free-boho-crochet-patterns/
Thank you!!
Just wanted to let you know, I pinned this pattern and there have been hundreds re-pinned from my pin…. Guess you have a winner here!
This is beautiful i have use a bigger motif and results was wow!
Thank you!
This is AWESOME! Quick and easy- made it for a music festival and am excited to wear! Thank you so much!
Thank you!
Maybe this is a silly question but I can not get 12 double crochet and 12 chain 1 out of my 7 chain circle! I managed to make the shirt but just had to add random double, ch1 in but I’m curious what I’m doing wrong! I’m referring to round one.
Thank you!!
Hi! When you do the 12 dc and 12 ch you should insert your hook into the middle of the ring. You’re not working in each ch, but into the middle of the ring you made. I hope this helps!
Hi, i need help! I cant understand how to make the fringe! 🙁
Here’s a good tutorial 🙂 https://thecraftymummy.com/2016/07/how-to-add-a-fringe-to-a-scarf/
My square is coming out a bit wavy and uneven around the corners. I have followed the tutorial. Is it supposed to look like this?
My squares are only coming out 5 inches. Suggestions?
You can go up a hook size 🙂
Hi intry to make this for someone who is 48” chest the v part at neck is to low any suggestions.?
If it’s too low then you can make the straps shorter 🙂
Hi in the picture button is showing so is that the back or is the button on the front thanks
Either way 🙂
Confused on connecting squares Do you cut yarn when connecting each square..
Confused on connecting squares on boho vest Do you cut yarn and connect each square or what is the way to do it..
Picture of someone wearing it please?
I would like to receive patterns via email please. Preferably Boho styles.
You can sign up for my newsletter here 🙂
https://www.subscribepage.com/hookedonhomemadenewsletter
Hi Breann, I’m trying to make this top but I need clarification on Row 2, it’s confusing to me & since you don’t give a stitch count I’m not sure where to put the 2dc in chain after making the Ch3, then which dc on top of dc and so on. Can you give a stitch count for this row for S/M? I wish you’d post a youtube video on this square since I’m making this square right now, lol. I saw other people were confused a bit too so you’d be helping many of us. Please let me know. Thanks so much.
ooops! I sincerely apologize to you, I missed that you DO give a stitch count of 36dc for row 2 (so sorry) – that helps a lot! but I’d still like a video, lol. I’m a visual learner. My yarn cake was on top of the pattern printout hiding that nugget of info, lol. Thanks again.
Hi;
Please can explain row 6 to me. I cannot get to 80 dc – following your directions. If I have 16 x 5 chains and I do four dc in each of those, (in each 2 dc ch 1 and 2 dc) I cannot get to 80 dc?
What Am I doing wrong?
Thanks
Pam
Hi! You’ll do 4 dc in each ch 5 space (that’s a total of 16 on each side = 64 dc) then work 4 dc in each corner (16 dc) 64 + 16 = 80 🙂
Hello!
I absolutely love this pattern!
I am currently making this top as a Christmas present a plus size lady what would you suggest for making the squares bigger again? I have already added the hdc round and unfortunately it’s still not big enough
Hi! Yes, you can add another round 🙂
Brilliant! Thank you so much!
Could you post a photo of the underside after attach the back loop slip stitches? Mine are looking a little funky and I want to make sure I did it right
This is a really cute pattern!
Thank you!!
Hello!
I just finished the squares and getting ready to join them. Row 6 (dc ch3 dc) in written instructions; video shows dc ch3 dc2. I figured out that the video version is correct and just wanted to let you know. This is for the 1st corner; the rest were dc2 ch 3 dc 2. I LOVE this pattern! Thanks so much for sharing! 😊
Oops! Fixing now 🙂 Thank you!
Looking forward to starting out with this gorgeous boho tank and moving onto other creations that have been posted by the creatives I prefer to call my fellow crafty contemporaries. Thanks for the inspo! I’ll be sure to post my finished project!
Love it! Crafty contemporaries!